Showing posts with label burp cloths. Show all posts

Monday, March 05, 2018

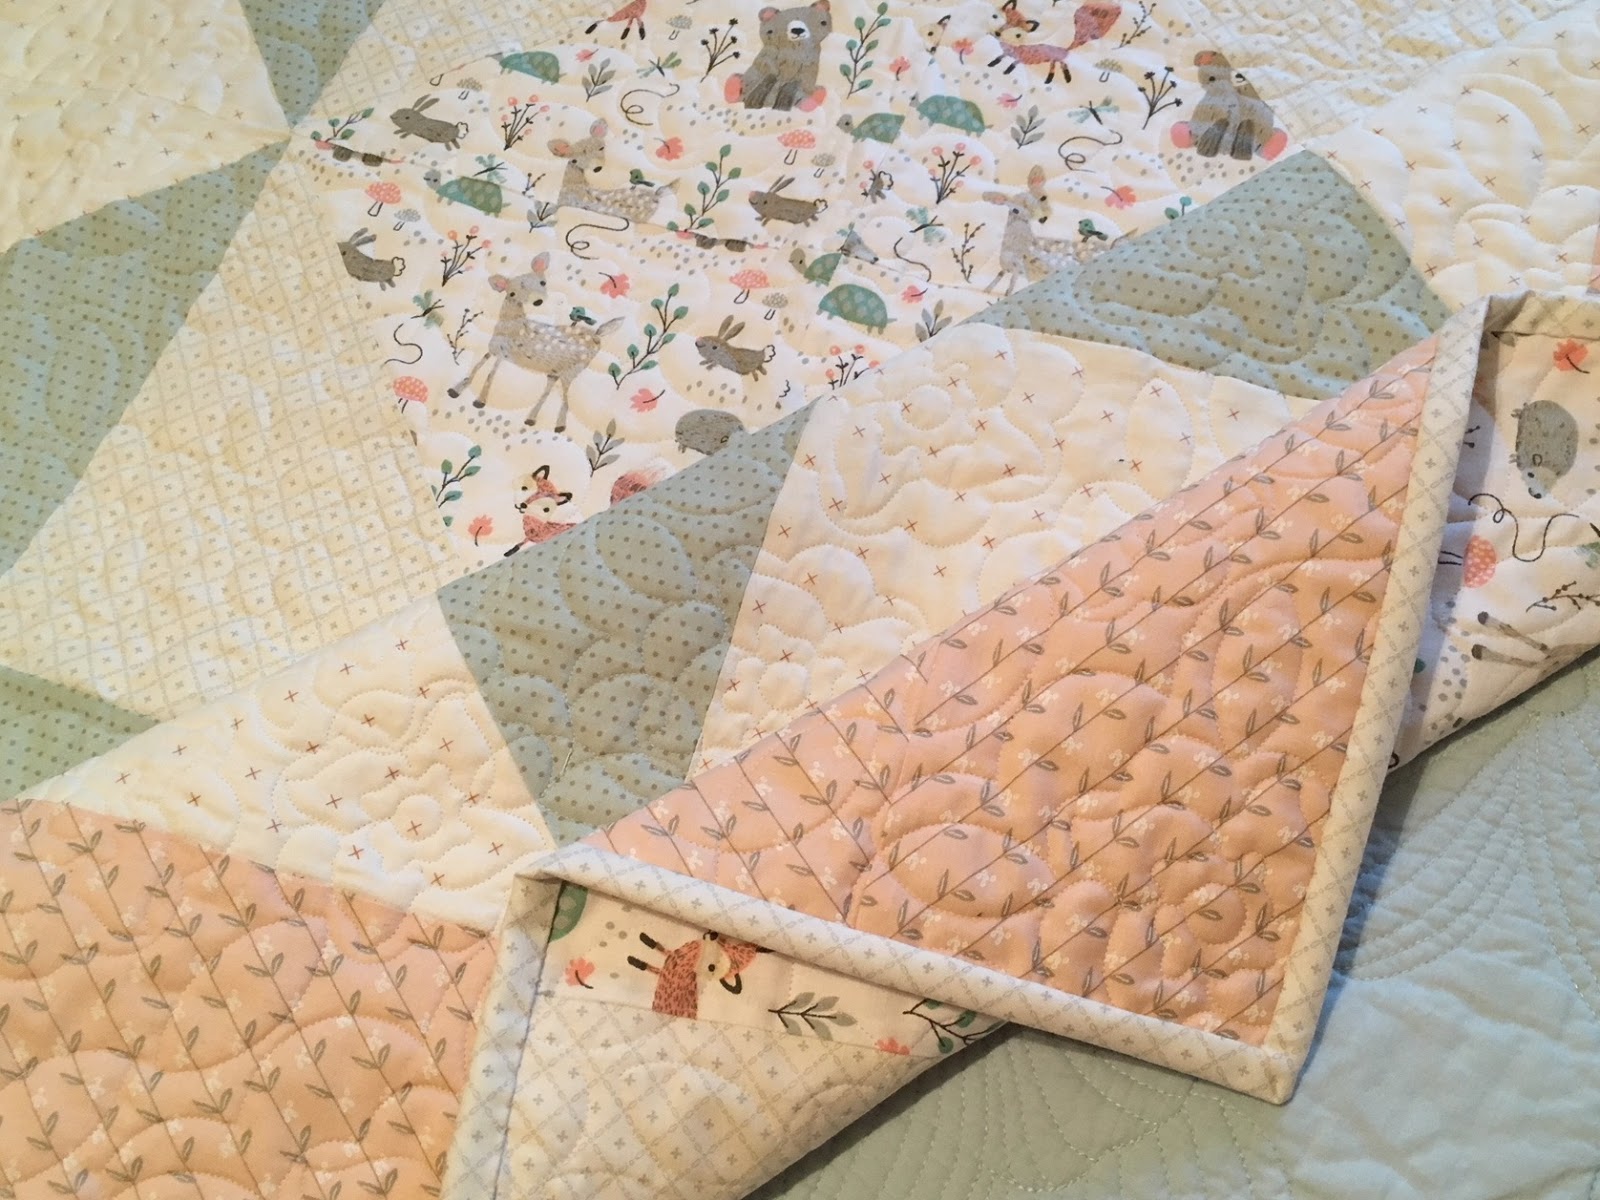
Baby Girl Quilt and Burp Cloths...


I love soft, muted colors for baby quilts. When I saw this fabric, I knew it was perfect for a little one our family is expecting in April...


The woodland print is adorable and I love the soft sage and pale pink with it...


I usually have a few scraps of fabric left over from a quilt, so I often make some burp cloths to accompany it.  My girls love these burpies because they are so absorbent. They are made from prefolded cloth diapers -- so easy and the fact that they match the quilt is an added bonus! Here's the tutorial.


Tuesday, January 10, 2017

Dwipe & Burp Cloths...


A couple of days ago I posted some photos of projects that I've been making the last couple of weeks for a couple of granddaughters that will arrive in February and March. Here are a few more of those projects...

A number of years ago I made this pattern for a Diaper/Wipe Tote. I named it the "Dwipe," and have been selling the pattern in my Etsy shop ever since. If you need a quick homemade gift for a mother-to-be, this should be your go-to gift. It's such an easy pattern to sew and it's something that will be used for years by the new momma (and daddy).  It's a small case where a parent can store essentials -- a travel case of wet wipes, a thin changing pad, and a few diapers. This tote can also come in handy for the parent who is training her child. One can put a change of clothing into the tote in case of emergency. This mini-tote can then be placed in a glove compartment, a purse, or a diaper bag. I made a bunch of these some months back and have been giving them away ever since.


I've saved the best for last. These are the easiest little gifts to make you will ever find, but mothers and fathers love these crazy burp cloths. Years ago one of my daughters-in-law asked me to make her some of these, and they've been a hit with the new mommas and daddies in our family ever since. They are basically a pre-folded purchased cloth diaper that has been fancied up a bit. Here's the simple tutorial I published years ago. It'll show you how to make these cute and practical gifts...'


{Once again, these fabrics are from of Hobby Lobby.}

Monday, July 08, 2013

Burp Cloths for Baby and a fabulous tip...


I mentioned last week that I was sewing non-stop for our 13th grandchild due next month. Receiving blankets were the first things off the line. Burp cloths were the next item I made...


These burp cloths are created from ready-made cloth diapers. It makes sense to make burpies from this soft and absorbent fabric.


You simply add a strip of fabric down the center of the diaper, and add ric-rac to the sides of the fabric. Love the ric-rac. I used flannel fabric this time for the center strips of fabric, but any cotton fabric will do.


I posted a tutorial entitled "Baby Burpies {the easy way}" that has step-by-step instruction on how to make these simple burpies.

Now -- here's a great tip: Often when I am making items like this, I will buy a Flannel Receiving Blanket Kit like this one from Target...

Do these fabrics look familiar? Those are some that I used for the burpies. These little receiving blankets are only 30"x30", which in my opinion is too skimpy for a receiving blanket, but I use them as fabric for other projects. I buy a package of four coordinating fabrics {over 3 yards of fabric} for $12, which is a great price! Then I cut them up and use them for projects like these baby burpies, bibs and tag blankets...


The receiving blankets are a light-weight cotton flannel, so they work perfectly when combined with the cloth diapers to make a burp cloth. I love how the fabrics coordinate to make a cute set. That's my tip for the day! Don't forget to check out the burp cloth tutorial.

Linked to:
Made by You Monday @ Skip to my Lou
Create & Inspire @ Handmade Cuddles

Thursday, August 09, 2012

Ruffled Burp Cloth Pattern & Tutorial


Last month was such a busy month for me, but I'm finally getting around to publishing my "Ruffled Burp Cloth" Tutorial. This burp cloth is the perfect compliment to my "Ruffled Bib" pattern and my "Maggie the Taggie Owl" pattern. These three items would make a wonderful baby shower gift for a new mother-to-be!


Materials:
1 - Front pattern piece from 100% cotton fabric
1 - Back pattern piece from 100% cotton, terry cloth or flannel fabric
2 - Strips of 100% cotton fabric 2" x 45" for ruffle
1 - Interfacing from 100% cotton quilt batting -- I recommend "Warm & Natural"

Seam allowance 1/2"

To cut the strips of fabric for the ruffle, simply use a rotary cutter (or yardstick and scissors) and cut two strips of fabric 2" wide and the width of your fabric. (see photo below)


The photo below shows the pattern pieces ready to be sewn...


The Ruffle

1. Sew short ends of one ruffle strip to the short ends of the other ruffle strip - right sides together - to make a continuous circle of fabric. Press seams open.


2. Fold ruffle in half lengthwise and press. There are several ways to distribute the ruffle evenly around the burp cloth. The following is just one of those ways... I distribute the ruffle equally around the front burp cloth pattern piece by dividing the ruffle in quarters and then eighths and pinning it to the front piece. Make sure the fold of the ruffle is toward the center of the burp cloth. (I continue dividing the ruffle up in that manner all around the front pattern piece.)


3. I work with 1/4 of the ruffle at a time and distribute it evenly along the edge of a quarter of the front piece. (see below)


4. Then I sew the ruffle to the front piece 1/8" from the edge to tack it in place.


5. Continue pinning and sewing the ruffle to the front piece in quarter sections until complete...


Attaching Front to Back

6. Now we are going to make a tasty little fabric sandwich with three layers of fabric. First lay the quilt batting piece down. Next, lay the burp cloth front right side up on top of the batting. Finally, lay the burp cloth back right side down on top of the other two pieces. Pin. Sew with a 1/2" seam allowance all the way around the burp cloth leaving a 3" opening on one side of the burp cloth.

7. Trim seams around entire burp cloth to 1/8" -- except at the 3" opening.

8. Pull the burp cloth right side out through the opening and press. Slip-stitch the opening shut by hand. Press again and you're done!


If you'd like the pattern to make a Ruffled Burp Cloth for a little bundle of joy in your life,
I will ask you to complete the following:

1.) Leave a comment below 

2.) Consider becoming a "follower" of my blog if you haven't already

3.) Send me an email with "Ruffled Burp Cloth" in the subject line!
(please don't leave your email address in a comment below)


My email address is:
justanotherhangup@gmail.com  
Remember to put "Ruffled Burp Cloth" in the subject line of your email. 


Also,go to these blog posts for additional items to combine with these burp cloths:


Wednesday, July 25, 2012

Ruffled-Edged Burp Cloths and a baby boy...


A few days ago I posed a question... I asked if anyone would care to venture a guess as to what the third baby item might be that I've made for our little collection of pieces to be given a new mother and her baby.

You might remember that the first item in our little ensemble was the Ruffled Bib...


The second item was Maggie the Taggie Owl...


And many of you guessed correctly when you thought the third item was a Ruffled-Edged Burp Cloth...


I will be posting the very simple pattern and super quick instructions on how to make this Ruffled-Edged Burp Cloth soon.

I want to thank those who have left comments and sent such kind emails lately in regard to the bib and tag blankie patterns and tutorials. I've had family here this last week and haven't had time to respond as I should to each email or comment, but I'd like you to know that I appreciate your kind words and encouragement. I've received over 500 requests for those patterns!  

For those who left your email address in a comment to request the patterns, instead please follow the instructions given and send me an email (my email address is on my sidebar under "contact information") with the request. I just haven't had the time to complete the requests from the comments, and it's much easier for me to respond to an email rather than cut and paste email addresses from comments given. Thank you so much!

This morning my little grandson was outside with me as I was taking photos of the Ruffled Burp Cloth in anticipation of the tutorial that will be published in a few days. It was a slightly cooler morning, the sprinklers were going full bore, and I could hear my grandson's giggles and chatter as I was shooting photos nearby. His laughter caused me to take a peak at him and this is what I found...


This boy loves water! He was standing right in front of the sprinklers having a grand ol' time!


This is the reason I've been preoccupied lately. I wouldn't want to miss a single moment...


Wishing you a cool and relaxing day! 

Thursday, March 10, 2011

Baby Boy Burpies...

We have a baby boy joining our family this summer, so I thought I would get busy and make some essentials. I love this pattern for a baby burp cloth. I made some of these a couple of months ago and the young mother said it is her favorite burpie for her new little one.


Here's the tutorial for these Baby Burpies {the easy way} that I created a couple of months ago to show you how to produce this easy project! Made from cloth diapers, they are absorbent, they wash well, and the fabric wrinkles less than most cotton fabrics...


Did you recognize the contrasting fabrics I used? Well, if you frequent the baby isle in Target they might look familiar. I was planning on making some burpies so I was at Target picking up a dozen cloth diapers, when I passed some receiving blankets. I'd never buy these items to use as receiving blankets because I consider them too small for the task, but the cute fabric caught my eye, and I decided to purchase the blankets to use as the contrasting fabric on these burpies. The cost of the fabric was about $2.30 a yard which is fabulous. I also liked the soft texture of the flannel and how the fabrics coordinated but not in a "matchy-matchy" way! I cut twenty 6"x21" pieces out of the contrasting fabric -- five out of each fabric -- to make a total of 20 burp cloths! 


Cost breakdown:
$17 for 12 pre-folded diapers = $1.41 per diaper
$8 for 4 receiving blankets = $.40 strip per burp cloth
$1.50 (50% off) Ric-rac @ Hobby Lobby (see below) = $.75 per burp cloth
thread


That's a total of $2.50 per burpie!


A couple of these burpies combined with a few other items would make a fabulous baby shower gift!

Linked to:
Friday Fun Finds @ kojo designs
Frugal Friday @ The Shabby Nest
All Things Domestic @ Crazy Domestic
Frugalicious Friday @ Finding Fabulous
Catch-as-Catch-Can @ My rePurposed Life
SAS @ Just a Girl

Monday, January 03, 2011

Baby Burpies {the easy way}

I was perusing down my lists of blogs the other day when I hopped, skipped and jumped to a tutorial at "See Kate Sew." The post explained how Kate took an ordinary cloth diaper and made it into a not-so-ordinary baby burpie. I loved her uncomplicated approach to making a cute burp cloth for a little one!
 

Later this week I'm catching a plane to my new little granddaughter's house. As much as I loved the burpies I made in November, I knew the burpies at "See Kate Sew" were a cute, practical alternative to the more fancy-smancy ones I made previously, so I decided to make a few of the simpler version. Can a baby have too many burpies? I think not. I added a little ric rac to mine, but otherwise used her tutorial. Check out Kate's tutorial at "See Kate Sew" for general directions and a look at her adorable versions!

Supplies needed:
1 Pre-folded cloth diaper
1 piece of contrasting fabric about 6" x 20" **
Ric Rac (optional)
Thread
(**Make sure the length of your contrasting fabric is 2" longer 
than the length of the pre-folded diaper.)

I added ric rac to the burpies I made, so here are a few more tips if you'd like that addition. Press under 1/2" on the long sides of the contrasting fabric...


Then open up where you pressed the fold in your fabric and place your ric rac (I used "jumbo" ric rac) so the folded crease sits to the left of the dip in your ric rac...


Here's another picture illustrating where to place the ric rac. The solid black line shows where the pressed fold in the fabric is situated. (Remember the folded hem is opened up and laying flat at this time.) Note the dip in the ric rac is just to the right of the fold. The dotted line shows where to sew...


The old adage "you learn something new every day" is definitely true in the blogging world. The other day I found a tutorial at "TaDa! Creations" on how to apply ric-rac to a hem of a shirt. It came into my life just in time for this project! Go here for the tutorial!

When you have sewn the ric rac to the seam, repress the fabric along the fold once again. Your contrasting fabric will look like this on the right side of the fabric, and...


and it will look like this on the underside of the fabric.


Center and pin your contrasting fabric strip in the middle of the diaper. You'll have an overhang of about 1" on each end of the diaper.


Sew the strip of fabric to the diaper about 1/8" from the edge, like this:


It's beginning to look a lot more like a burpie now. Just a few more finishing touches...


When you turn the burpie over you'll easily see the overhanging fabric. Take your scissors and trim the extra fabric along the edge of the diaper.  These diapers are not perfectly rectangular. If that bothers you, try to remember the purpose of a burp cloth and that should help put your mind at rest.  ;o)


Then zig-zag along the short edge of the burpie making sure you catch the contrasting fabric in the zig and zag!


 That's all there is to it!


I love this cute version of the burpie!
It's so easy to make, because most of the work is already done for you!

Linked to:
Frugalicious Friday @ Finding Fabulous
Show Off Your Stuff Party @ Fireflies & Jellybeans
Hookin' Up with House of Hepworths
Transformation Thursday @ The Shabby Chic Cottage
Strut Your Stuff @ Somewhat Simple
Get Your Craft on Thursday @ Life as Lori
Strut Your Stuff @ Saturday Mornings
Show & Tell @ Blue Cricket Design
Get Your Craft On @ Today's Creative Blog
Mad Skills Monday @ Support Blog for Moms of Boys!
Cheap Thrills Thursday @ Black Kat's Design