

Receiving Blanket
Materials needed:
1 1/4 yards flannel
1 1/4 yards cotton fabric (or flannel)
5 yards (2 pkgs.) Jumbo Rick Rack
embroidery floss
thread
Instructions:
Making your fabric into a perfect square:
1.) Trim any manufacturers lettering from the selvage (finished edge) of your flannel fabric.
2.) To cut your fabric into a perfect square without much measuring, trim one unfinished edge straight by using a rotary cutter. Then fold the fabric on the bias (diagonally) so that the just trimmed edge meets a selvaged edge, like this...

3.) There will be a little extra fabric on one side. (This should be the unfinished edge of your fabric that hasn't been trimmed.) Use the edge of the top fabric as a guide to trim off the extra fabric underneath. When you're done trimming that edge you will have made a perfect square!

4.) Use the edge of a plate to draw a line to round the corners of your fabric and trim your fabric on that line.

5.) When finished with Steps 1 - 4 you will have a perfect square with rounded corners...

Applying the Rick Rack:
6.) Sew the Rick Rack onto the top of your flannel fabric by placing the rick rack just inside the edge of the fabric and sewing about 1/8" from the edge.


Finishing the edges:
7.) Now we'll make it into a double-sided (soft flannel on one side -- cotton on the other) blankie... Cut any manufacturer's lettering off the selvages of the cotton fabric.
8.)Place the flannel fabric on top of the 1 1/4 yard of cotton fabric -- right sides together. Pin the edges. Trim edges of your cotton fabric closer to the edges of the flannel fabric.


10.) Pull fabric right side out. Press edges of fabric and slip stitch the 4" gap shut.
11.) To secure the top fabric to the bottom fabric: Start by evenly measuring out 9 points and putting a pin in each spot, like the illustration below.

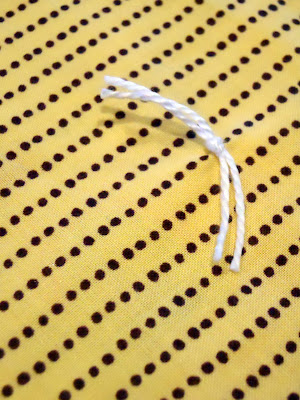
12.) Then use a double strand of embroider floss to tie the fabrics together.
13. That's it! You've got a beautiful, well-made receiving blanket for an adorable little munchkin in your life!

I'd like to say these blankets are more economical than the store bought varieties, but generally speaking that just isn't true. Mine cost a little less than $20 for the materials for one receiving blanket. (You could make them with less expensive fabric, which would help them cost less.) I can tell you, however, that these blankets last forever! We still have several that I made for my own children that are in great condition. They are used when our grandbabies come for a visit. ;o)


Link Parties:
Strut Your Stuff Baby Ideas @ Somewhat Simple
Mad Skills Mondays @ Support Blog for Moms of Boys
For the Kids Friday @ Sun Scholars
Show & Tell Saturday @ Be Different Act Normal
Friday Fun Finds @ kojo designs
Friday Flair Party @ Whipperberry
All Things Domestic @ Crazy Domestic
Frugalicious Friday @ Finding Fabulous
Free for All Friday @ Sassy Sites
Fantabulous Friday @ Mommas Kinda Crafty
8.)Place the flannel fabric on top of the 1 1/4 yard of cotton fabric -- right sides together. Pin the edges. Trim edges of your cotton fabric closer to the edges of the flannel fabric.

9.) Sew the flannel and cotton fabrics together by lining up your presser foot along the flannel edge and sewing. Approximately 1/3" seam allowance. (This seam will be "inside" the line of thread where you tacked the rick rack.) Leave a 4 inch gap along this seam to pull the fabrics right-side-out.

10.) Pull fabric right side out. Press edges of fabric and slip stitch the 4" gap shut.
11.) To secure the top fabric to the bottom fabric: Start by evenly measuring out 9 points and putting a pin in each spot, like the illustration below.

12.) Then use a double strand of embroider floss to tie the fabrics together.

13. That's it! You've got a beautiful, well-made receiving blanket for an adorable little munchkin in your life!

I'd like to say these blankets are more economical than the store bought varieties, but generally speaking that just isn't true. Mine cost a little less than $20 for the materials for one receiving blanket. (You could make them with less expensive fabric, which would help them cost less.) I can tell you, however, that these blankets last forever! We still have several that I made for my own children that are in great condition. They are used when our grandbabies come for a visit. ;o)

Often I buy fabric online, but these fabrics were purchased at a Hancock Fabric Store in our hometown. They have a great supply of heavier-weight printed flannel. Love those funky looking flannel dinos!
Link Parties:
Strut Your Stuff Baby Ideas @ Somewhat Simple
Mad Skills Mondays @ Support Blog for Moms of Boys
For the Kids Friday @ Sun Scholars
Show & Tell Saturday @ Be Different Act Normal
Friday Fun Finds @ kojo designs
Friday Flair Party @ Whipperberry
All Things Domestic @ Crazy Domestic
Frugalicious Friday @ Finding Fabulous
Free for All Friday @ Sassy Sites
Fantabulous Friday @ Mommas Kinda Crafty


