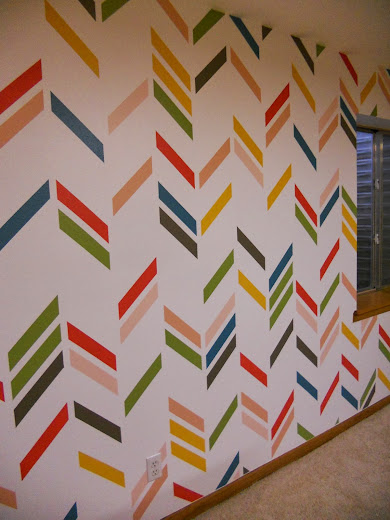
Saturday I finished an accent wall that I've been working on most of the week. It started with Plan A -- using a stencil on the wall. That plan was discarded for Plan B -- which involved using miles and miles of painter's tape and a whole lot of patience. The painters tape served as the lines between the herringbone pattern. Because this is a shuffled herringbone pattern, I put a little piece of tape on the sections to be painted. Then I covered those areas with white paint to seal the edges of the tape so there would be crisp lines when I added the colored paint...
Before painting I figured out the color pattern I would be using by adding a dash of paint to each block...
By Saturday I had painted the Herringbone pattern on the wall and all I had to do was wait for the paint to dry! Here's a photo after the paint was applied...
The dimensions of the project are easy. For the same pattern place the vertical tape 8 inches apart. Then mark down every four inches for the diagonal pattern, like this...
I was a little concerned that the colorful paint would seep under the tape because our walls are textured, but when I removed the tape there wasn't much of that at all. Grateful. A teeny bit of touch up was all that was required.
Here's the finished wall...
This project was very time consuming, but I absolutely love it!
It's exactly the playful feel that I wanted for this rec room for the grandkids!
FYI: Here's some information on the paint I used. All the paint was from the Valspar "Eddie Bauer Home" Signature Collection: Island Blue, Dahlia, Taffy, Yogurt, Java, Dark Mango, & Apple Green.
I Heart Naptime Linky Party
Friday Favs Party @ Naptime Crafter
The CSI Project
Handmade Tuesdays @ Ladybug Blessings
Show Me What Ya Got @ Not Just a Housewife


