Wednesday, September 22, 2010

"Baxter the Bat"


Hey Ladies...
Head on over to Eighteen25 and check out my post today!
Eighteen25 has had an entire month of 
Spooktacular Halloween ideas...

My contribution?
(You may lovingly refer to him as "The Bax.")

Please leave a comment on my post at Eighteen25, 
so I don't feel like a loser-dweeb! ;o)
Thank you!

Tuesday, September 21, 2010

Trick-or-Treat bags made easy!

I'm ahead of schedule this year. I usually don't start thinking about Halloween until October 1st, but this year I've cranked out a few Halloween projects well ahead of time. One of the first projects I finished was a Trick-or-Treat Bag.


Do you remember the Lil' Girl Springtime Totes that I made? Well, this Trick-or-Treat Bag is the same pattern. If you're interested in making one of these Halloween totes, just buy some cute Halloween fabric and follow the Lil' Girl Springtime Tote instructions (sans the fabric flower on the front!).


The fabrics I chose for these bags are the dream child of Alexander Henry and can be purchased at Fat Quarter Shop (and many other places). I was introduced to this line at "Your Fabric Shopper."  I combined Endora's Dots, Witches in Stitches, and Witchy Stitchy Owl with natural muslin to make these adorable Trick-or-Treat bags.


I love the thought of a Trick-or-Treat bag that is used year after year -- at least while the children are small and need only a little tote -- rather than a pillowcase! I'm a sucker for traditions.


Last year I also made some Trick-or-Treat Bags for my grandkids. (Pictures below.) You can see the post about these little bags here. The bags were appliqued, but otherwise the pattern was the same as the Lil' Girl Springtime Tote except the front piece was only one piece of fabric, so its measurements were identical to the back piece of the tote. Before sewing the bag together, I cut out a rectangular piece of fabric and appliqued it to the front piece of the tote. Then I appliqued a piece of "candy corn" on top of the rectangle. Below are a few examples from that sewing spree...


All of these totes are so easy to make and they make fun little Halloween gifts for the ghosts and goblins in your life!


Linked to: 
Frugal Friday @ The Shabby Nest
Frugalicious Friday @ Finding Fabulous
DIY Fall Festival @ The DIY Showoff
Get Your Craft On @ Life as Lori
Show Off Your Stuff @ Fireflies & Jellybeans 
Hookin' Up @ House of Hepworths
Strut Your Stuff Party @ Somewhat Simple 
Transformation Thursday @ The Shabby Chic Cottage
Show & Tell @ Blue Cricket Design
Anything Related @ All Thingz Related 
The DIY Project Parade @ DIY Show Off
Get Your Craft On @ Today's Creative Blog
Nifty Thrifty Tuesday @ Coastal Charm
Mad Skills Monday @ Support Blog for Moms of Boys


Photobucket

Monday, September 20, 2010

Dwipe...

Last week my daughter and I finished several projects. One of these projects was making several Dwipes for friends and family that have recently given birth to little girls. I also made one for my Etsy -- it'll be in there later today.
The Dwipe came to be when one of my daughter-in-laws wondered if I could create a pattern for a diaper and wet wipe case. Soon after the "Dwipe" was born. I've been selling them and giving them as gifts ever since.
It's a small tote where a parent can store essentials -- a travel case of wet wipes, a thin changing pad, and a few diapers. This tote can also come in handy for the parent who is training their child. One can put a change of clothing into the tote in case of emergency. This mini-tote can then be thrown in a glove compartment, purse, or diaper bag and you're ready to go! Carrying this type of tote to a restroom will be more subtle than carrying a child, package of wet-wipes, and a diaper and more convenient than a heavy diaper bag. Fathers love the Dwipe because it's more compact than carrying a diaper bag to the restroom when their child needs a quick change. This, along with some wet wipes and a package of diapers, makes the perfect gift for a new mother.

Friday, September 17, 2010

Friday's Fabulous Finds...


I spy with my Etsy eye something...
 crimson and smokey gray


Clockwise, starting top left:

Have a wonderful weekend!

90 days to go...

The thought of putting up a Christmas craft so early in the year goes against my better judgment, but my daughter and I have been crafting this week and she finished this Christmas block advent calendar yesterday so I thought I'd better take a few pictures of it before she packs it away and heads home tomorrow. This calender is much like the Halloween advent calendar we made earlier this week. Just so you know there are 90 days left until Christmas...
That's a whole quarter of a year. 
It give me plenty of time to procrastinate. 

Wednesday, September 15, 2010

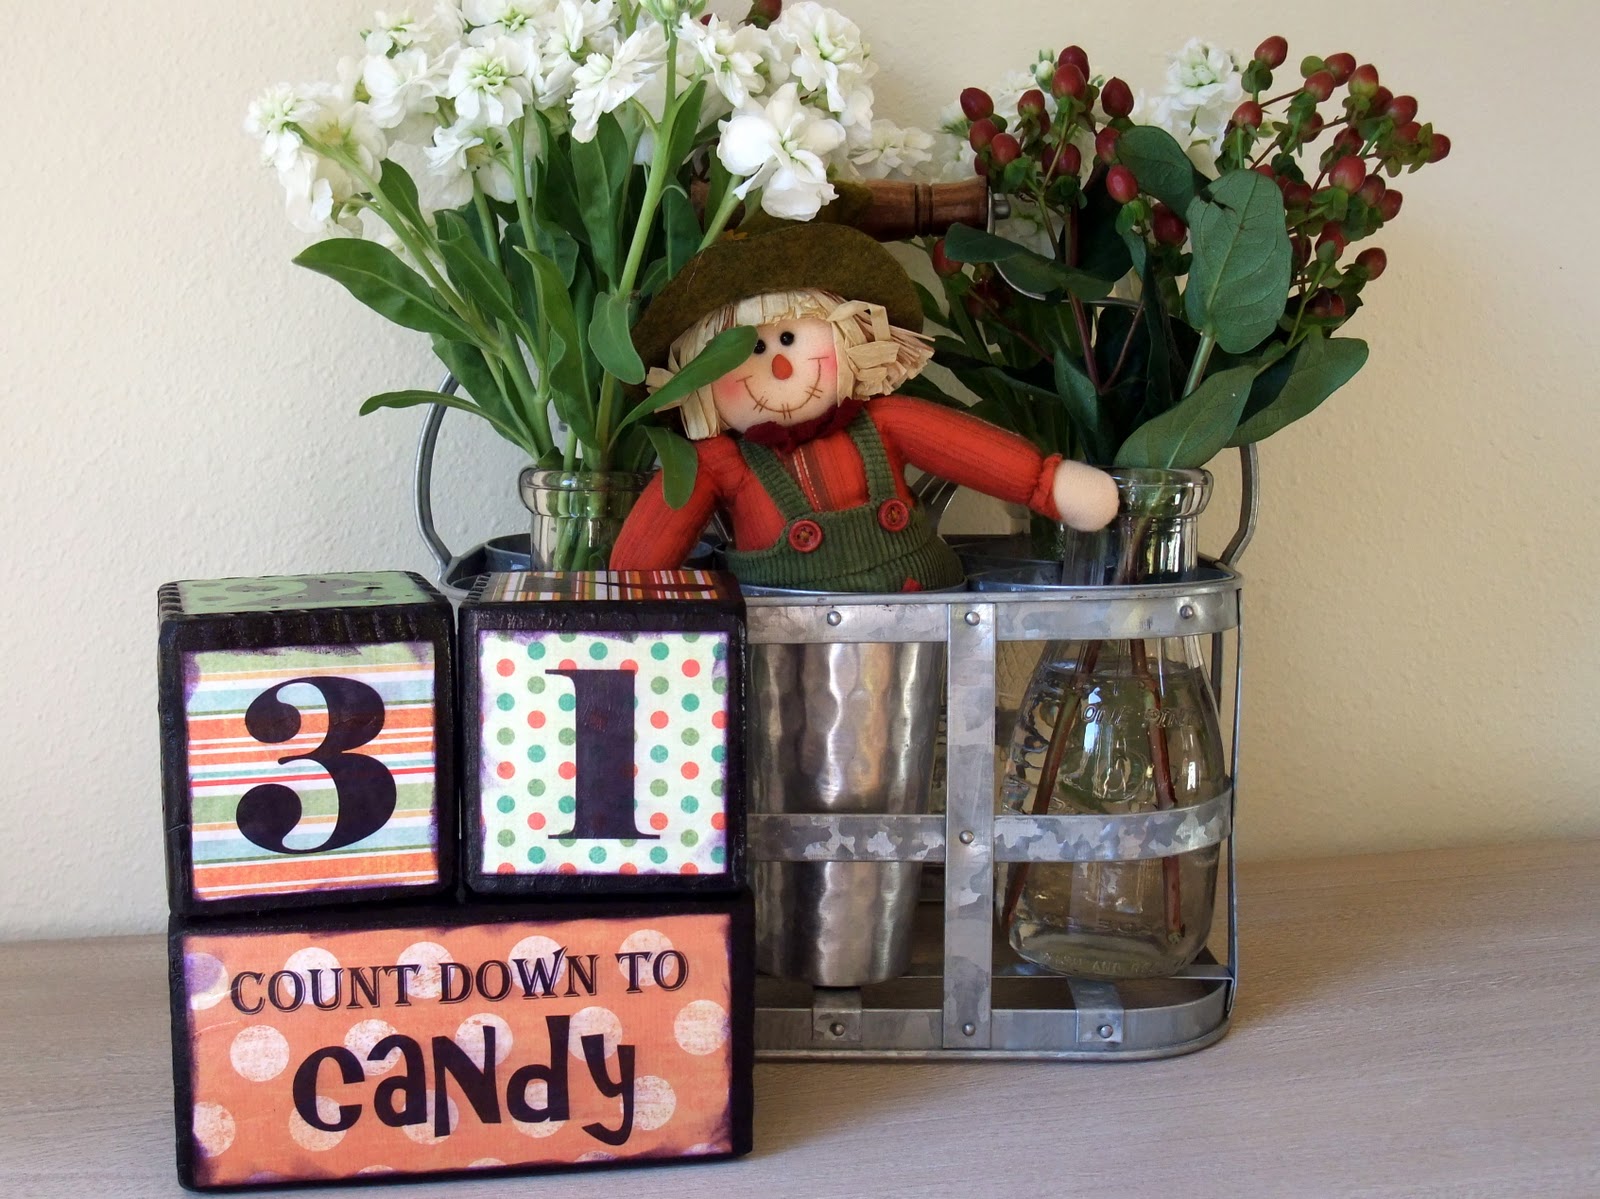
Halloween Advent Calendar...

This is one of those projects that is definitely not an original idea. I always like to give credit where credit is due and "How Does She?" deserves the praise this time. The adorable Halloween advent calendar that she shows on her blog comes in kit form on her website. After traveling all over creation to get the supplies, I can definitely see the wisdom in buying the kit! Still, there are advantages to the "do-it-youself" venue. Namely: cost. I wanted to make one for each of my married kid's families, one for us, and a few to give as gifts. That brought the total up to nine calendars and I knew I could make them more economically if I purchased the supplies myself.


I started by stopping by Home Depot and purchasing a 4"x4"x12 foot piece of Douglas Fur -- about $13. While there I asked them to cut the 12 foot length into 18 square cubes and 9 rectangular pieces that were double the length of the cubes. (Home Depot cuts their lumber for no additional charge.) While I was waiting to get these cut I noticed a "discard" pile where they sell odd lengths of wood for $.51 a piece. There were three 4 foot lengths of 4"x4" pine in that area for that price! Moral of the story -- it would be worth checking out that pile before purchasing the longer length for 12 times the cost! Still, even at $13 the wood came to less than $1.50 per calendar and I was able to get 9 calendars out of that 12 foot length of wood.


To complete the project, purchase or collect the following supplies: 
  • sandpaper
  • black spray paint
  • scrapbook paper
  • Mod Podge
  • paint brush
  • stamp pad for distressing
I sanded the blocks down with an electric sander and spray painted them with a glossy black paint...

Instead of vinyl lettering I made two PowerPoint documents and printed the numbers and phrase onto scrapbook paper. If you would like to make an advent calendar, just email me {my email address is on my sidebar} and I will send you the PowerPoint documents that you can use to create a calendar of your own. Just type "Halloween &/or Christmas Advent Calendar" in the subject line of your email me and {please} choose to "Follow" my blog! I made these documents in Microsoft PowerPoint 2007. If you don't have that program you won't be able to bring up the documents. There is one "number" document. You'll need to change the numbers to print each page.

Then I cut out the phrase and numbers and distressed the edges of the paper using a black ink pad...


A little lot of Mod Podge was used to apply the scrapbook paper to the blocks. Make sure you use Mod Podge on both surfaces that you glue together. Then paint a layer of Mod Podge over the top of the paper to secure it better in place...


Let those babies dry and you've got yourself a calendar...


Now for the tricky part. I spent the longest time trying to figure out how to place the numbers on the blocks to create the 1st through the 31st days in October. Then, my husband Googled "wooden block calendar" and within seconds my question was answered. That, my friends, is one of the reasons he is the bread-winner in our family.


The first cube should have the numbers 0, 1, 2, 3, 4 and 5. The second cube should have 0, 1, 2, 6, 7 and 8. The "6" is then turned upside-down to create the number "9" when needed. Someone had to get up mighty early in the morning to figure that one out!


This idea could be applied to many holidays...
Later this week my daughter and I are planning on making a "Count Down to Christmas"!

Monday, September 13, 2010

Sourdough Apple Braid

I have read a number of posts recently where ladies have incorporated apples into their recipes. Tis the season for a little apple love. A couple of days ago I decided to make another batch of sourdough with the same recipe I gave you earlier. It's so easy to pull my sourdough starter out of the fridge in the evening, mix in a few things, and leave it on my counter to rise all night. I love that process. The airy, pungent dough greats me with a soft "hello" when I come downstairs in the morning. By mid morning we have the aroma of sourdough bread drifting through the house, and by noon there are loaves cooling on the counter. Surely there is bread in heaven.

For this impromptu recipe I concocted an apple filler, much like you would make the filling for an apple pie. Chunks of pealed apples, sugar, lemon, cornstarch, spices -- you know what I mean. Once again I divided my risen dough in quarters and made two regular rounds (for sandwiches, etc.) and two apple braids. Oh goodness, does it get any better than this? Then I plopped some of that appley goodness in the middle of the dough and braided away. I let all four breads rise once again, and then I made up a little glaze of 1/6 cup honey and 2 Tbsp. melted butter and brushed it on the tops of the braids. Without further adieu all four items were shuffled into the oven. Oh, the sweet fragrance that permeated my house.

Meet my Sourdough Apple Braid...


Do you notice that the appley cinnamon filling is hard to contain? It keeps playing peek-a-boo. Like this...


And this...


I'm beginning to worry about the safety of this loaf.
It may not make it to the conclusion of this photo shoot...


Fortunately, I made two of these.
I can have one fully digested before my husband comes home
and still have one left to share with him.

How's a girl supposed to keep a slim-trim figure
when she reasons like that?


Mmmmmmmm
Generous chunks of smooth, sweetened apples...

And the winner is...

There were many potential winners for this month's Give Away. Most were correct when put the clues together and guessed Gatlinburg, Smokey Mountains or Tennessee! And, yes, we did a little shopping in Pigeon Forge too, so I counted that as well. We had a fabulous vacation. It's definitely a place where we'll want to return time and time again. There's something for everyone -- young and old alike. Now, on to announce the winner.


The winner of this month's Etsy Give Away
 is...
(drumroll please)

Gail @ My Repurposed Life
Gail not only guessed correctly when she said "Great Smokey Mountain," but
for extra credit she guessed Gatlinburg!
Gail may choose any wristlet, travel bag or dwipe from my Etsy!

Thanks to all who participated!

My daughter is visiting this week and we have some fun projects planned 
that we'll be sharing in the next few days!

Sunday, September 12, 2010

Etsy Give Away!


Go here to have a chance at winning
any wristlet (clutch), dwipe (diaper holder), or travel bag
from my Etsy! 

You must enter before midnight tonight!

 Best of luck!


Saturday, September 11, 2010


 re·mem·ber

 to retain in the memory; keep in mind; remain aware of

Thursday, September 09, 2010

Etsy Give Away!

Labor Day weekend found my husband and I vacationing with my oldest son and his family. We had a lovely time. Here are some of the sights we saw and some things we did:
  • 6 days with nuthin' but grandkids and their parents (the best part)
  • traveled up a mountain in an aerial tram
  • rode a chairlift and came back down on an alpine slide
  • hiked up and through mountains to a beautiful waterfall
  • visited an aquarium
  • shopped in a long row of gift shops
  • experienced a downpour of rain the likes of which I have never seen or heard
  • enjoyed these beautiful views from our cabin

 The question is...
 WHERE WERE WE?

Here are a few more clues:
  •  our plane headed east as we left Denver
  • our cabin was on the perimeter of a national forest
  • black bears are a big deal in these here parts!

If you'd like a chance to win a gift from my Etsy, all you have to do is guess where we vacationed last weekend! Only the state or the National Park need to be named, but for extra credit you can name the town. Obviously, more than one person can choose the same place. The names of those who guess correctly will have their names put into a bowl and I will draw a winner. The winner will be able to choose her own wristlet, travel bag or dwipe from my Etsy! It's as simple as that!


No anonymous comments, please. I need an email address or accessibility to a public blog. Private bloggers --feel free to enter, but you'll need to leave your email address. If I don't have any way to contact you, your name will not be eligible. 

This contest will run through midnight on Sunday, September 12th. Monday morning, September 13th the winner will be announced.

Good luck!