Showing posts with label Lil' Girl Springtime Tote. Show all posts

Tuesday, September 21, 2010

Trick-or-Treat bags made easy!

I'm ahead of schedule this year. I usually don't start thinking about Halloween until October 1st, but this year I've cranked out a few Halloween projects well ahead of time. One of the first projects I finished was a Trick-or-Treat Bag.


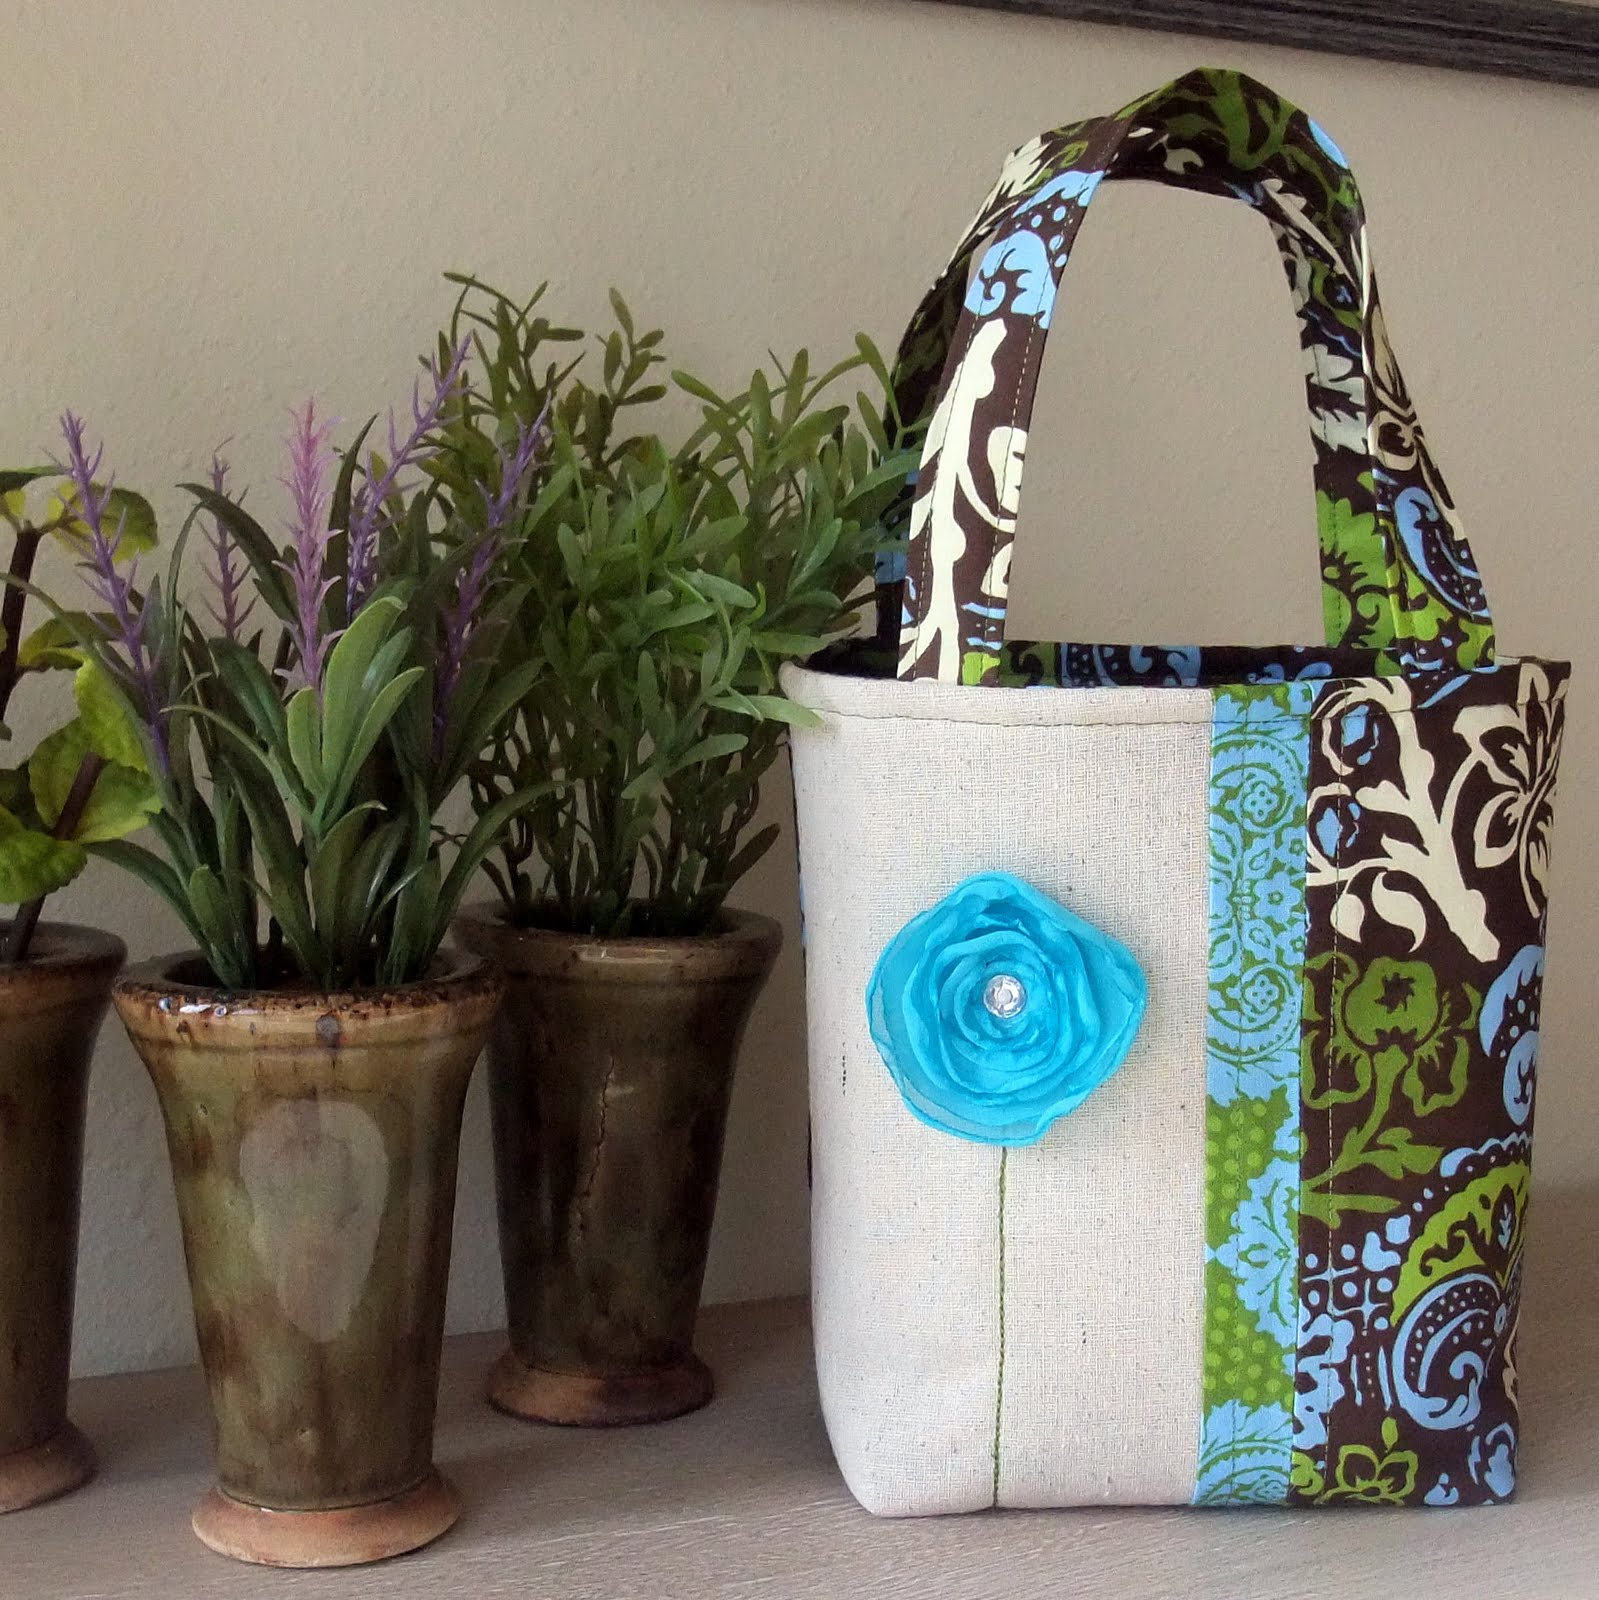
Do you remember the Lil' Girl Springtime Totes that I made? Well, this Trick-or-Treat Bag is the same pattern. If you're interested in making one of these Halloween totes, just buy some cute Halloween fabric and follow the Lil' Girl Springtime Tote instructions (sans the fabric flower on the front!).


The fabrics I chose for these bags are the dream child of Alexander Henry and can be purchased at Fat Quarter Shop (and many other places). I was introduced to this line at "Your Fabric Shopper."  I combined Endora's Dots, Witches in Stitches, and Witchy Stitchy Owl with natural muslin to make these adorable Trick-or-Treat bags.


I love the thought of a Trick-or-Treat bag that is used year after year -- at least while the children are small and need only a little tote -- rather than a pillowcase! I'm a sucker for traditions.


Last year I also made some Trick-or-Treat Bags for my grandkids. (Pictures below.) You can see the post about these little bags here. The bags were appliqued, but otherwise the pattern was the same as the Lil' Girl Springtime Tote except the front piece was only one piece of fabric, so its measurements were identical to the back piece of the tote. Before sewing the bag together, I cut out a rectangular piece of fabric and appliqued it to the front piece of the tote. Then I appliqued a piece of "candy corn" on top of the rectangle. Below are a few examples from that sewing spree...


All of these totes are so easy to make and they make fun little Halloween gifts for the ghosts and goblins in your life!


Linked to: 
Frugal Friday @ The Shabby Nest
Frugalicious Friday @ Finding Fabulous
DIY Fall Festival @ The DIY Showoff
Get Your Craft On @ Life as Lori
Show Off Your Stuff @ Fireflies & Jellybeans 
Hookin' Up @ House of Hepworths
Strut Your Stuff Party @ Somewhat Simple 
Transformation Thursday @ The Shabby Chic Cottage
Show & Tell @ Blue Cricket Design
Anything Related @ All Thingz Related 
The DIY Project Parade @ DIY Show Off
Get Your Craft On @ Today's Creative Blog
Nifty Thrifty Tuesday @ Coastal Charm
Mad Skills Monday @ Support Blog for Moms of Boys


Photobucket

Monday, March 29, 2010

Totes residing in Etsy...

Last week I made some Lil' Girl Springtime Totes for my granddaughters for Easter. At the same time I whipped up a few more. They are residing in my Etsy. The first two below are a slightly larger size than I made for the little girls. These would be wonderful for a 9 year old and up as a tote. They could also be used by an adult woman as a scripture tote or as a small "project" tote when you travel. They would be the perfect size to store a little crocheting, knitting or needlepoint and a book! These measure 7 inches wide x 9 inches tall x 3.5 inches deep with 13 inch straps. I love the Tanya Whelan floral in the one below. Isn't it pretty?

Also this cute tote for the little girl in your life. Love the chocolate and teal in this little girl Hang Up! This tote measures: 6.5 inches wide x 8 inches tall x 3 inches deep with 13 inch straps.


These "Springtime Totes" get me in the mood for
warmer weather and lots of colorful flowers!

Wednesday, March 24, 2010

Lil' Girl Springtime Tote Tutorial

Here's the tutorial I promised yesterday for the Lil' Girl Springtime Tote. When finished this tote measure 6.5 inches wide x 8 inches tall x 3 inches deep with 13 inch straps. Just the right size for storing all kinds of little girl treasures. It can even be used as a scripture tote. You will need the following materials:


Tote front:
1 - 6"x11" muslin
1 - 2"x11" cotton fabric
1 - 5"x11" cotton fabric

Tote Back:
1 - 11"x11" cotton fabric

Lining:
2 - 11"x11" cotton fabric

Straps:
2 - 3.5"x14" cotton fabric

Fusible Fleece Interfacing:
2 - 3/4" x 14"
2 - 11"x11"

General Information: 1/2" seams unless otherwise indicated.

Assemble as followed. (Photos are numbered to coincide with the corresponding step.)

1.) Cut out fabrics as indicated.

2.) Fold straps in half lengthwise. Press.
3.) Fold strap edges toward center fold. Press.
4.) Insert 3/4"x 14" fusible fleece into strap. Close strap along fold lines and press to attach fusible fleece.
5.) Topstitch strap 1/8" from both edges.

6.) You should have two 1"x14" straps completed.

7.) Pin 11" sides of front strips together and sew, making sure the 2" strip is in the center. Press seams toward darkest fabric and topstitch 1/4" from seams on cotton fabric.

8.) With an iron attach 11"x11" fusible fleece to wrong side of front tote as directed by instructions on fusible fleece.

9.) With iron attach 11"x11" fusible fleece to wrong side of back tote as directed by instructions on fusible fleece.

10.) On front of tote mark with pins where you want your "stem" to be sewn (about 1 1/2" from contrasting fabric).

11.) Sew a straight line with green thread using pins as a guide to create "stem."

12.) Pin straps to tote front and back, right sides together. Straps should be 2 1/2" from outside edge...

13.) ...and approximately 4" apart. Baste straps to tote front and back.

14.) Sew front to back along side and bottom seam lines.

15.) Sew front lining to back lining along side and bottom seam lines making sure to leave a 3" hole on the bottom seam of the lining.

16.) To make boxed corners, fold bottom corners of tote and lining as shown below. Draw a line 3" across.
17.) Stitch along your drawn line.

18.) We're almost there, gang! Trim and zig-zag boxed seams on tote and lining. Turn lining right side out as shown below.

19.) Place lining inside tote with right sides together. Pin top seams together and sew along seam line.

20. ) Carefully pull the tote and tote lining through the hole in bottom of the the tote lining. On right side of tote lining sew the hole shut.

21.) Tuck the tote lining into the tote. Pin top edge flat and topstitch top of tote. Press.

22.) Place a couple of books inside the tote to make the tote rigid as you attach flower. Make flower using this tutorial. Glue flower to tote using fabric glue and let dry. When glue is dry, press tote again being careful not to touch the hot iron to the synthetic flower.

23.) Present this adorable lil' tote to an adorable lil' girl of your choice!

Up close & personal...

If you make a "Lil' Girl Springtime Tote" and create a post about it, please send me an email or make a comment on my blog so I can visit your blog to see your project! If you make these totes with the intention to sell them, please change them up a little so your product and mine (since I will sell these in my Etsy shop) aren't identical. That, my friend, would be very much appreciated! ;o)

You can see more of these Lil' Girl Springtime Totes by going here.


Linking to:
Frugal Friday @ The Shabby Nest
Remodelaholics Anonymous Share Your Story Friday @ Remodelaholic
Creative Cats @ Poppies at Play
Frugalicious Friday @ Finding Fabulous
Saturday Nite Special @ Funky Junk Interiors

Lil' Girl Springtime Totes...

I have three beautiful granddaughters. I'm not exaggerating. You can see for yourself...

Photos courtesy of Angie Wilson Photography.

(I also have four adorable little grandsons, but I'll save that post for another day.)

Last year for Easter I made my girly grandbabies Lil' Girl Cupcake Totes, but I decided to devise a new pattern for this Easter and make them each a "Lil' Girl Springtime Tote." Again, it took me some time to tweak the pattern and make it just right, but here's what I came up with...

These totes might look a little familiar. They are sort of a spin-off from the pillows I made.

They are approximately 6.5 inches wide x 8 inches tall x 3 inches deep with 13 inch straps. Just the right size for storing all kind of treasures. They can even be used as scripture totes.

This morning I decided to share this pattern with you all, and I devised a tutorial that I will post tomorrow.

This is a simple tote to make and I have lots of photos of the process. The experienced sewer will be able to whip one up in no time, and the even novice sewer should be able to follow the directions and easily take a whack at it. I look forward to sharing...

Have a great day!


Linking to:
Get Your Craft on Thursday @ Life as Lori