Showing posts with label kindle case. Show all posts

Thursday, June 14, 2012

More Kindle Cases...


The fire is still raging in northern Colorado, so most of us have spent more time than usual indoors, which isn't necessarily a bad thing. As a result the shelves in my Etsy have been restocked with Kindle Cases...


To see more, hop on over to my Etsy Shop and browse around!

Thursday, May 31, 2012

Imported Lace Kindle Case Tutorial...

Often when I publish a tutorial I'm asked in a comment or email if I plan on selling the item in my Etsy. Sometimes the answer is "no", but occasionally I do make extras and put them in my Etsy to sell. This is the case with my Ruffled Kindle Case.


Tuesday I posted my "Ruffled Kindle Case" tutorial. Today I'd like to suggest a variation to that tutorial and show you my "Imported Lace Kindle Case." {Did you notice that rhymes? It does.} Here's the tutorial:  Instead of running a fabric ruffle down the center of the case, I simply sewed two lines of beautiful crocheted imported lace down the center and then applied the twill tape over the ends. {End of tutorial.} ;o)

Here's a tone-on-tone I made yesterday...


All three of these cases {and more} are for sale in my Etsy for those non-sewers in my group!


For you sewers... If you don't have a Kindle already, you might have to go purchase one just to try out your sewing skills!


Have a nice day!

Tuesday, May 29, 2012

"Ruffled Kindle Case" Tutorial...


I've loved the design of this "Ruffled Kindle Case" ever since I made the first one a month ago! I've been promising a tutorial for weeks now, and today I finally took the time to put one together. This case has a beautiful little ruffled front with an etched mother-of-pearl button and cord closure. If you're looking for an easy sewing project, this one's for you.  It doesn't get much simpler than this! {Update: Check out my "Imported Lace Kindle Case" for an even easier variation for this Kindle pouch!}

For those of you with no desire to make one of your own, check out my Etsy Shop where you can purchase one of these cases!


My "Ruffled Kindle Case" will fit any Kindle that is 7.5 inches x 4.8 inches x .45" or smaller! In other words the case will hold a Kindle, Kindle Touch, Kindle Touch 3G, Kindle Keyboard 3G or Kindle Fire. {The case, however, is too small for a Kindle DX.}


Materials Needed:

2  -  6 3/4" x 9" front and back (muslin, linen, or cotton)
2  -  6 3/4" x 9" lining (contrasting cotton)
2  -  6 3/4" x 9" fusible fleece
1  -  5" x 14" contrasting cotton fabric for ruffle
6 1/2" length of cording
9 1/2" length of 1/2" twill tape
One 3/4" button

Note: 3/8" seam allowance unless otherwise stated.
Finished measurements of bag approximately 5.5" x 8".

Tutorial:

1.) Prep Work: Cut out all pieces of fabric and apply fusible fleece to wrong side of case front and back...


2.) Making the Ruffle: (see photos below)
a.) Fold ruffle in half lengthwise -- right sides together -- and sew 1/8" from the unfinished edge. {Just sew the long side -- not the ends.}
b.) Press seam open.
c.) Turn the fabric right side out and press so that the seam is down the middle on one of the sides. This "seamed" side will become the underside of the ruffle.
d.) Sew a basting stitch 3/8" from the middle seam -- along both sides of the seam. Don't trim threads ends.  These basting stitches will be used to gather your ruffle. Turn your fabric right side up. Gently pull the two threads on the front of the ruffle -- leaving the threads on the back of the ruffle alone. Gather the fabric as you pull. When your gathers reach the middle of the ruffle, shift to the two front threads on the right side of the ruffle and repeat. Keep gathering the fabric toward the center point until your gathered fabric is the length you want it to be. {For a YouTube video on how to gather fabric using this technique, go here.}


3.) Attaching the Ruffle: Once the ruffle is gathered attach it to the case front -- making sure it is centered properly on the front.

Sew ruffle to case front using a regular stitch right down the middle of the basting stitches. Remove the basting stitches.


4.) Twill Tape: Pin the twill tape down the center of the ruffle and sew close to the edge of the tape.


5.) Cording: Cut cording and attach the loop to the back of the case in the middle at the top. I tape the ends of the cording with a little masking tape so the cording is less likely to pull through the seam.


6.) Lining: Pin together lining pieces -- right sides together. Stitch sides together, pivoting at the corners and leaving a 3" opening on the bottom seam. Back-stitch at the opening to ensure your stitches are secure. Trim seams and set aside.


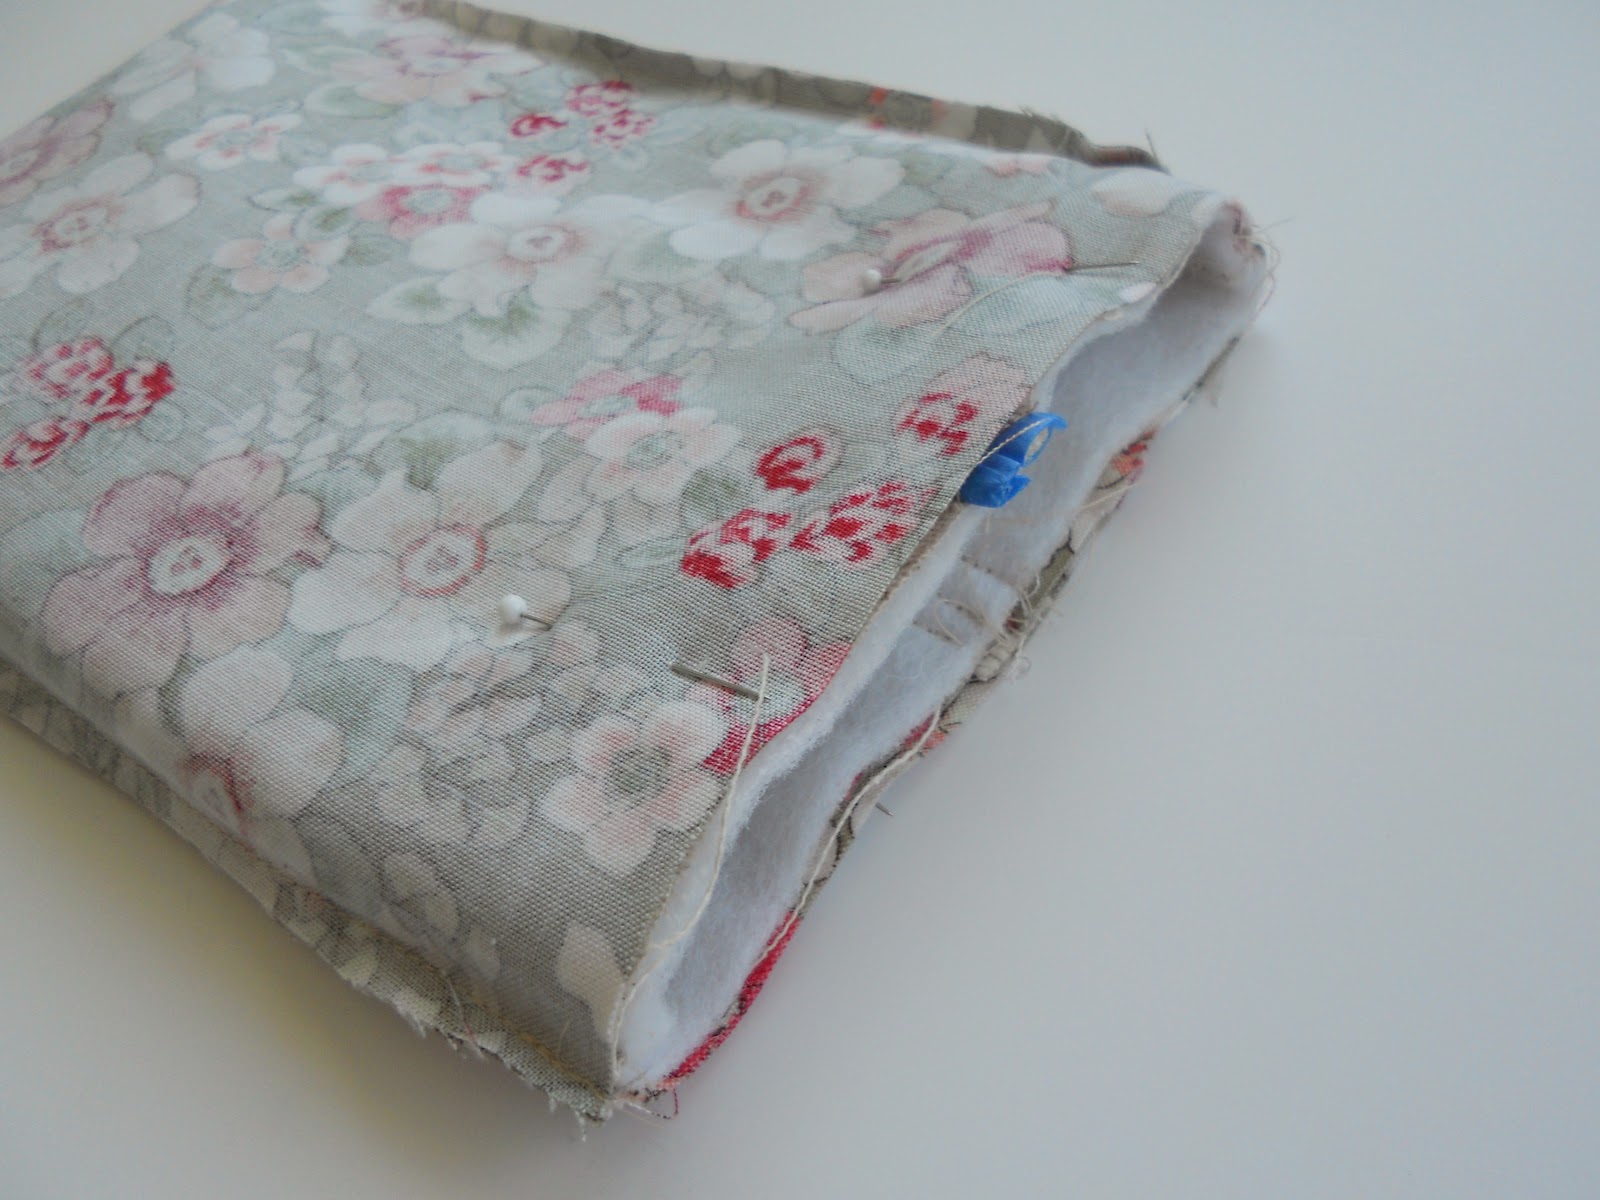
7.) Case Front & Back: Pin case front to case back -- right sides together -- at side and bottom seams. Stitch seams together - trim seams -- turn right side out and press.


8.) Sewing Lining to Ruffled Case: Slip case into lining -- right sides together. Match seams and pin. Sew around top of case and zig-zag the edges. {Pay special attention to the area where the cording is -- make sure it is very secure.}


9.) Finishing Touches: Turn case right side out by pulling the bag through the opening in the bottom of the lining. When case is right side out sew seam together at the bottom of the lining 1/8" from edge. Tuck lining into case and press the front and back of your Kindle case.


Top-stitch 3/8" around the top of the case, then sew button 1" from the top edge. Press once again and you're done!


You've now completed your "Ruffled Kindle Case"! 

I remember when Kindles first came out I wasn't sure I'd ever want one. I'd always loved turning the pages of a book and the feel of a book in my hands.


I got over that nostalgic-ness real quick-like when my son gave me a Kindle for Christmas a couple of years ago. I've had a love affair with my Kindle ever since. Serious. Love. Affair. I couldn't live without it -- at least I'd never want to try.


Because my creative juices are fueled by your wonderful comments, please leave one if you appreciate this tutorial! Thank you!

Linked to:
Hookin' Up w/House of Hepworths
Show Off Your Stuff Party @ Fireflies and Jellybeans
Link Party @ Somewhat Simple
Handmade Tuesday @ Ladybug Blessings
The Inspiration Board @ Homework


Thursday, May 03, 2012

Ruffles...

Have you noticed that ruffles are everywhere these days? Ruffled handbags, ruffled blouses, ruffled pillows -- it seems everything can be made better with a gathered fabric flounce!


This week I'm away visiting family, but last week I decided to get on the ruffle bandwagon and make myself a new Kindle case...


In the past I've made my Kindle cases with zippers, but this time I wanted a simple closure with a button and corded loop...


I really like the etched mother-of-pearl button I was able to find. It adds just the right touch of femininity against the natural muslin...


I hope to be able to publish a tutorial for this Ruffled Kindle Case that anyone would be able to easily alter for any size Kindle, Nook eReader or iPad. We'll see how that goes...


Would you be interested in a tutorial like that?


Just wonderin'...


Have a nice day!

Monday, January 09, 2012

Bunting Kindle Case...


This Christmas my 8-year-old granddaughter received a special gift. She is a voracious reader, so her parents presented her with a Kindle for Christmas. I love that they encouraged her love of reading with that gift. While they were visiting her parents asked me if I might make a case for her Kindle, so a couple days ago I got busy...


I'm not sure I'm ever going to tire of the banner craze. There's something so fun and whimsical about banners, and I thought they would look perfect on a Kindle case for our Zoey.


Before they left her parents measured Zoey's Kindle because not all Kindle's are created equal. It turns out hers is a little more demure than mine with measurements of -- 4 3/4" x 6 3/4". I decided to make the finished case 6" x 8", so I cut two pieces of muslin 7" x 9" for the outside of the case and two pieces of complimentary cotton fabric 7" x 9" for the lining. I also cut out two 7" x 9" pieces of fusible fleece and secured them to the muslin. A 12-inch zipper is also required. I used 1/2" seams.


I used the same approach that I illustrated in my "Bunting Cosmetic Bag" tutorial to string the bunting across the front of the case...

 
Then I used the same technique to sew the bag together that Anna {from "Noodlehead"} showed us in her tutorial of her Lil Cutie Pouch...


I hope Zoey likes her case and that her Kindle continues to feed her addiction to reading!


Linked to:
Make-It-Yourself Monday @ An Original Belle
Head to Head Showdown @ I Can't Stop Crafting
Sunday Sisters Link Party @ Sisters of the Wild West
Show & Tell @ Be Different Act Normal
Friday Fav @ Naptime Crafter
Made Monday @ Toastie Studio
Friday Flair @ Whipperberry
Free for All @ Sassy Sites
Hookin' Up @ House of Hepworths
Strut Your Stuff @ Somewhat Simple
Sew Cute Tuesday @ Creative Itch
Show Off Your Stuff @ Fireflies & Jellybeans
DIY Under $5 @ A Little Tipsy
Party Time Tuesday @ Northern Cottage
Show & Tell @ Blue Cricket Design
Handmade Tuesdays @ Ladybug Blessings
Ta-Da Tuesday @ Mommy by Day; Crafter by Night
The Inspiration Board @ Homework
Show Me What You Got @ Not Just a Housewife
Get Your Craft On @ Today's Creative Blog
Made by You Monday @ Skip to my Lou
Make it Monday @ Brassy Apple
Made with Love Link Party @ Sew Chatty
Craft-O-Maniac Link Party

Monday, January 31, 2011

iPad Case...

About a month ago I was directed to this fabulous pillow tutorial at the blog Sew, Mama, Sew! I fell in love with the quilting techniques used in making that pillow and knew I wanted to use those techniques at some point in time -- either to make that gorgeous pillow or something else. Shortly after reading that tutorial I designed and created a Kindle Case for the Kindle I had received for Christmas. When one of my daughters-in-law, Mia, saw that case she mentioned that she would love something like that for her iPad! My thoughts immediately went to the tutorial at Sew, Mama, Sew! and a design for an iPad Case was born...

Mia's favorite color is green, so I found coordinating fabrics in my scrap stash. I followed the instructions in the tutorial at Sew, Mama, Sew! and sewed some strips of fabric together. I then used my rotary cutter to cut across the sewn strips to produce a colorful strip of fabric! 


Those strips, along with some white flannel and earthy muslin, were joined together to make the front of the case...


I absolutely love the white stripe and soft texture of the flannel next to the more course fabric of the muslin. Delicious!


I'm not entirely happy with the dimensions of the case. Next time I would make it a little smaller, but I am very happy with the design...


I used the same fabric for the back and lining. It's called "Pom Pom" and it's from the fabric line "Flourish" from Studio E by Alicia Place Frost. Love it!


Fusible fleece was attached to the front and back pieces and the lining pieces of this item, so the case is well-padded to give some protection to the iPad. If I make another one of these, I will make it slightly smaller and post the specific measurements for the case.


All in all I'm very happy with how it turned out.


Linked to:
Saturday Soiree @ A Little Lovely
Friday Fun Finds @ kojo designs
FFAFriday @ Sassy Sites
Show & Share @ Just a Girl
Frugal Friday @ The Shabby Nest
Hookin' Up with HOH
Strut Your Stuff @ Somewhat Simple
Show Off Your Stuff @ Fireflies & Jellybeans
Get Your Craft on Thursday @ Life as Lori
Anything Related @ All Things Related
All Things Domestic @ Crazy Domestic
Get Your Craft On @ Today's Creative Blog
The DIY Project Parade @ DIY Show Off
Craftomaniac Monday @ Craftomaniac