Saturday, September 14, 2013
Flood Clean-Up Underway...
Yesterday I showed some photos on my blog about the "500 Year Flood" in Colorado. I've never been in any type of clean-up effort for a natural disaster before today, so when we got a call around noon to help a member of our church whose home had flooded I went in the clothes I had on and put on my new tennis shoes. About two seconds after arriving, my feet looked like this...
I won't show you what I looked like when we finished the job. For the record my tennies are white, and I was wearing white low cut socks that you can hardly see when my shoes are on. I had gone to this house with the assumption we would be clearing water out of a basement, but we realized rather quickly the task was much larger than that...
These homes back up against a beautiful creek that turned into a muddy river that flooded this neighborhood. Homes had anywhere from a few inches to 8 feet of water and mud in their basements. We were asked to help remove the mud from a culdesac that is maintained by the neighborhood homeowners association. This culdesac is just off a street that is maintained by the city. When we arrived there was about a foot of mud in the culdesac and the driveways of the houses. We worked with shovels, snow shovels and push brooms to move that mud away from the houses, down the culdesac, and onto the city street where city trucks could come and remove it. It was a long culdesac...
Our task was made a little easier when four-wheelers with snow plows were brought in to help move the mud...
I've never seen mud that has the consistancy of velvety dipping chocolate until today. Amazing. By the time we left the culdesac was mostly clear of mud. As we worked I didn't imagine that we would ever see the pavement, but sure enough it was there...
There may be more photos like this as I help with cleanup efforts throughout our town. Most of the roads have been reopened in Longmont and the waters are receding. It's so odd to drive through areas that look perfectly normal and then go to areas that are devastated. So sad, but I'm thankful that many areas were spared. It'll feel good to work in the other areas and try to make a difference.
Friday, September 13, 2013
Flooding...
Things have been quiet on my blog this week. There's a good reason for that. We live in Boulder County in Colorado and our hometown has been experiencing scenes like this the last few days...
They are calling this the "500 Year Flood" because it is unprecedented. Neighborhoods in my hometown have been evacuated and are under water. A little town just west of us, Lyons, is totally surrounded by water. Fortunately, the Colorado National Guard was called in with trucks that could traverse the river of water and are evacuating people, but there are many further up the mountain that are stranded. Estes Park has a torrential river running through the main street of town. So incredibly sad. These are scenes from our hometown of Longmont...
Our town has been cut in half with the flooding of the St. Vrain river -- which typically is more like a creek. There have been no avenues open from the north end of town to the south end. A river is running through the town, as illustrated in the photo below.
Thousands are without power and water supplies to surrounding towns have been compromised and cut off. Below is a fire engine that was sent to rescue two stranded motorists that had bypassed a barricade at 1:30 a.m. In the process of rescuing the stranded persons, the water continued to rise and overcame the engine. Fortunately, the crew made it out safely as did the rescued parties, but there lies a firetruck that is desperately needed right now because two people acted impulsively.
{All above photographs courtesy: Times Call}
Our home is fine -- as is my husband's office. So far we've weathered the storm, but I feel so bad for those whose home or business has been flooded. I know there will be plenty of opportunity to serve my community in the next couple of weeks, so blogging is going to take a back seat. Here's a photo of a subdivision that is about two miles from our home...
{Source: Payton Peterson}
Please pray for those whose lives and property are in harms way and the rest of us that are just trying to tread water until the sun starts to shine and rain isn't in the forecast. Thank you.
Tuesday, September 10, 2013
Child's Play Tent Tutorial...
As a child I remember building forts, tents and tee pees with sheets, blankets and pillows layered over chairs, sofas and beds. Something magical happens when a child's imagination is fired. This indoor/outdoor play tent is the perfect hideaway for any child, and it's an easy, fun project that shouldn't intimidate any adult. Let me repeat... This is probably one of the easiest projects you could make for a child. As an added bonus this tent folds flat for easy storage!
This tent was introduced on my blog last week as part of the "Waverize It" fabric challenge. Click here to learn how I added Waverly's "Button Blooms Confetti" fabric to a chevron print to give the effect of flowers climbing up the sides of the tent!
Materials for Tent Frame:
2 - 1" x 2" x 8' lengths of select pine, cut each in half to form four 4' lengths for tent poles
3 - 3/4" x 48" hardwood dowels
3/4 inch spade drill bit
Note: I bought "select pine" (which is the highest grade on the market) for the tent poles at Home Depot. Select pine has a smooth, even finish with no splinters, however, there are less expensive grades available that you could use. Home Depot will cut these lengths in half at no additional charge. All the materials for the tent frame, including the drill bit, cost about $20.
Instructions for Tent Frame:
1. Take one 4' length of 1" x 2" select pine and measure and mark 6 inches down from the top of the piece and 3 inches up from the bottom of the piece, centering the mark on your wood. Using the 3/4 inch spade bit, drill a hole through each mark. I used a drill press to drill accurate holes, but a hand-held drill will work well too.
3. Line up two lengths of pine (tent poles) and slip a dowel through the holes that are 6 inches from the top. The dowel should fit snuggly in the holes. On the other end of the same dowel slip the two remaining tent poles onto the dowel. That dowel will form the the ridge pole on the top of the tent.
4. Slip the other two dowels through the holes that are 3 inches from the bottom of the tent poles to form a brace on each side of the tent.
Optional: If you have rambunctious kids and are afraid that it will collapse inward when bumped by your little ones, you can add an additional horizontal pole on the base at the back of the tent. Use another length of pine, drill 3/4 inch holes in the ends and slip the pine over the two bottom braces (dowels), like this:
When you go to store the tent, simply take off that bottom piece of pine and collapse the tent inward.
5. Your frame is complete. It couldn't have been easier!
Materials for Fabric Tent:
Note: Because people may want to finish off or hem the edges of their tent differently, I am going to give the finished measurements** for the fabric tent. This finished measurement is the size of fabric you will need after you've hemmed the edges. One might choose to turn over and hem the raw edges around your tent, zig-zag the edges, or simply leave the edges "as is". That decision might depend on what type of fabric you choose. Duck, twill, upholstery fabric, faux leather, fleece or cotton (make sure it is at least 44" wide) can all work beautifully for this project. Buying a twin flat sheet at Walmart and cutting it down could be the least expensive way to go. Faux leather or fleece would be cute for a little boy's tent and you wouldn't have to finish off the edges! If you're a less experienced sewer, the thinner fabrics (a twin sheet or lightweight cotton) will be easier to manage.
8 yards of 1" ribbon or twine for ties, cut in 8 - 1 yard lengths
45 inch length of 2" wide grosgrain ribbon for casing
**Finished Size of Fabric for Tent: 43" x 86"
Instructions for Fabric Tent:
1. Finish the edges of your fabric to form a 43" x 86" rectangular piece for the tent.
Tip for the novice sewer: If you choose to hem your tent edges, make sure you add the size of your hem to your original fabric piece. For example if you stitch a 1 inch hem on each of the four sides of your tent, you should start with a piece of fabric that is 45" x 88", then turn over the edges 1 inch on all four sides and stitch around the outsides edge to form a piece that is 43" x 86".
2. Fold the tent in half lengthwise and iron along the center fold. This fold will help in the casing placement.
3. Center grosgrain ribbon over the center fold on the wrong side of the tent fabric and pin. Turn short ends of ribbon under to make a finished edge and stitch close to the outside edge along the length of the ribbon. This will form the casing for the ridge pole.
4. Mark 18" down from the center fold and pin one 1 yard length of the ribbon or twine to the wrong side of the tent fabric. Measure 18" down from the marking you just made and pin another length of ribbon or twine. Do this on all four sides of the tent fabric, like this:
6. Slip ridge pole through the casing in the tent. Tie ribbons or twine around the tent poles to secure the fabric.
7. Enjoy watching the children in your life pretend, imagine, invent and relax in their own little world.
When the children are finished playing, simply fold the tent poles together for easy storage!
Linked to:
Show Me What You Got @ Not Just a Housewife
Monday, September 09, 2013
Home Again...Fabric...Tutorial...
I returned home last evening from a wonderful week with one of my son's and his family. They had a new little one join their brood a few weeks ago, so I went to help the family. So much fun! I miss them already. Here's an adorable photo of his older sister. She and I took a lot of walks together. It made me realize how much a two year old enjoys the journey. She hopped along picking up treasures and holding them in her chubby little hands loving every minute of the adventure. As an adult I usually set my sights on the destination, rather than appreciating the journey. It was a good lesson for me to learn.
As much as I miss that little newborn baby boy and his family, it was good to get home. These beautiful fabrics were waiting for me when I returned...
I have a lot of projects that I'm going to be working on this fall for Christmas presents. These will definitely come in handy. I ordered them at Fabric Bubb (Etsy shop).
Tomorrow I'm looking forward to publishing my tutorial for the Child's Play Tent that I posted about last week. It's such a fun, easy project that anyone -- regardless of their sewing ability -- can tackle!
Friday, September 06, 2013
Friday's Fabulous Finds...
I spy with my Etsy eye...
autumn just around the corner.
Clockwise, starting top left:
Wishing you a beautiful weekend!
Sunday, September 01, 2013
Waverize It!
I'm delighted to take part in "Waverize It!" a fabric challenge for bloggers sponsored by Waverly Fabrics and Jo-Ann Fabrics and Craft Stores. This challenge is in celebration of National Sewing Month in September and Waverly's 90th Anniversary! Participating bloggers were challenged to think outside the box and transform something in their lives through sewing, using Waverly fabrics. I love me a challenge...
Waverly's beautiful "Button Blooms Confetti" was the inspiration for my project. Its bold, vibrant colors reminded me of a meadow of wildflowers...
... so, I decided to plant a child's play tent in that meadow of flowers and let those blossoms climb up the sides of the tent!
Wonder-Under (a double-sided paper-backed fusible web) was used to adhere the "Button Blooms Confetti" fabric to the chevron print.
I pressed a long strip of Wonder-Under to the Waverly Fabric, then used scissors to cut around the flowers. The paper on the back of the fusible web was removed and the flowery fabric was positioned and ironed onto the right side of the chevron print.
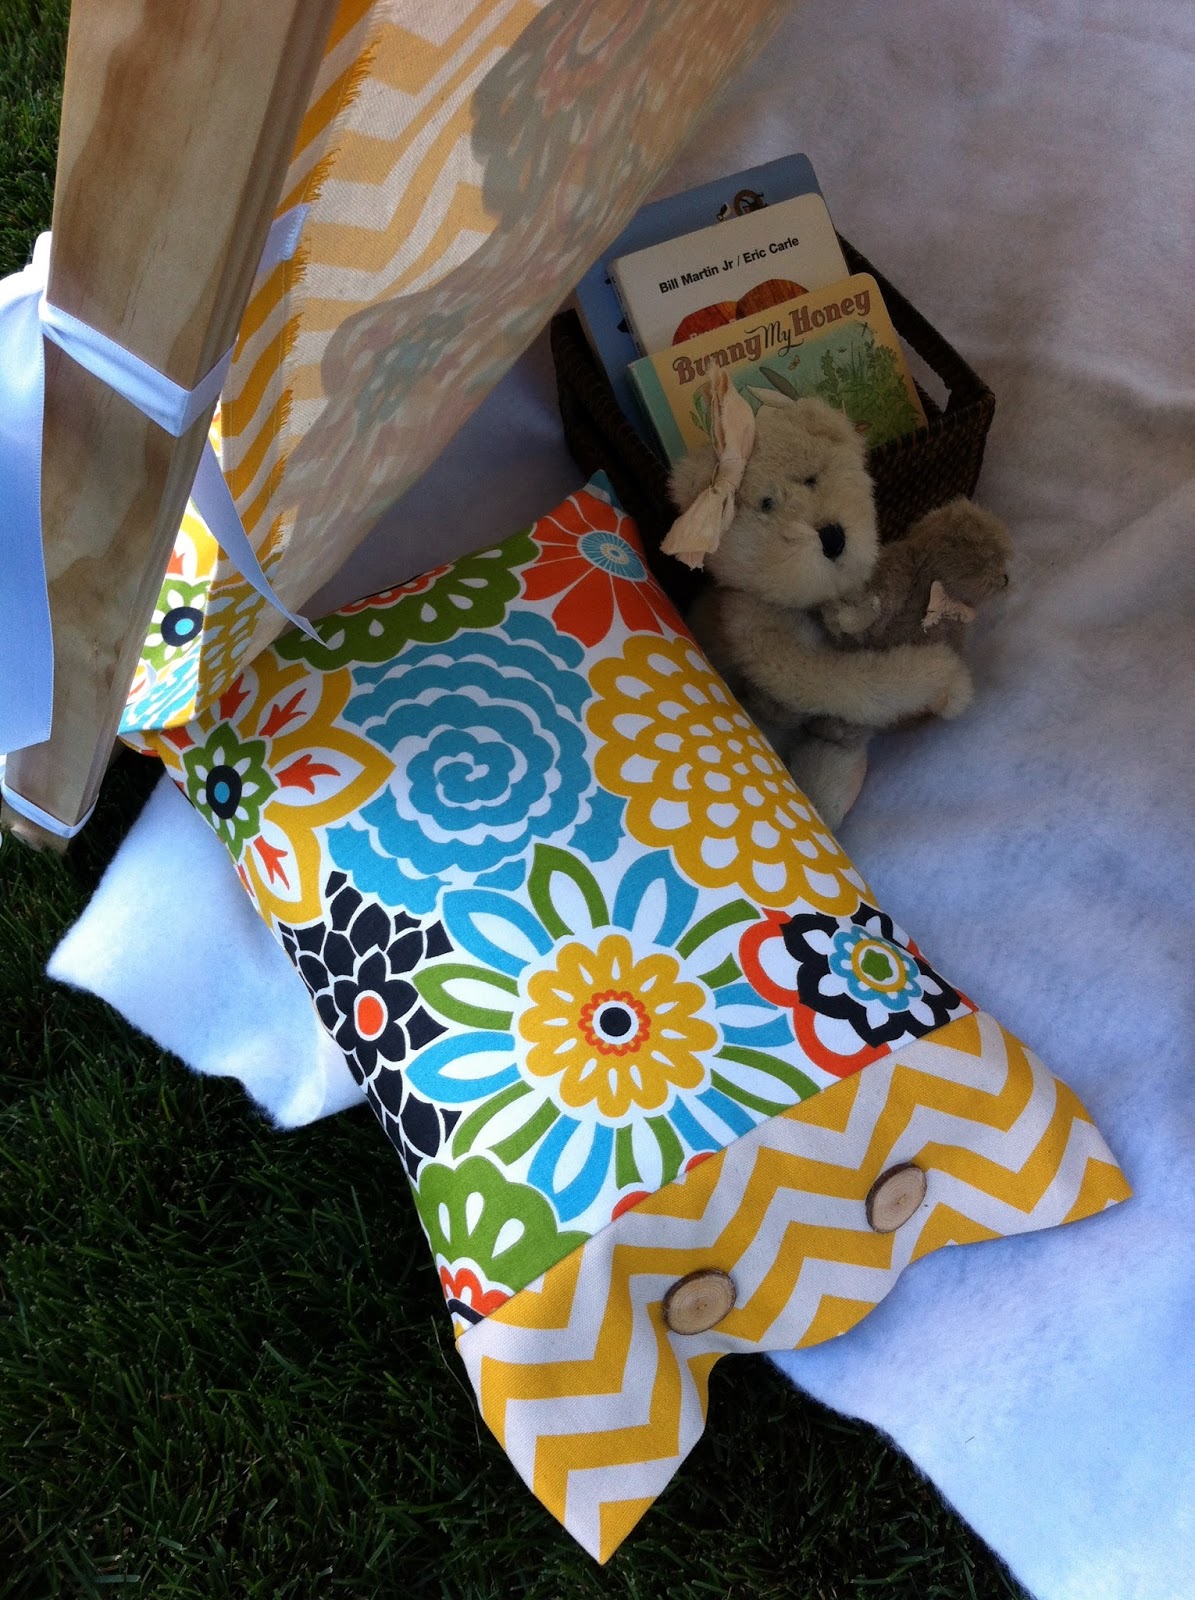
I had a little fabric left over, so I made a coordinating pillow. I imagine this tent will be used for quiet times and for noisy play times!
I love how the bold, vibrant flowers in this Waverly fabric look like they are growing up the sides of the tent...
This Waverize It! blogger contest has been fun for me to participate in, but here's the good news. In September Jo-Ann and Waverly are hosting a
open to all consumers. This contest helps celebrate National Sewing Month in September and Waverley's 90th Anniversary! The grand prize for the Facebook contest is $1000 in Waverly fabric and a $250 Jo-Ann gift card! Start dreaming how you can Waverize something in your life.
Click here for my complete tutorial on how to make this tent!
Subscribe to:
Posts (Atom)