
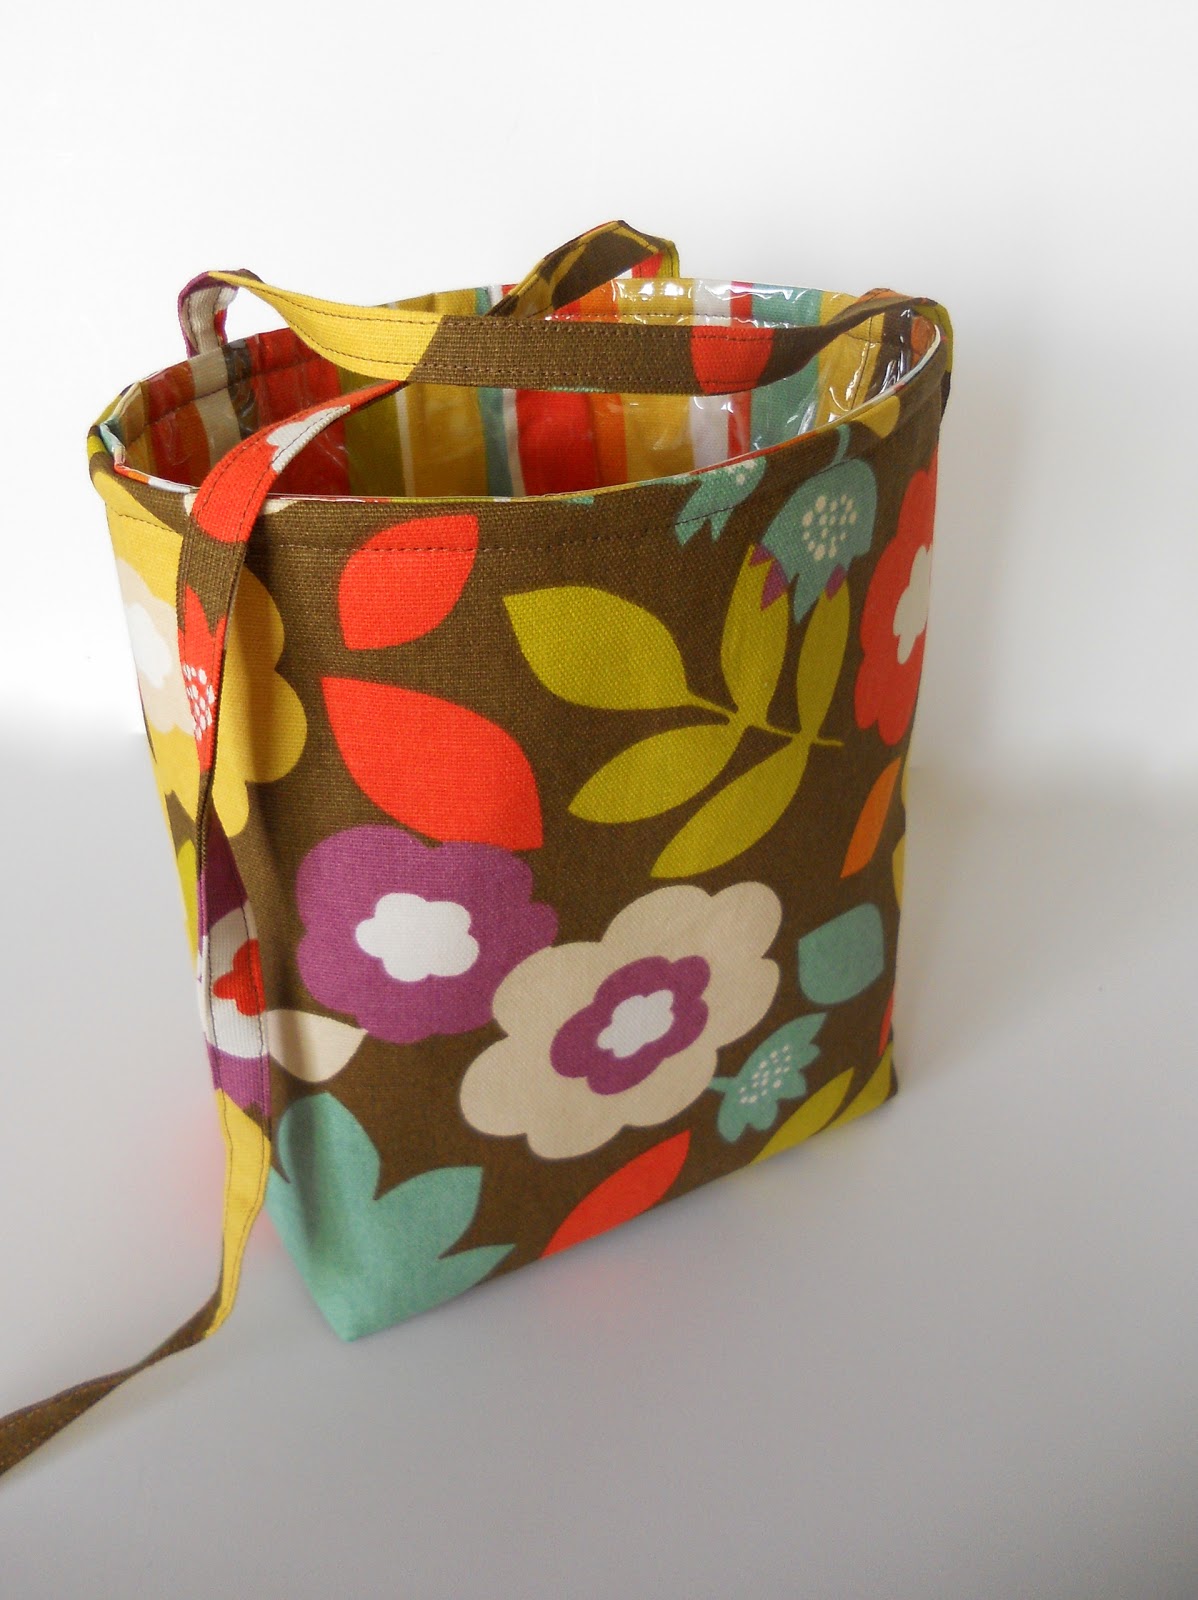
This tote is lined with clear vinyl fabric to make it easy to clean with a damp cloth. The outside fabric of the tote is 100% cotton duck found at Hancock Fabric and had been pretreated with a soil and stain repellant. {See links to fabric below.} The bag is interfaced with fusible fleece for added stability. I've seen a lot of variations of "kid organizers" for cars, but when my daughter-in-law requested I make one she wanted a simplified version. No pockets or tucks or froo-froo -- just a bag to shove junk into in a hurry! This tote is similar to others I've made with just a few variations.


Materials needed:
Front and back of bag: 2 - 12" x 12" squares of cotton duck or canvas fabric
Interfacing: 2 - 12" x 12" squares of fusible fleece
Lining: 2 - 12" x 12" squares of contrasting cotton duck or canvas fabric
Vinyl lining: 2 - 12" x 12" squares of thin clear vinyl fabric (very thin)
Strap: 2 - 2" x 20" pieces of cotton duck or canvas fabric to match front and back pieces
Cotton thread
3/8" seams unless otherwise noted
Finished measurements of bag: 9.5 inches tall x 7.5 inches wide x 4 inches deep with 19" straps
Note: Instead of using clear vinyl fabric over the lining of the bag as I did, you could simply use oilcloth or a laminated fabric for the lining. Laminated fabric, however, is about $19 a yard. Because I was making seven bags, I chose to go the less-expensive route and bought some cotton duck fabric on sale for $7/yard and some clear vinyl on sale for $1.30/yard. The clear vinyl fabric is optional.
Tutorial:
1.) Before sewing: Cut out all pattern pieces. Apply fusible fleece (iron on) to wrong side of front and back fabric pieces.

2.) Straps: a.) Fold straps in half lengthwise. Press. b.) Fold unfinished edges toward center fold. Press and pin. c.) Topstitch strap 1/8" along both finished edges of strap. I left the ends unfinished. You should have two straps that are 1/2 inch x 20 inches in length. Press and set aside.

3.) Front and back: With right sides together, pin bag front to back. Stitch side and bottom seams together using a 3/8" seam, pivoting at the bottom corners as illustrated below.

4.) Gusset or "boxed corners": To make gussets put your hand inside the bag and fold the corner into a point where the bottom and side seams meet. An easy way to make sure seams are aligning is to push a pin through the middle of the top seam, continue pushing pin through all the layers of fabric. The pin should exit the fabric in the middle of the seam below. Pin. Measure down to where it is 4" across the width. The halfway point (2") should be in the middle of your seam. Use a pencil or disappearing ink marker to mark the stitching line.

Stitch across the marked line, back-stitching at the edges. Check the gusset to make sure you are happy with it, then trim away the excess fabric to avoid bulk and zig-zag the edge. Treat the other corner in the same way.

Turn the bag right side out, press and get ready to attach the straps!

5:) Attaching the straps: On the back side of the bag pin straps 2.5 inches from the side seams (see below). Baste or zig-zag the straps into place. Set bag aside.

6.) Lining: To make the lining we will make a delicious little fabric sandwich. Lay one piece of your cotton lining face up. Arrange both pieces of vinyl fabric on top of that piece of lining, matching sides. Then, place the second piece of fabric lining, right side down, on top of it all. Pin through all thicknesses.

7.) Lining gussets: Make gussets for lining as you did for the bag (see step #4). Make sure the vinyl is smooth between the lining fabric before you pin and sew. Check the gusset to make sure it is stitched correctly, then trim and zig-zag the seam. Leave bag wrong side out.
8:) Sewing the lining and bag together: Place bag into lining right sides together. Match seams and pin. Sew around top of bag. Turn bag right sides out by pulling the bag through the opening in the bottom of the lining.

9.) Finishing touches: When bag is right side out match the seams at the bottom of the lining. Pin seam and sew 1/8" from edge making sure lining and vinyl is tucked into the seam.

Top-stitch around the top of the bag about 3/8" from edge.

10.) To install: Lift the headrest in your car (see below) and tie straps around the posts...


6.) Lining: To make the lining we will make a delicious little fabric sandwich. Lay one piece of your cotton lining face up. Arrange both pieces of vinyl fabric on top of that piece of lining, matching sides. Then, place the second piece of fabric lining, right side down, on top of it all. Pin through all thicknesses.

Before sewing, measure 3.5 inches from both sides of lining and pin at that point (see photo above). Stitch sides and bottoms together, pivoting at the bottom corners and stopping at the 3.5 inch mark -- back-stitch at the end of your stitches.
7.) Lining gussets: Make gussets for lining as you did for the bag (see step #4). Make sure the vinyl is smooth between the lining fabric before you pin and sew. Check the gusset to make sure it is stitched correctly, then trim and zig-zag the seam. Leave bag wrong side out.
8:) Sewing the lining and bag together: Place bag into lining right sides together. Match seams and pin. Sew around top of bag. Turn bag right sides out by pulling the bag through the opening in the bottom of the lining.

9.) Finishing touches: When bag is right side out match the seams at the bottom of the lining. Pin seam and sew 1/8" from edge making sure lining and vinyl is tucked into the seam.

Top-stitch around the top of the bag about 3/8" from edge.

10.) To install: Lift the headrest in your car (see below) and tie straps around the posts...

Then, lower the headrest to hide the straps. You've got yourself a "Trunk for the Junk!"

Disclaimer:
This product does not in any way, shape or form, implied or otherwise,
expressed or suggested, guarantee your vehicle will be well-kept and free-of-clutter.
We can only hope...
;o)

We can only hope...
;o)

Because my creative juices are fueled by your wonderful comments, please leave one if you appreciate this tutorial! Thank you!

Mop it up Mondays @ I Should be Mopping the Floors
DIY Under $5 @ A Little Tipsy
Show & Tell @ Blue Cricket Design
Sew Cute Tuesday @ Creative Itch
Feature Friday @ Blissful & Domestic
Handmade Tuesday @ Ladybug Blessing
Get Your Craft On @ Today's Creative Blog
Ta Da Tuesday @ Mommy by Day : Crafter by Night
Trash to Treasure Tuesday @ Sassy Sites
Made Monday @ Toasties Studio


