Monday, February 28, 2011

March "Plaque Attack" has arrived!


I'd like to start this post by saying "Thank You" to the many who sent such nice comments in their emails requesting last month's Plaque Attack and Young Women Value Plaque. I'm so sorry that I don't have time to respond back to you individually. Most often I just send the plaque document without a word, when I'd like to write you each a long email thanking you for your support. Please believe me when I say it is truly appreciated. 

In order to receive the document for this plaque,
please follow the instructions below...

For those new to the "Plaque Attack Club," last September I introduced a new monthly feature on my blog and named it "Plaque Attack." The best way to describe "Plaque Attack" is that it is a free plaque-of-the-month club. Each month -- a few days before a new month begins -- I will make a post featuring a new plaque. The plaque wording will reflect holidays or activities unique to the coming month.

 
Many have requested to be put on the email list to receive the plaque wording monthly. In actuality there is no "list." You'll need to check back every month and request the new plaque to receive the document. A number of ladies have sent me photos of their plaques or a link to a post after creating them. Nothing makes me happier than to see your wonderful and unique creations! It fabulous to see the different spin people put on the same basic idea. Please feel free to share your creations!


If you would like to make the plaque for March, please follow the instructions below...

You will need the following materials:
1- 6 1/2" square wooden plaque
(Plaques can now be purchased online here.)
1 - piece of scrapbook paper
craft paint / spray paint
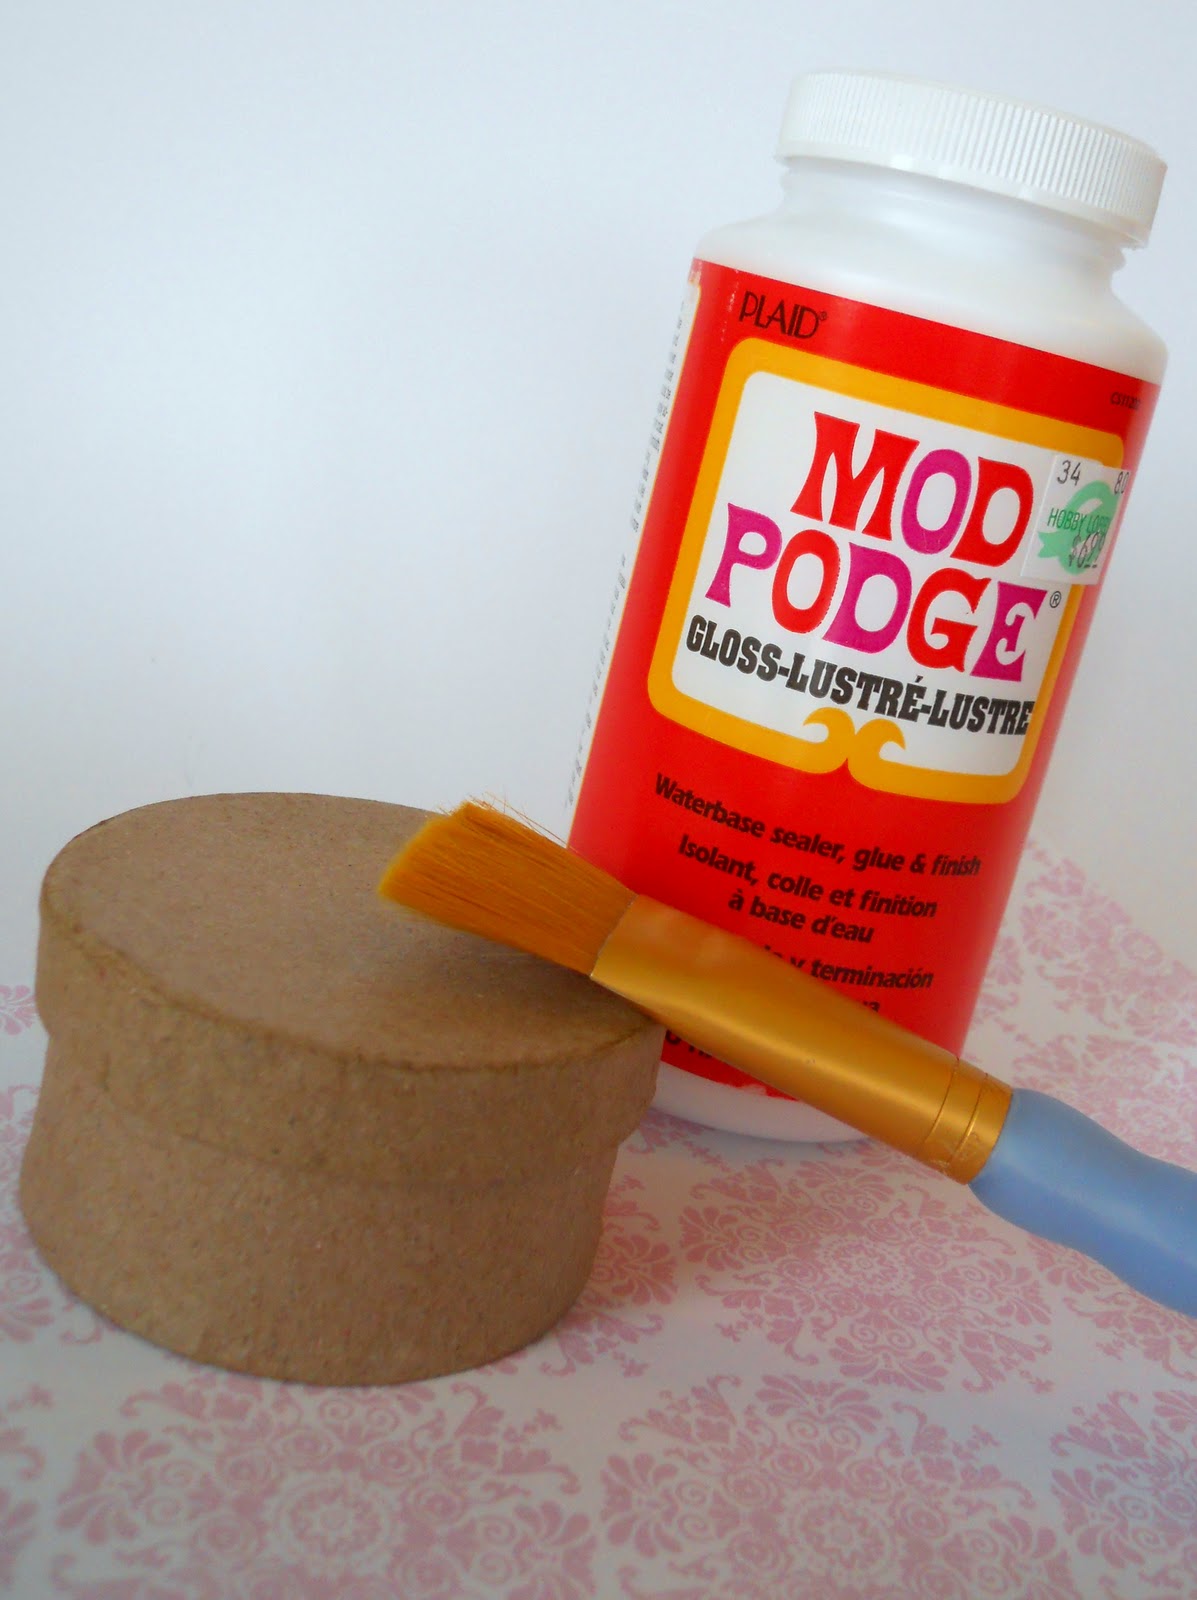
Mod Podge
paint brush


Print the document off on a piece of scrapbook paper.  {Important Tip}  I learned a valuable lesson last month when I was making a plaque. Occasionally when I've made my plaques I've been disappointed because sometimes the ink bleeds a little when I apply the Mod Podge. I decided to try the product below to see if it would seal the ink on the paper, and it did...

That's Rust-oleum Painter's Touch Ultra Cover 2x Matte Clear Sealer. You can get it in the spray paint department at Home Depot or a similar product at Hobby Lobby, WalMart, etc. I printed the document on my scrapbook paper, and then I sprayed this clear sealer on it. Hold the can about 1 foot away from the paper and lightly spray it one direction and then the other direction. Just apply a light coating to set and seal the ink, so it doesn't bleed when you apply the Mod Podge. See how crisp the letters look below...


A 6 1/2" square wooden plaque can be purchased at most hobby stores. I found mine at Hobby Lobby for $1.47. I lightly sanded my plaque and painted on one coat of green acrylic craft paint. After the clear sealer has dried on your scrapbook paper, cut it to the desired size. Paint the front of your plaque with a thin layer of Mod Podge, then do the same to the back of the scrapbook paper and apply the paper to the front of the plaque. Make sure all bubbles under the surface of the paper have been eliminated and that the paper is nice and flat. Let dry. Then, liberally apply a finish coat of the Mod Podge over the entire front of the plaque to give it texture and sheen.Total cost approximately $2.50.


Remember: 
I'm offering this plaque free of charge to all. Just leave a comment below and shoot me an email with the words "March Plaque Attack" in the subject line. I'll return your email with the plaque image attached in a Microsoft Word document. My email address is on my sidebar under "Contact Information." 


Important: 
© By requesting this document via email you are agreeing not to sell the pattern or sell products with this pattern on them. You may make as many products as you would like for personal use or gifts.

Did you notice the cute fonts I used? These free fonts can easily be downloaded to your computer by going to {Kevin&Amanda.com}. They have hundreds of fabulous fonts for the taking. So kind of them to share their talents so freely!

Linked to:
Show Off Your Stuff @ Fireflies & Jellybeans
20 Below @ Christina's Adventures
Get Your Craft On @ Today's Creative Blog
t2t Tuesday @ Sassy Sites
Mad Skills Monday @ Support Blog for Moms of Boys
Strut Your Stuff @ Somewhat Simple

Sunday, February 27, 2011

Thankful Thoughts...

What inspired me this week?

A couple of weeks ago my sister sent me this quote. It immediately became a favorite of mine. This week I tried to internalize it...

"Patience is a willingness, in a sense, to watch the unfolding purposes of God with a sense of wonder and awe -- rather than pacing up and down within the cell of our circumstance."
Neal A. Maxwell, Ensign, October 1980


What surprised me this week?

I was surprised this week when my mother called and told me she had been worried about me. She had noticed for the last month that I seemed "a little down" when I spoke to her. She asked, "Is everything alright?" 

I tend to cruise through life at warp speed, but occasionally something happens to slow me down. Her question prompted one of those times. The truth is I had been a little troubled and overwhelmed. Nothing specific was hovering over me, just the usual and demanding pressures of life combined with feelings of angst over the seemingly constant upheavals and unrest in the world. My feelings were causing me to be critical and anxious and a little depressed. Her question prompted me to ponder what I could do to put more joy and peace back into my life, and I was reminded of an experience I had ten years ago... 

On August 27, 2001 we saw our son Ian off at the airport. He had been called as a missionary for our church and would serve for the next two years in Quebec, Canada. A few days after arriving he wrote his first letter from his new home in Quebec City.

His companion and he had decided to proselyte on the streets in Old Quebec. As Mormon missionaries do, they were contacting people along the large boardwalk next to the river at the base of Castle Frontenac, now a large hotel. Both Ian and his companion were newly called missionaries, so they had little experience to draw on as they approached the busy people walking past them on the boardwalk.  In his letter he related the following experience...

"We were attempting to contact people, but since we were both timid about it we weren't being very effective. After a while a man (not a member of our church) came up to my companion and started talking to him. This man told my companion that he was a psychologist and that he had been watching us for a couple of minutes. He then reprimanded us for not being effective and "wasting time." To paraphrase the conversation, the psychologist said something to this effect. 'Don't waste time! You may have just arrived in Quebec, but why waste time? 99.9% of the people won't be mad at you for saying "hello." If someone rejects what you believe then that is his problem. You might feel bad for them, but pick yourself up and move on with enthusiasm to the next person. Go and do what you need to do and don't waste time in fear!' Ian went on to say, "That's what the man told us, and it was exactly what I needed to hear."

Good advice for a missionary, but the story doesn't end there. Our family received Ian's letter on the afternoon of September 11, 2001. His letter was a ray of sunshine on an otherwise bleak day. As I read his letter that day, his experience with the psychologist was especially interesting to me. The advice that the psychologist gave Ian and his companion was excellent for a missionary, but as I read it on September 11th the message made a powerful impression upon me. The psychologist said, “Go and do what you need to do and don’t waste time in fear.” That day was a day full of fear, so the advice was particularly timely. Later as I was talking to my mother about Ian’s experience, she mentioned that a week before she had been reading and a particular quote impressed her. She thought it was applicable for a new missionary, so she typed it at the top of the letter she sent him that week. The quote was:

Work in place of worry.
Faith in place of fear.

Back to the present... With political unrest, economic depression, and natural calamities happening throughout the world and with the difficult situations that occasionally occur in family life, there is much to make us feel unsettled and worried. However, since my mother's phone call I've been revisiting this experience we had ten years ago and, once again, attempting to take the advice I learned that day. I've tried to replace worry with constructive service and fear with faith in Jesus Christ. As a result many of my concerns have seemed to fade away and peace has settled in. Thank you for your surprise question, Mom, and for your love and concern. It led to me better place.


©2011- Please refer to my copyright policy on my sidebar. Thank you!

Friday, February 25, 2011

Wednesday, February 23, 2011

Money Saving Tip #1: Bathroom Redo


Life is busy. In the last six weeks I've traveled across the country to the east coast twice for the arrival of a new grandbaby and her "baby blessing" -- a special family occasion. Between those trips I sandwiched in a trip to Omaha to visit my daughter's family. Such fun occasions that left very little time for crafting.


However, somehow I've managed to squeak in some important projects. I don't know if you remember a post I wrote awhile back telling how we were going to begin a complete overhaul of the top floor in our home. After writing that post, I collected some initial quotes. The bids I received reflected professionals doing all the work. These quotes came from small retail stores in our community. I was hoping to support our local economy. We had a gabillion dollars saved for the event, but as I went to different stores and priced just how much it would cost I soon realized it would cost two gabillion dollars which was one more gabillion than I had expected. 
That was about the time I realized I would either have to pare down the project or get my nails dirty. I decided on the later. Because we want to pay cash for all these renovations, we decided to do some of the work ourselves and hire out some of the more complicated work. At this point in time I fell out of love with some of our local businesses and in love with the big box stores in our community -- Home Depot and Lowe's. As much as I'd love to support hometown stores, I can be extremely fickle when it comes to saving a buck or two or thousand. Over the next few weeks I'll post about some of those savings and some of the projects that we are tackling ourselves!

Cost Saving Tip #1: Ready-made Granite Countertops

I wasn't set on having granite countertops in the guest bathroom, but it was definitely a preference. I priced them at a local granite "store" and found the price would be $499 for a granite piece -- a remnant from a bigger project they had --  to be cut and finished off to the size I needed: 22" x 48". I would then need to buy a sink (approximately $100) to install in the vanity. It would cost six hundred dollars for the granite countertop and sink. I must have a "cheap" streak in me a mile wide, but that seemed like a ridiculous price. I decided to go to HD and Lowe's to see if they offer granite at a less expensive price. Their custom granite countertops are similar in price, but I did find a product that both stores offer that fits the bill -- an in-stock, ready-made granite countertop with ready-mounted sink.
Cost (when bought in-store): $199

These ready-made vanity tops come in 32", 36" and 48" lengths -- all for $199. This is the color we chose:


These ready-made vanity tops includes a beautiful natural granite countertop and a solid porcelain, factory-mounted basin at less than half the price of other quotes. Of course the selection of colors is much more limited, but if you can live with one of their color choices, it's a fabulous deal. 

Savings: $400 
{cha-ching}

I'm spending the next few days refinishing the cabinets for the same bathroom. They are going from an honey oak finish to a light gray painted finish. 

Wednesday, February 16, 2011

End Table Redo...


Usually my projects have more to do with a sewing machine than power tools, but this week has been the exception. Several months ago I bought a cute chunky end table at a thrift store, and I've been waiting for it to warm up a little to refinish it. I found it for $22 at a flea market in town. That was more than I would have liked to have spent. I'm cheap when it comes to used furniture, but it was solid maple with cute lines and curves, so I bought it anyway. Here's what it looked like when the purchase was made... (Try to ignore that "awesome" burgundy paint glopped on the top.)


The first order of business was to strip the stain, varnish and that awful burgundy paint off -- get 'er down to her birthday suit so to speak. Errr. Anyway, I had heard about a company in town that strips furniture. You take your item into the store, and the gentleman puts it into a big vat of nuclear waste paint and varnish remover. The paint remover sloshes around the item for awhile and when it comes out it is as clean as a whistle. It was worth every penny ($35). A (very) light sanding and she was ready to paint...


I sat around looking at that little table for the last couple of weeks trying to figure out how to paint it. I finally decided to paint it black. I love how black paint shows off the details of wood and how it shows up beautifully next to a lighter wall. Here's the new and improved chunky-monkey end table. 


I bought the paint at Home Depot and used a brush and sponge roller. This grayish-black concoction is a Martha Stewart paint, called "Francesca."  Love this paint. It covers beautifully and the color is so rich! 


Linked to:
Catch as Catch Can @ My Repurposed Life
Fabulous Friday Finds @ Frou Frou Decor
Frugalicious Friday @ Finding Fabulous
Frugal Friday @ The Shabby Nest
FFA Friday @ Sassy Sites
Strut Your Stuff @ Somewhat Simple
Transformation Thursday @ The Shabby Chic Cottage
20 Below Thursday @ Christina's Adventures
Hookin' Up with HOH @ House of Hepworths
Show Off Your Stuff Party @ Fireflies &Jellybeans

Monday, February 14, 2011

Lauren's Questions Answered...


A couple of weeks ago, when I posted about my newly created iPad Case, I received an enthusiastic comment and questions from a reader. It looked like this:

Today I've decided to answer Lauren's questions. Hopefully, there are a few more out there besides Lauren that could benefit from this post. The first question Lauren asked was... 

"How long have you been sewing?" 

I had to get my abacus out to give Lauren the accurate answer of 42 (gasp!) years. It's true, I sewed my first item in my mother's womb. Actually, my mother enrolled me in a 6-week sewing class one summer when I was 12 years old. That was probably some of the best money my parents ever spent on me. I learned the basics in that class. A basic sewing class can make the difference between a well-used machine and one that collects dust from being tucked away in a closet. 

Tips for the Novice Sewer

Lauren then asked if I had any tips for a beginning sewer. I've come up with three tips that, in my opinion, can make the difference between a so-so project and one that pops! They are:

 1. An iron is your friend.
 
I remember back in the day being told by my sewing instructor how important it is to steam open all seams with a hot iron and press the project as it progresses through the steps to completion. At the time it seemed time consuming and unnecessary, but it is some of the best advice in regards to sewing I ever got. I can always tell the difference between a project that has been pressed along the way and one that has not. The pressed item will look fresh, crisp and professional -- the unpressed item will look tired, unkept and "homemade". That's all there is to it -- press those seams open and make friends with your iron! 

2. Double fabric when necessary.


This is a well-kept secret and I'm letting you in on it... For most of my projects, like the pillow above, where I use muslin I double my fabric to give it a smooth, polished look. All the panels on the pillow above are doubled in thickness. I love the natural, rustic look of muslin and I use it a lot. However, muslin can be lightweight and have very little "body." By doubling the thickness (cutting two pieces of the same fabric and using them as one piece) I create a much more professional look on my creations. When you use this technique you won't see a lumpy, bumpy pillow as the finished product. The double thickness hides the irregularity of the stuffing material and makes the pillow look more refined. 

3. Use a good quality interfacing. 
Often a beginner sewer will think that interfacing is "optional" and in reality it is. However, if you want a finished project that has body and will last, you'll want to include a good quality interfacing between the layers of fabric. It makes all the difference. I most often use fusible fleece. It is a thicker, more sturdy interfacing and when applied adds thickness and body to any project. I use it on all of my projects that call for interfacing and some that don't! I have used fusible fleece on all of my kid creations, all of my adult totes and cases, and many pillow tops. Again, it makes the end product look more professional and sturdy.   

Lauren, I hope this answered some of your questions and I hope this was helpful to others! 

Wishing you all a love-filled Valentine's Day...


Sunday, February 13, 2011

Thankful Thoughts

What moved me this week?
This week I went to visit my daughter and her family in Omaha. Each evening before they put their sons (ages 1 & 3) to bed their family kneels in prayer. After the prayer is finished the word "hugs" rings out. This word initiates what can only be described as a "hug-fest." Their two little ones run from person to person flinging their arms wide and hugging each adult tight. When all the adults are taken care of they turn toward each other and plow into one another's arms. Seeing their chubby little arms solidly wrapped around each other moved me. The love between siblings is a wonderful thing. It can be such a positive and bolstering force in one's life -- even when you're toddlers!

 What surprised me this week?
Having a craft blog is a humbling experience. At least for me it is. One never knows when one shares a creation just how well it will be received, so it was a bit of a surprise this week when my "Love Birds" Heating Pads for my grandchildren were met with enthusiastic approval by my blogging friends. (Thank you!) Even more of a surprise is that our grandkids seem to love them. Apparently, they love being warmed up at night with their little Love Bird by their sides. One grandson, a one year old who sleeps on his stomach, falls asleep with it firmly tucked under his tummy every night! It was a pleasant and welcome surprise!

Thursday, February 10, 2011

"Love Birds" or Rice-Filled Heating Pads for Children

Update: This pattern is now being sold in my Etsy store!

The other day a flock of "Love Birds" descended upon our home. These are not typical Love Birds, but I think it is an apt description none-the-less. After all, they are birds and we are giving them to our grandchildren with a whole lotta love


For awhile now I've been trying to think of a little present I could make for our grandchildren for Valentine's Day. I wanted to make something that would remind them of my husband and I, so I naturally gravitated to something that would hold them, hug them, and keep them warm -- just like us.


Last month I made a few Rice-Filled Heating Pads for some special adults in my life. I thought about those and then decided to make a "child's version" for our grandchildren for Valentine's Day. As a result, this here flock was created... 


I started, like I usually do, with paper and pencil...


That crude drawing took on a more polished look, and from that sketch a pattern was developed. I've been told that children who use rice-filled heating pads love them. The warmth of a heating pad can soothe a child's achy muscles or ease the pain of a stomach ache. It can keep a child warm on a cold night, and it can even be used to gently warm up a baby's crib before he goes to bed. (Remove the heating pad before the baby is placed in the crib, and always check the mattress temperature.) I'm certain a rice filled heating pad is not nearly as good as being held by a loving grandparent, but hopefully having their very own "Love Birds" will remind them that they are loved! 


Did you notice that the tummy of these Love Birds are in the shape of a heart? I thought that was an appropriate touch for Valentine's Day!


The back of the birdie is made of flannel -- soft, cuddly, and warm. The front is made from cotton fabrics. (Make sure you use cotton fabrics when you make your Love Bird because synthetic fabrics -- like Minky -- can melt in the microwave!) Just pop the birdie in the microwave for 60-90 seconds and when it emerges it is warm and toasty!

These Love Birds will soon fly off and wend their way toward our grandchildren spread throughout the U.S. It makes me feel good to know that they will hold these on Valentine's day and know that they are loved.


I've decided to offer this pattern 
and some brief instructions on how to make this 
"Love Bird Heating Pad" 
available to all! 

Click here to be transported to my Etsy store to receive this PDF pattern for "Love Birds" -- a rice-filled heating pad for children.


If your little one doesn't use his "Love Bird" as a heating pad,
it could definitely double as a bookend! ;o)

Linked to:
True Love Contest @ Sew Mama Sew
Best Project of the Month @ Today's Top 20
All Things Inspired @ All Things Heart & Home
Anything Related @ All Things Related
Handmade Tuesdays @ Ladybug Blessings
Get Your Craft On @ Today's Creative Blog
Mad Skills Monday @ Support Blog for Moms of Boys
Motivate Me Monday @ Be Colorful
Craftomaniac Monday @ Craft-O-Maniac
Show & Tell Saturday @ Be Different Act Normal
Saturday Nite Specials @ Funky Junk Interiors

Sew Crafty Saturday @ Wildflowers and Whimsy
Friday Fun Finds @ kojo designs
Weekend Wrap Up Party @ Tatertots and Jello
Frugalicious Friday @ Finding Fabulous
Fabulous Friday Finds @ Frou Frou Decor
Friday Linky Party @ Sassy Sites!
All Things Domestic @ Crazy Domestic
Frugal Friday @ The Shabby Nest
SAS Day @ Just a Girl
20 Below Thursday @ Christina's Adventures


Monday, February 07, 2011

Simple Expressions of Love...

A few weeks ago, out of the blue, a dear friend of mine dropped off a sweet little gift -- a small box of assorted chocolates and a little birdie that I love! I wasn't home at the time, so she put it by my front door and sent me a text to let me know that a little something was waiting for me when I got home. Don't you love small and simple expressions of love? I know I do. Sometimes a two-pound box of See's candy fits the bill, but most times a little container with three chocolates is all you need to let someone know they are well thought of and loved.


Along this line here is a simple and inexpensive gift from the heart that you can give this Valentine's Day to someone you love or admire. It combines a paper mache box ($.99) covered with scrapbook paper ($.50) and Mod Podge.You can add a beautiful removable flower made from synthetic fabric scraps to the top of the box and (of course) some chocolate and you have yourself a lovely gift. Let's start with the box...


You can buy these paper mache boxes at any craft store. This one is about 3 inches wide by 1 1/2 inches tall. It's just a little squirt -- perfect for jewelry or some chocolate pieces. For a more complete tutorial on how to cover a paper mache box, go to this tutorial I created last Spring. This isn't rocket science though, so most likely you'll be able to get the gist of things from looking at the photos below! To cover the bottom of the box: Cut your paper so there is at least a 1/2 inch overlap on each side...


Then paint Mod Podge on both the paper mache box and the scrapbooking paper and adhere the paper to the side of the box. Slit the "overhanging" part of the paper every 1/2 inch, apply Mod Podge to the paper and the box, and glue the paper to the inside of the box. Do the same to the overhang on the bottom of the box. Then apply Mod Podge over all the scrapbooking paper on the box to give it a little sheen.
 

To finish the inside of the box I cut a strip of paper to cover the edges of the scrapbook paper on the inside of the box. Apply Mod Podge over that as well...


To cover the lid of the box just place your lid on the underside of your scrapbook paper and draw a circle around the lid. Then measure the side of your lid (mine was 1/2"), multiply that by 2, and add that amount (1" for mine) to the edge of the circle.


Cut the paper out and apply it with Mod Podge to the top of the box. All that's left is to slit the sides and Mod Podge them to the side wrapping them around to the inside of the lid much like you did the bottom part of the box.

Now all you have to do is make a gorgeous flower...


The flower pattern that I used is one I created about a year ago. Go here to read the post. This pattern is now for sale in my Etsy store. Go here to buy it!  Once the flower was created, I taped it to the top of the box...


I used three different types of fabric for this flower. The first was a soft pink poly satin, the second a white poly satin, and finally a white shimmery organza. I think it's one of my favorite flowers ever because of the different layers of color and texture...


I chose to tape it to the top of the box in case the recipient might eventually want to take the flower off the box and use it in a different way.


I then added a little soft pink crinkle paper and some chocolate kisses.  A Valentine's gift isn't complete without a little chocolate...


This little gift could be considered 3 gifts in one. A little box to hold treasures, a removable flower to be used however the recipient would like and, of course, some chocolate. It's not an expensive gift, but sometimes those small, simple gifts from the heart are the best of all.


Linked to:
Show & Tell Saturday @ Blue Cricket Design
Frugal Friday @ The Shabby Nest
SAS Day @ Just A Girl
20 Below Thursday @ Christina's Adventures
Trash 2 Treasure @ Sassy Sites
Linky Party @ Love Stitched
Meet Up Monday @ The House Creative