Tuesday, May 31, 2016

Furniture Refinishing -- Oak Kitchen Table -- Part 1


I love refinishing furniture. There's something about taking a piece of furniture that's seen better days, and making it beautiful and new once again. Our oak kitchen table has needed a face-lift for a year now. It served us well for almost 25 years, but it needed a little tender loving care. I had noticed recently that the varnish was starting to wear, and in one little corner the varnish seemed a little "sticky." I've read that this stickiness might be the result of the original finish being improperly cured or mixed. In any case, it was time to take this girl to the spa and give her a make-over.

The table was originally similar to the one below, but ours is larger and has two pedestals. {Our table is solid oak -- this one could be a wood veneer.} We decided to keep a stain finish on the top of the table {only darker} and paint the pedestals white with a brown/gray glaze.


I began by refinishing the top of the table, which includes four leaves. This table sits 12 people, so it's not a small task. I did quite a lot of research online before I began. The steps that I used worked beautifully, so I'd definitely recommend this process.

To strip the top of the table and ready it for the stain, I first used Zep All-Purpose Cleaner and Degreaser. I then applied Citristrip Stripping Gel. This is a great product that I've used before. The gel formula makes it much easier to apply and it does a beautiful job of stripping away the old varnish and stain. One caution: On the can it says you can leave the stripper on the piece of furniture for 24 hours before taking it off. The first application I left on for three hours, then easily removed it with a paint remover tool. I decided to apply a second coat to remove every trace of the stain and left it on overnight. Mistake. The Citristrip dried on the table and it was much harder to remove. I would definitely remove the paint stripper within three hours of application for an easier removal. After removing the Citristrip I cleaned the table with Klean Strip Paint Stripper After Wash. Then, wait until the table is totally dry to sand. I used my orbital sander with a 220 grit sand paper to make the top of the table as smooth as glass. Gorgeous unfinished oak...


When the table was ready to be stained, I applied Minwax Pre-Stain Wood Conditioner. This product prepares the wood for staining and prevents blotchiness. The next step was to stain it the color we'd chosen...


We decided on Minwax Gel Stain in Hickory. While researching products to use I wanted to stay with the same product line for the prestain, stain, and protective finish. That way the products "work together." Minwax has a nice website that helps you choose the products that are best suited for a particular project. This Minwax Gel is wonderful. I really enjoyed using a gel stain over the more common runny version. Here are some photos of the stained wood. It's much darker than the original honey oak color of the table. This first two pictures were taken right after the stain was applied -- still wet. It still has a reddish hue to it.


As the stain dried it became darker and the red hue disappeared...


I love this dark stain. I'll wait a day or two to apply a coat of  Helmsman Spar Urethane in Satin Finish. Before I'm done there will be three coats of protective finish -- with a light sanding between coats. After that's done, I'll start on the pedestal prep and painting. I can't wait for the finished product!

*** Unfortunately, I've had an epic fail with the Minwax Gel Stain. {My fault.} Stay tuned and on Monday, June 6th, I will update you on this Project: 
Furniture Refinishing -- Oak Kitchen Table -- Part 2.***

Tuesday, May 24, 2016

Bloomin' Tuesday...


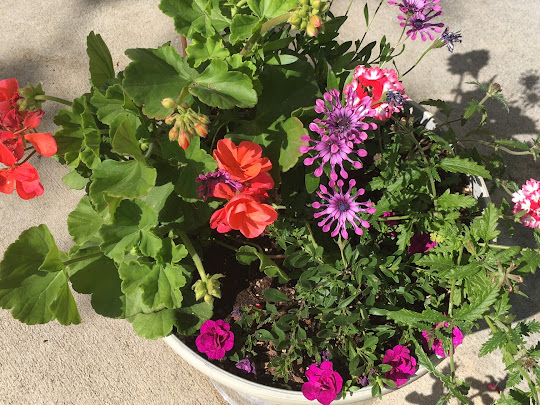
The weather has finally warmed {for the most part} here in Colorado, so my garden has really started blooming! The last few weeks have been filled with potting plants, making wood planter boxes, reconditioning soil and planting flowers, watering, mowing lawns, etc. It seems as if there is always something to do, but I love working in the yard, so I'm good with that. So much of our yard is in flower beds and container plants that it takes a lot of time and money to get it going in the spring, but it's worth it. The other night the hubs and I had dinner on our backyard patio -- surrounded by a myriad of container plants, green grass, buzzing bees and Beau {our puppy}. It's little moments like that that I treasure. Here is a sampling of what's happening in our garden today...

A few of my grandkids gave me this adorable Mexican bull planter for Christmas. They know I love blue and white pottery and gardening, so this was the perfect gift for me...


Last week I got the impatiens planted off the patio in our backyard. These impatiens looks scrawny right now, but in a month they will be lush and beautiful and fill in that whole area.


We have a high school in our town that specializes in career and technical education. Kids from all over the district can take classes, like horticulture, at this school. At the end of the school year, they sell a huge variety of flowers and vegetable plants that they've grown. They are beautiful plants at a great price. I bought almost all my flowers and tomato plants at this sale this year. Here are a few examples of the containers I planted with flowers from this school.


It seems like a yard will go for years without the need of major renovation, and then suddenly a complete overhaul needs to take place. That's what happen in our yard this year. Two large mounds filled with junipers had to be taken out and were replaced with new soil, a border of large rocks, and perennials. We also took out four large planter boxes that had rotted with age. These planters were filled with roses bushes. I love roses, but they never did well in that shaded location.  We made four new cedar boxes and planted impatiens that will fill the boxes and thrive in that shady location.


Today I plan on weeding {it never ends!} this little perennial flower bed by my front door and planting some diascia. They thrive in the only sunny spot in this flower bed!


Friday, May 13, 2016

Thursday, May 12, 2016

Shabby Chic Baby Tutu...


This is my favorite baby tutu that I've made for a variety of reasons. In my book, there is nothing sweeter than a shabby chic style on a little girl. Love the lace, the creamy colors, and the charm. This tutu took a little more planning and execution than the leopard tutu and chevron tutu that I blogged about previously.


For this tutu I bought a 100% cotton onesie and dyed it an off-white color in a tea bath. {You can google "dyeing fabric with tea" and find thousands of tutorials.} I wanted a vintage feel for this little outfit, and the dyed onesie instantly provided that look. It was interesting that the onesie took on a rosy hue next to the pink lace.


When that was completed I sewed a lace owl {found at Hobby Lobby} onto the front of the onesie.


Then I got to work making the tutu. For this tutu I used soft laces of different sizes and color and ribbon instead of tulle. 


I attached the lace and ribbon the same way as I attached the tulle on the other tutus. What makes this outfit especially wonderful is some of the lace I used. My mother used to make jointed teddy bears. Her creations were beautiful.
 

Several years ago as we were moving her to another home, we found some lengths of lace that she hadn't yet used, and I became the recipient of those treasures.  Some of the laces {the pinkish one and a cream colored one} are used on this tutu.


It's makes me feel good that a great grandchild will be wearing some beautiful vintage lace that my mother bought and used on her teddy bears. Sweet.


Wednesday, May 11, 2016

Baby Tutu {Gray Chevron & Pink}


A week or so ago I published a post about a little leopard tutu I made for our grandbaby due in June. I've made another one since then...


Once again I bought all the materials for this project at Hobby Lobby. I love the selection of onesies they have -- cute leopard prints, chevron, and more -- that are reasonably priced.


The tattered fabric blossom that I attached to the onesie adds a sweet touch to the outfit.


I often think of tulle as being starchy and stiff, but this tulle on a spool is soft and silky. I don't think it would irritate a baby's skin in the slightest.


Go here for more detailed information as to where you can buy the materials for these tutus!


Tuesday, May 10, 2016

Textile Tuesday...


Generally speaking I'm not much of a quilter. Years ago I made a couple of large quilts -- queen size -- and almost died of frustration and boredom. I like projects that whip up in a day or less. Lately, however, I've seen some small, baby quilts that have inspired me, so I got the urge to try a smaller, more bite-size variety. I absolutely love some of the fabrics they have at Hobby Lobby right now, so I picked some up and decided to do a disappearing nine patch quilt. This quilt is probably one of the easiest, most forgiving quilts one can make. Here are the fabrics I've chosen...

Wish me luck!


Tuesday, May 03, 2016

Baby Tutu...


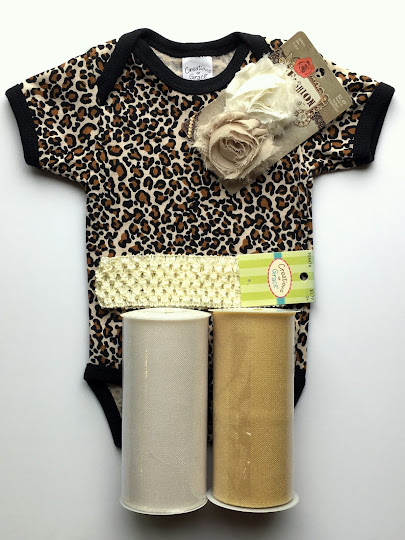
Here's my first attempt at the Infant Tutu that I blogged about yesterday. In that post I mentioned where you could find a tutorial and a YouTube video on how to make these easy, no-sew tutus for infants and little girls. I found all the "ingredients" for this outfit at Hobby Lobby.


This itty-bitty onesie is 0-3 month size. I have this amazing pin on Pinterest that helps you determine how long a tutu should be according to age or size.


Because I'm making this for an infant, I wanted it to be about 6 inches long, so I cut lengths of 6" tulle 13 inches long {you fold the strand in half and tie it onto the headband -- so you double the length you want of the tulle and add an inch for the knot}. Just follow this YouTube video or this blogpost for instructions.


This leopard print is a little wacky, but sometimes a girl {no matter the age} has to get a little wild and crazy!


This is one of the easiest projects I've made in a long time. I finished this one yesterday and have plans to make another couple today.


They take about a half hour from start to finish, and you don't even have to get your sewing machine out!


Monday, May 02, 2016

Baby Tutus -- the easy way!


I get a lot of my ideas standing in the check-out line with other crafty/sewers at Hobby Lobby. The longer and slower the line, the more ideas I get. The other day I stood next to another grandma who was making a tutu for her grandbaby. My antenna perked up because we are expected a little granddaughter the end of June. She explained what she was doing, and since then I found a blogpost and a YouTube video that demonstrated how to make these simple, no-sew tutus for infants or toddlers!


Last week I ran off to Hobby Lobby and picked up everything I needed to make these...


Today I'm going to be putting these together. Should take me about 10 minutes. I can't wait! I've been told you can also use ribbons or lace in place of the tulle. I'm looking forward to making a shabby chic version too!


No need for a tutorial here, just follow the links I provided above!