Friday, October 31, 2014

Wednesday, October 29, 2014

My Superheros...

You might remember last week I worked at break-neck speed to make some Little Girl Princess Superhero Capes and Little Boy Lightening Bolt Superhero Capes for my granddaughter's birthday party. Saturday I received this photo of the birthday girl and her big brother. Was it worth it putting in the effort to make those capes? A thousand times "yes!"


Tuesday, October 28, 2014

Quilt Display


This last weekend my husband and I took a quick trip to Omaha. Our grandchildren were in a special program at their church, and we wanted to be able to take in the performance. While we were there we went to the "Mormon Trail Center at Historic Winter Quarters", which is run by The Church of Jesus Christ of Latter-day Saints. This visitor's center teaches about the early migrations of Mormon Pioneers and about their temporary settlements in the Omaha area. My ancestors were part of that migration, so I feel a special connection with this area.


In the visitor's center they occasionally have a display of one type of another. This month they featured a quilt display. I've never particularly enjoyed quilting -- it's too tedious for me -- but that doesn't mean I don't appreciate the time, effort and talent that goes into quilt making. Here is a selection of some of the beautiful quilts that we saw. I can hardly imagine how many hours went into each one of these beauties...


These gorgeous quilts make me want to whip out my rotary cutter and mat and throw together a quilt. Of course, my quilt would have 10" blocks instead of 2" blocks, but still...

Friday, October 24, 2014

Wednesday, October 22, 2014

Little Boy Lightening Bolt Superhero Cape Tutorial


Yesterday I mentioned in a blog post that I made eight superhero capes for my granddaughter's birthday party. Four little boys and four little girls will be receiving a superhero cape as a party favor. I directed you in that post to my Little Girl Princess Superhero Cape tutorial, so you could make a superhero cape for a little girl in your life.  I also mentioned I would be posting a Little Boy Lightening Bolt Superhero Cape tutorial to cover the rascally boys in your life!


These little boy superhero capes are every bit as cute as the girl version! I love the superman type emblem with the lightening bolt coursing through it!


Seriously cute.
Wanna make one?


Materials:
  • Cape: Cut two out of cotton fabric (The length of fabric is determined by how long you want the cape. See comments in "Cape Pattern" below.)
  • Emblem: Use one sheet of contrasting color Glittered Fabric Rectangle found in the same craft aisle as the felt squares at Hobby Lobby.
  • Lightening Bolt: Cut one out of 1 sheet of Silver or Gold Glittered Fabric Rectangle.
  • One - 1 to 1 1/4 inch button
  • Three inch piece of Velcro
  • Jumbo Ric-Rac (optional)
Use 1/2" seam allowance unless otherwise indicated.


Cape Pattern:

Go to my Little Girl Princess Superhero Cape Tutorial and follow the directions to make a "Cape Pattern."

Emblem & Lightening Bolt Applique Patterns:
To receive the lightening bolt appliques, just send me an email. My email address is located on the sidebar of my blog. In the subject line type "Little Boy Superhero Cape", and I will send you back an email with a pdf document containing the pattern pieces for the emblem and lightening bolt.

When cutting out the emblem, use the Glittered Fabric Rectangle suggested above in "materials". The lightening bolt can also be cut from the same type of fabric -- using a different color. No fusible bond in necessary, just pin emblems in place and zig zag or straight stitch around each piece.

Tutorial:

Follow the direction in the Little Girl Princess Superhero Cape Tutorial to make the little boy cape. Substitute the lightening bolt for the crown and a button for the fabric flower. It's that easy!


I love toys that promote imaginative play in children. Sometimes the most simple props -- like a superhero cape -- are irresistible to young children and can spark the imagination for hours!


Tuesday, October 21, 2014

Little Girl Princess Superhero Capes...


A couple days ago we were facetiming with our daughter and grandchildren, and I remembered that it was little Taitum's birthday this Saturday. Taitum is a southern belle. She's a little slip of a thing with impeccable manners, but as you might be able to guess from the photo below, she also has an adventurous side...


Her mother told us about the birthday party she has planned for Taitum which involves a "superhero" theme. She had planned to make some superhero capes for all the kids as party favors. I'd been promising to make Taitum a little girl superhero cape for eons, so I offered to do the sewing. I had one day to finish all eight capes so they would arrive in time for the festivities.

Yesterday I worked at sweat-shop speed, and by 10:30 last night I put the finishing touches on the last one. This morning I had enough time to take some photos before I shipped them off. I made four Little Girl Princess Superhero Capes and four Little Boy Lightening Bolt Superhero Capes. {I'll show you the little boy capes later this week.}  Here are the princess capes. Taitum told me on the phone the other day that her favorite color is "bink," so I made plenty of "bink" ones for her to choose from!


I know I've said it before, but I absolutely LOVE the glittered fabric rectangles you can buy at Hobby Lobby that I used for the superhero emblem and crown on the capes. They are found next to the felt squares in the craft department. These flexible fabric sheets are easy to cut (no unraveling), and you can sew them onto your projects with a zig-zag or straight stitch. They add so much pizzazzzz to these little kid capes!


I made a little synthetic flower for the neck tabs to cover up the stitching lines where I attached the velcro at the end of the tabs.


I can just imagine my little granddaughter and her girlfriends saving the world with these capes fluttering in the breeze behind them!


If you'd like to make a Little Girl Cape for the superhero in your life, 
just click here for the tutorial and pattern.


Here's a sneak peek at the Little Boy Lightening Bolt Superhero Cape that I made for the little boys invited to Taitum's birthday party. I'll post a tutorial and the pattern for these capes later this week...


Friday, October 17, 2014

Thursday, October 16, 2014

Antique Dresser


This post has been a long time in coming! If you have a really good memory, you might remember that we bought this dresser back in June, and I started refinishing it at that time. If you're interested you can read
Part 1...


Part 2...


and Part 3 of this saga...
  

Those posts detail how I cleaned and restored the piece to it's former glory. Between those posts and now, summer happened. A couple of weeks ago after I got home from my last trip, I knew it was time to finish this project!

When we bought the dresser the framed mirror that rests on the top of the dresser was a mess. It had been jury rigged, and incorrectly "fixed" many times, so this is where we spent most of our time in restoring this piece. We repaired the obvious, and some not-so-obvious, problems. Then I restored the frame the same way I refinished and restored the dresser. A beautiful new beveled mirror replaced the corroded old one. Then it came time to hang the mirror in the newly restored oak frame. The former owner(s) had attached the mirror to the frame with makeshift brackets...


What's more, they hadn't hung the mirror straight, so it tilted on the frame. It was a mess. We bought some new swivel brackets and mounted them on the mirror and frame...


The last step was to mount the frame onto the back of the dresser -- easy...


This dresser now sits in a newly painted and redecorated room. I love the intricate carvings and curved lines of the framed mirror pared with the straight lines of the mission style dresser. So beautiful...


We were lucky to find a dresser that still had all original hardware...


I think I was fortunate to pay $130 for this beautiful dresser. It cost another $100 to replace the old mirror with a new beveled one. {crazy} All in all, it was a great project, and I'm so happy with the results of this antique piece.


Friday, October 10, 2014

Monday, October 06, 2014

Suzanne's Black & White Chocolate Chip Cookies


 I love this time of year because I get the urge to start baking again. As the temperature outside cools down, my oven warms up...


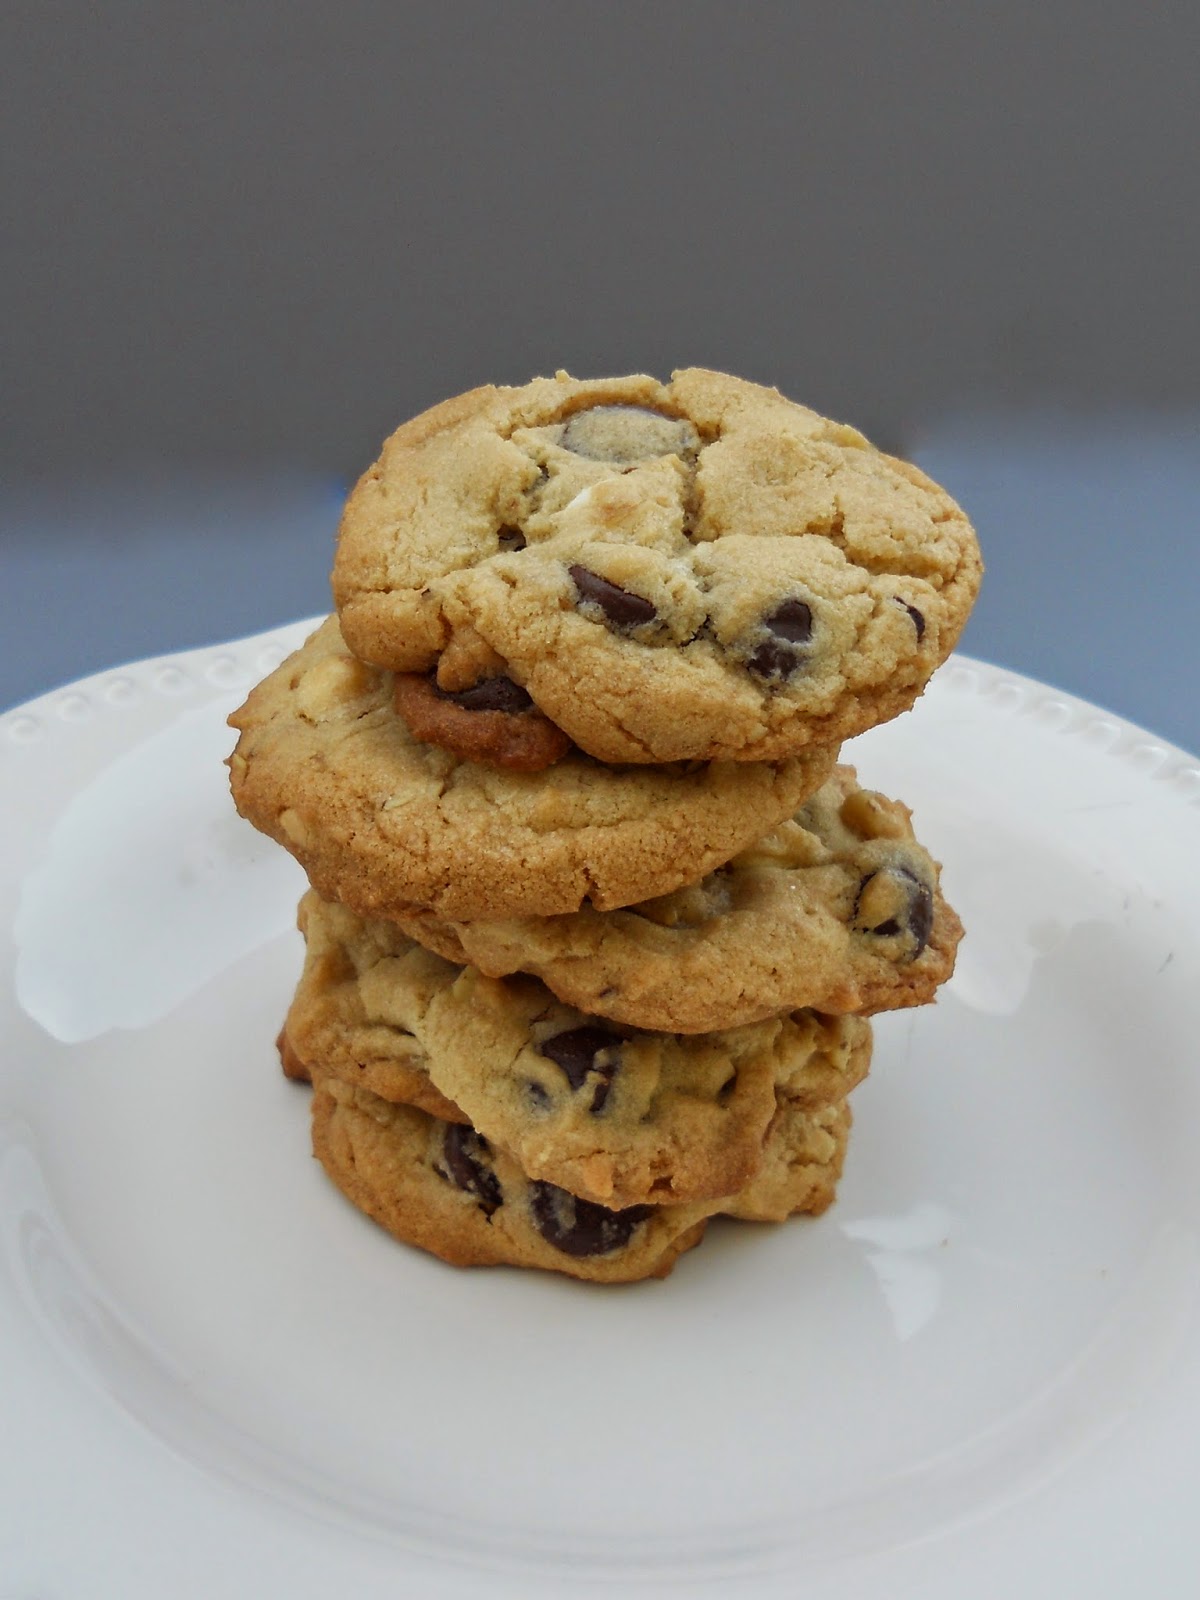
Here's a recipe I've tweaked, and in my estimation it's as near to perfection as any cookie has a right to be. Crispy on the outside... chewy on the inside... and stuffed with semi-sweet and white chocolate chips and nuts. Seriously yummy.


 Suzanne's Black & White Chocolate Chip Cookies
{makes 6 dozen cookies}

1 cup (2 sticks) of salted butter, softened
1 cup of butter-flavored shortening
1 1/4 cup of light brown sugar
1 cup of granulated sugar
3 eggs, room temperature
1 tablespoon vanilla

4 cups all-purpose flour
1 1/2 teaspoons baking soda
1 teaspoon salt
3 cups semi-sweet chocolate chips
2 cups white chocolate chips
2-3 cups nuts (optional)


1.) Preheat oven to 350 degrees (F). Lightly grease cookie sheets with a little bit of shortening or line cookie sheets with parchment paper.

2.) Beat softened butter, shortening and sugars in large bowl until creamy (about 3 minutes). Add eggs one at a time, beating after each addition. Add vanilla. Sift together flour, baking soda and salt in a separate bowl. (Sifting makes a big difference.) Gradually add flour mixture to butter mixture, mixing until just blended. Add chocolate chips and nuts; mix well.

3. Using a 2 tablespoon cookie scoop, drop dough about 2 inches apart on prepared cookie sheets. Bake 12 minutes. Let cool.


I'm hungry.

Sunday, October 05, 2014

Thankful Thoughts...


What moved me this week?

For the last few years I've been on a quest to develop more inner peace. I think that's something we all crave, but often, especially when we are facing real-life challenges, it's not easily found. I've had enough experiences in my life to know that true inner peace can only be found through Jesus Christ and his teachings, but for me, knowing that and applying His principles -- especially when life gets painful -- can be two separate things. This week I had a break-through in this quest when I realized that inner peace and faith are inseparably connected. As I read specific scriptures about faith, I realized that God has given us the capacity to exercise faith, and by doing so we can replace our fears and concerns with inner calm, comfort and hope born of the Spirit. When we have faith that the Savior is all-powerful and that He knows and loves us and is aware of our thoughts, concerns, failures and pain, we can be assured that He will provide help and support when we need it most, no matter how challenging the circumstance. By exercising more faith in Jesus Christ and inviting Him to shoulder our burdens and heal our hearts, He helps create for us a new path to inner peace. Now that I've discovered how to develop more inner peace, my next journey is to grow my faith and trust in the Lord. I'm confident that inner peace will be a natural consequence of that quest.