Wednesday, December 14, 2011

Stenciled Walls ::: Yum!


Raindrops on roses, whiskers on kittens, and stenciled walls are a few of my favorite things. At the moment "stenciled walls" tops the list. A couple of weeks ago I offered you a sneak peak of the wall I was stenciling in my bedroom.


I am so excited to introduce you to a fabulous company that specializes in gorgeous stencils -- Cutting Edge Stencils. They have a broad selection of luscious stencils from geometrics to florals to murals to damasks to nursery patterns and more. The stencil I used on my walls is called "Brocade No. 1", and it is definitely #1 in my book! Here is the wall shortly after I finished stenciling...


I decided to use this beautiful chunky damask stencil on a feature wall in my bedroom. The day after I stenciled the wall my contractor came rushing into the room as he readied himself to continue work on the remodeling in the master bath. He didn't know I had stenciled the wall the day before. He took one look at the wall, stopped in his tracks, and his jaw dropped! The wall has the same effect on me. I absolutely love it...


What's more -- my husband loves it. 
That makes me feel really good.

When I decided to stencil my wall, I had a particular look in mind. I wanted the design to be soft and calming, so I chose a paint color just a shade lighter than the wall color for the stencil. Then I chose the stencil...


I love the chunkiness of this particular damask pattern. It's traditional and sophisticated, with a trendy flair. I chose to have the design float -- like bubbles on the wall -- rather than have it spaced out evenly. That's the whimsical in me.


As much as I love the current trend of vinyl stickers {I have a couple on the walls in my home}, they are very one dimensional in nature. With a stencil you can create more of a two dimension feature by making the paint lighter in some areas and darker in others. I love the imperfect nature of a stencil. I like the soft edges and textured feel of the paint on the wall. That's something you just can't get with a vinyl wall decal.


If you've never stenciled and are intimidated by the process, don't be. It's easy to do and just takes a little practice. The best tip I can give is -- don't use too much paint on your roller or sponge! Dip your foam roller, stencil brush or sponge in the paint and then dab the paint off on a paper towel or paper plate until it is almost dry. With just a little paint on your applicator you're ready to stencil! Because I have textured walls, I used a small piece of a sponge instead of a foam roller or stencil brush to stencil the pattern onto my wall. I find that by using a sponge I can control the amount of paint I use more easily. You can always add more paint if you want it darker. Cutting Edge Stencil has this video to illustrate the process...


We've made a lot of wonderful improvements in our Master bed and bath the last couple of months, but my stenciled wall is one of my favorite changes! I would definitely recommend the stencils at Cutting Edge Stencil if you are looking for a quality product and an economical way to make an beautiful change.


Linked to:
 Visit thecsiproject.com

Monday, December 12, 2011

Holiday Accent Pillow from a Placemat...

This isn't the first time I've repurposed a placemat to make an accent pillow, but it's a technique that bears repeating. It's a quick, economical way to make a holiday pillow. Also, there's no skill set for putting together one of these beauties! Anyone can make one because there's no sewing machine required.


Here are the specifics:
Placemat found @ Target, $3.99
Poly-Fil Fiber @ Hobby Lobby or Walmart, $2
Needle & Thread (sewing machine optional)

Start by purchasing a placemat, some poly-fil fiber "stuffing", and putting aside 15 minutes -- or less. I purchased this holiday placemat at Target. Make sure your placemat is lined on the back. In other words there needs to be two pieces of fabric sewn together -- the front piece of the placemat and a back lining.

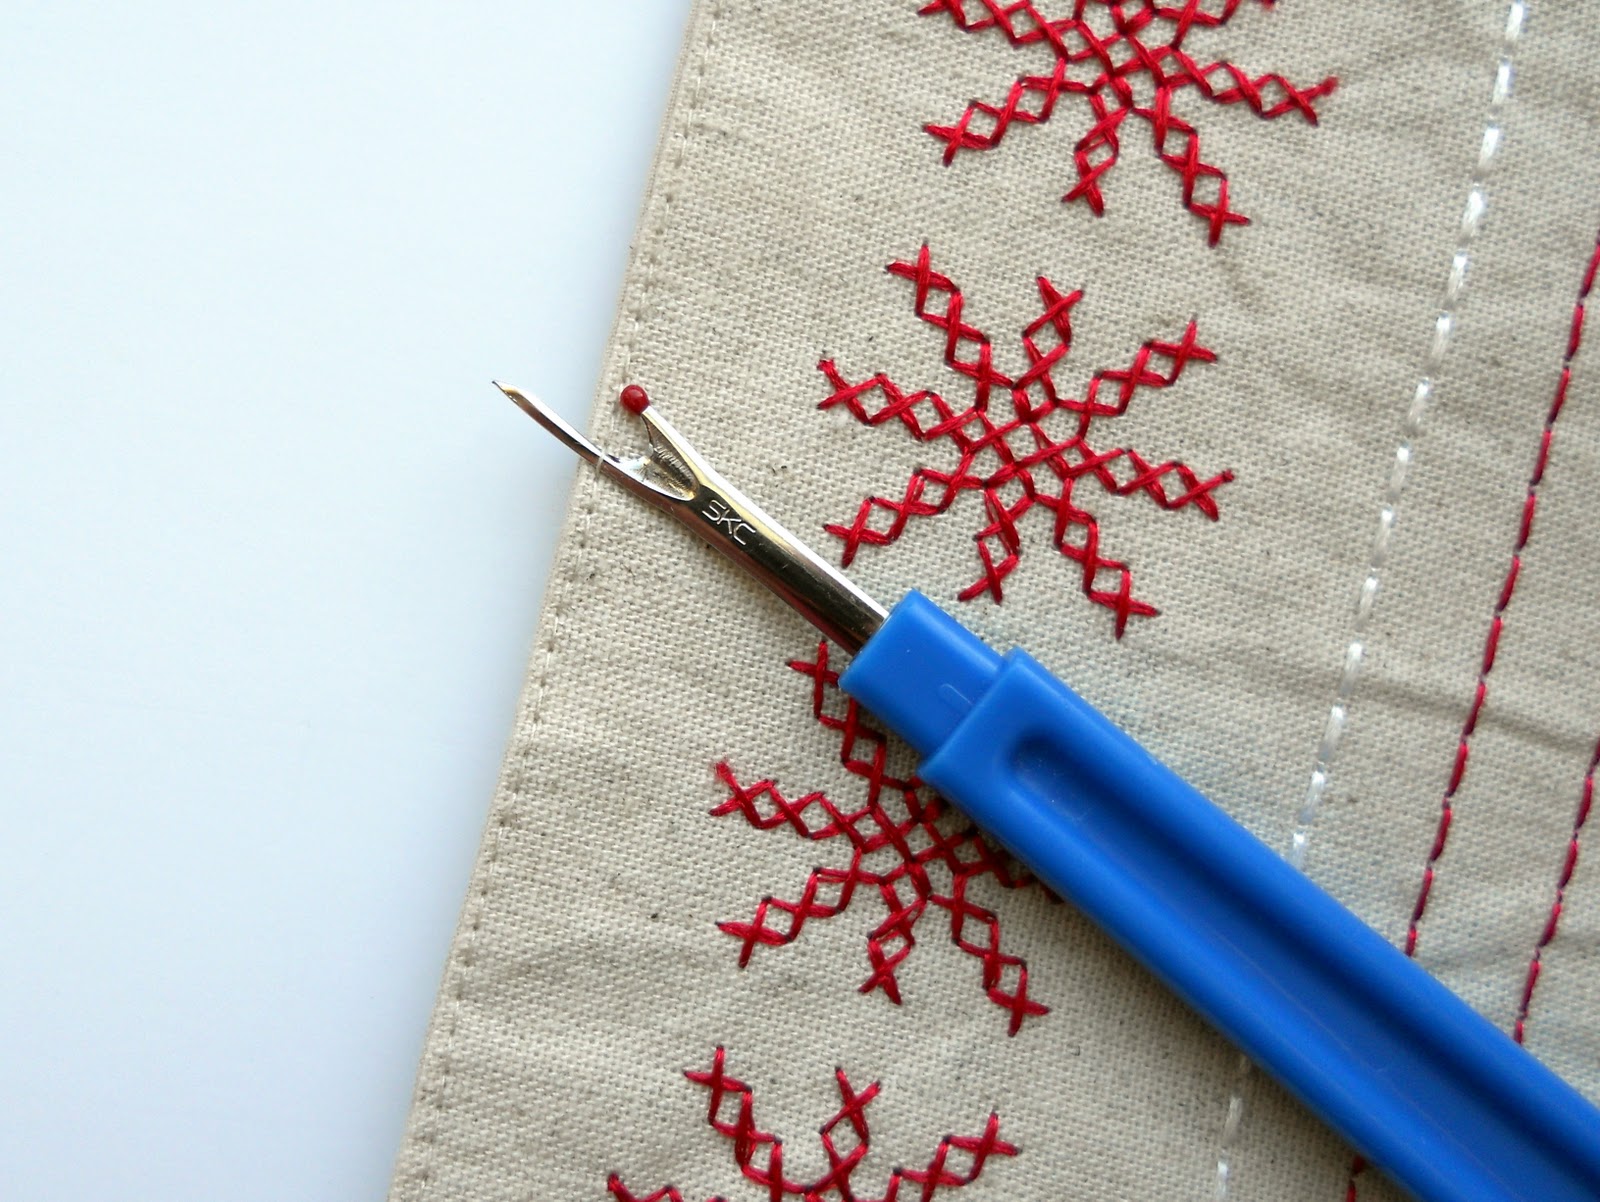
Use a seam ripper or sharp pair of scissors and open a hole in the bottom seam of the placemat that is large enough to fit your hand through.


Then stuff the inside of the placemat with the Poly-Fil until it's nice and full. I use one 12 oz. package of stuffing.


Sew the seam back together with your sewing machine or by hand using a blind stitch.
 

The whole process takes the better part of 10 minutes. Truly.


I've given placemat pillows to friends for Christmas and have several around my home as well. They are so economical and easy to make and they create a fun splash of holiday cheer in any room!

Linked to:
Show Off Your Stuff @ Fireflies & Jellybeans
DIY Under $5 @ A Little Tipsy
The Inspiration Board @ Homework
Show Me What You Got @ Not Just a Housewife 
Handmade Tuesday @ Ladybug Blessings
Made by You Monday @ Skip to my Lou


Thursday, December 08, 2011

Rub-a-Dub-Dub...


It's time for a scrub!

I've been wanting to make a homemade organic facial scrub for some time now. Yesterday I was inspired by a friend of mine who posted a few recipes (post #1; post #2). Store-bought scrubs, even those packaged as “all natural” or for sensitive skin, can be harsh and irritating. These home-made sugar scrubs are less course than most store-bought exfoliants, so they tend to be less abrasive on your skin. Whether you’re looking for a way to banish dull skin without spending hundreds on salon treatments, or just want an “all-natural facial scrub” that really is natural, these homemade skin exfoliants might be just what you need. I was excited to make some of these for gifts for friends for Christmas. This would also be a fun and easy project to make with children for their mother, grandmother, teachers, etc.!


I started by purchasing a few basic items, like these jars. They hold about 8 oz., which is a generous amount for a scrub. 


I bought them at Hobby Lobby {50% off this week} for $1 each. Do I hear a "way to go"? I also bought a little condiment spoon to go with each jar for about $1. You can purchase these spoons online or at most kitchen stores. {Look here or here.} I bought mine at Ace Hardware -- go figure.


Sunflower oil is another ingredient you'll need on hand. It's less fragrant and heavy than many other oils, which makes it perfect for scrubs. I also bought some essentials oils and made sure I had some vanilla and almond extract on hand. The essentials oils can be purchased at health food stores. They are $3 to $7 depending on the oil you purchase. You only use about 20 drops per batch, so they'll be around for a good long time!


I made three different recipes using a variety of flavors and oils. 
Here are the recipes I came up with...


::: Peppermint Sugar Scrub :::


Ingredients:
2 1/2 cups granulated sugar
1/2 cup salt
1 cup sunflower oil
 {If more sunflower oil is needed add a tiny bit at a time until satisfied with consistency.}
about 21 drops of peppermint essential oil
Mix ingredients together.
Done!


::: Brown Sugar & Almond Facial Scrub :::


Ingredients:
1 1/2 cup granulated sugar
2 cups brown sugar
1/2 cup salt
2 Tbsp. vanilla extract
2 tsp. almond extract
1 cup sunflower oil {add more if necessary}
Mix together.
Done!


::: Orange Peppermint Facial Scrub :::


Ingredients:
2 1/2 cups granulated sugar
1/2 cup salt
1 cup sunflower oil
about 21 drops orange essential oil
about 4 drops peppermint essential oil
Mix together.
Done!

This gift is obviously inexpensive which is easy on the budget, but -- more important -- I think it is a sweet, personal gift that others will enjoy!


Link Parties:
Handmade Tuesday @ Ladybug Blessings
Made by You Monday @ Skip to my Lou
Sister Sunday Link Party @ Sisters of the Wild West
Friday Fun Finds @ kojo designs
Friday Favs @ Naptime Crafters
Free for All Friday @ Sassy Sites
Frugalicious Friday @ Finding Fabulous
Hookin' Up with HOH

Visit thecsiproject.com

Wednesday, December 07, 2011

"Snowball" Votive Candle Holders...


I finished my Christmas decorating yesterday. It was a miracle, and I even had a little time to create...

Last month I was brainstorming how I could make some candle holders that resembled snowballs. I had a picture in my mind for a tablescape, but didn't know how to put it all together. At first I thought about using styrofoam balls with the bottom cut flat and an area cut out for a tea light, but styrofoam has a pesky habit of melting and catching fire so that idea was nixed. I finally settled on attempting a different approach...


It worked. 

This was such an easy project and I love how it turned out! You only need the following materials to make these snowball votive holders:
{a round glass votive holder, $1.99 @ Hobby Lobby}

{spray adhesive}

 {artificial snow flakes, $1.99 @ Hobby Lobby}

With those three materials these adorable snowballs can be built...


For those of you who say you don't have a crafty bone in your body, here is the the detailed tutorial: ;o)
  • Dump some snowflakes into a container.
  • Go outside {don't use spray adhesive inside -- take my word on this one} and spray the glass votive holder with the adhesive. 
  • Take the votive holder and roll it in the snow flakes. Pat the snow flakes down a little with your hand so they adhere to the glass.
  • Repeat if necessary.  
Some say fire and ice don't mix. 


I disagree.


Update 12/15/2011: I made more of these candle holders today and instead of using a spray adhesive, I painted Mod Podge onto the glass and then sprinkled on the "snow." It worked beautifully! After you've sprinkled on the snow, pat the snow down with your hand to help it adhere better! 

For those who missed my Plaque Attack post yesterday, go here!


Link Parties:
Handmade Tuesday @ Ladybug Blessing
Made by you Monday @ Skip to my Lou
Sister Sunday Link Party @ Sisters of the Wild West
Friday Fun Finds @ kojo designs
Friday Favs @ Naptime Crafters
Free for all Friday @ Sassy Sites
Frugalicious Friday @ Finding Fabulous
Hookin' Up w/House of Hepworths
Show Off Your Stuff @ Fireflies & Jellybeans
Show & Tell @ Blue Cricket Design
DIY Under $5 @ A Little Tipsy


Tuesday, December 06, 2011

December's Plaque Attack...


I'm interrupting my annual Christmas decorating to publish this post. If you knew the disastrous condition of my house right now you would question whether I should be sitting at my computer. In a few days my house will be tidy and neat, but during the time I am decorating it looks very, very scary with boxes, lights and tinsel strung everywhere. Regardless, here I am taking a few minutes to post my December 2011 Plaque Attacks. It's my {early} Christmas present to you!

As much as I like adorning our home with festive holiday decorations, some of the embellishments I love the most are those that remind me of the true meaning of Christmas. My December Plaque Attacks reflect those feelings. The first document is one of my favorite quotes by Neal A. Maxwell. It reminds me to look for opportunities of service no matter how busy I get during the holidays...


I didn't have time to make a plaque with the second document, but this scripture spoke to me Sunday as I was reading Luke...


Normally this scripture reads like this, "For unto you is born this day in the city of David a Saviour, which is Christ the Lord," but Sunday it became more personal. I realized the angel wasn't only speaking to the shepherds as he heralded the birth of the Savior, but to me as well. This plaque denotes the personal relationship we can each have with the Savior.


For those new to the "Plaque Attack Club," each month I feature a new printable document. Know that you'll need to check back every month to receive each new document. Collect the following materials to make a plaque of your own:
  • 6 1/2" square wooden plaque {available online or at craft stores}
  • 1 piece of scrapbook paper 
  • acrylic craft paint to compliment your paper
  • Mod Podge {I like matte finish.}
  • paint brush
  • Rust-oleum Matte Clear Sealer
For a tutorial on how to make these plaques, go here!

I am offering both December Plaque Attacks in a single document for anyone requesting it. Simply leave a comment below and consider becoming a follower of my blog. Then send me an email (my email address is on my sidebar under "Welcome -- Contact Information") with the words "December Plaque Attacks" in the subject line of the email. I will return both plaque images in a single Microsoft Word document.


Merry Christmas! 

Link Parties:
Friday's Fun Finds @ kojo designs
Free for All Friday @ Sassy Sites
Frugalicious Friday @ Finding Fabulous
Show Off Your Stuff Party @ Fireflies & Jellybeans
Show Me What Ya Got @ Not Just a Housewife

Visit thecsiproject.com

Monday, December 05, 2011

A Favorite Repurpose...


The remodeling of our bedroom and bathroom has brought many unexpected changes throughout our whole home. In the process of getting ready for the remodel we removed much of the furniture in our master bedroom so I could paint the room more easily and in anticipation the installation of new carpet. I didn't take a "before" of our bedroom and the furniture, but suffice it to say the furniture in our bedroom looked somewhat similar to the photo below in that it had two large "towers" on either side of the bed, a bridge light going over the top connecting the two towers, and a headboard. I think our unit had a more "classic" feel than the furniture in the photo below -- not quite so early 90's -- but I might be deluding myself with that observation.


When we removed the furniture from the bedroom my husband and I were surprised at how large the room felt without it. The wall unit took up so much space that it made the room look smaller than it actually is. We decided we liked the roomy feel much more, so we started looking around for new bedroom furniture that would fit the room better. This is what we decided on:


As much as I loved the new furniture, I had a problem with getting rid of the old. We knew we wouldn't be able to get more than a couple hundred dollars for it which bothered me because it is solid wood and beautifully crafted by a furniture company in our hometown. Regardless, we resolved to list the items on Craig's List and hope for the best.

A few days later I was agonizing over how to better organize an area of our computer room. When we had our home built square footage was our biggest concern. We had seven children and we needed lots of room, so we compromised on some of the furnishings. We surmised that later we could change flooring, tile, etc. as money became less scarce. As a result we had this less-expensive bookcase and "desk" built into a nook in the study when the home was built...


The "desk" served its purpose for a lot of years as a good place for kids to study or a place to plop my husband's laptop. The bookcase , however, was always a problem. Instead of becoming a shelf for books it also became home to CDs, electronic cords, printer cartridges, and junk {my opinion, not my husband's}. As much as I tried to organize it with baskets, it still looked unkept and messy. That day as I tried to think of how to organize this area better, I had {if I do say so myself} a brilliant idea. I did a little measuring, called my favorite handyman, explained my fabulous idea and a week later the old "desk" and bookcase were removed and in its place I had this fabulous built-in...


If this built-in looks a little familiar, it should.


We took the two towers that were on either side of our bed and with a little finagling created this built-in cabinetry for the den.

Here's the process:

In order to make the two towers look as one, we needed to pop off the top piece from each of the towers and use one solid piece of wood across the top. Below are the two towers sans the drawers.


We also needed to put the towers on a base because we have a return air duct on the wall behind where the unit would be placed, so we needed to put a return air grille in the bottom of the cabinetry so the air could flow across the bottom of the cabinets into the return air duct on the wall. Having this return air unobstructed would make the room warmer in the winter and cooler in the summer.

The  "bridge" {from the bedroom wall unit} made the perfect base for the cabinet. We also used a piece of wood from the bridge for the piece used to go across the top of the cabinets. {See "bridge" in the photo below.} The towers fit amazingly well in the space in the study, but we purchased a piece of oak and used it as a filler on either side so it would fill in the space perfectly.


Unfortunately, I could not find a return air grille in an oak finish in the size we needed. So I bought a white one -- spray painted it tan -- then used an orange glaze and a brown glaze to give it an oak finish. {You can see it laying on top of the bridge in the above photo.}


I could not be happier with the result. It's just what I imagined it would be. I love the fact that all those items that used to be in plain sight on the bookcase are now sitting on shelves behind closed doors or tucked away in a drawer. Plus there is sooo much more storage available in this unit. I'm also happy to have something left of the furniture I once appreciated!


I do believe this is one of my favorite repurposed items ever!

Link Parties:
Saturday Nite Special @ Funky Junk Interiors
Show Off Your Stuff @ Fireflies & Jellybeans
Show & Tell @ Blue Cricket Design
Trash to Treasure @ Sassy Sites

Thursday, December 01, 2011

Stencil Day...


It's stencil day at our home today. I'll publish another post detailing this process, but I'm using this gorgeous brocade stencil from Cutting Edge Stencils to make an abstract design on one of the walls in our bedroom today. I love the way the stencil floats on the wall in no particular order and the subtle feel of it all!


It's a bit of a tedious process, but well worth the effort. More to come when I've finished the wall! Have a great day!