Showing posts with label pillows. Show all posts
Tuesday, June 30, 2015
New Resource for Pillow Forms!
Recently I was given the opportunity to try a product from a new-to-me company called, Pillow Cubes. Pillow Cubes is a pillow form manufacturer that sells by the case. They fill their pillow forms with a variety of products, such as: real goose down or duck feathers, "synthetic" down, polyester, or a 100% recycled "green" fiber. To top it off, all their products are made in America. That's something I can truly appreciate!
Normally, as a home-sewer, I don't have the need to buy pillows in bulk. But occasionally I have had the opportunity to teach a class or make pillows for gifts that would require me to buy more than a few pillow forms at a time. For those of you who make and sell pillows, Pillow Cubes could be a great fit as your pillow form supplier.
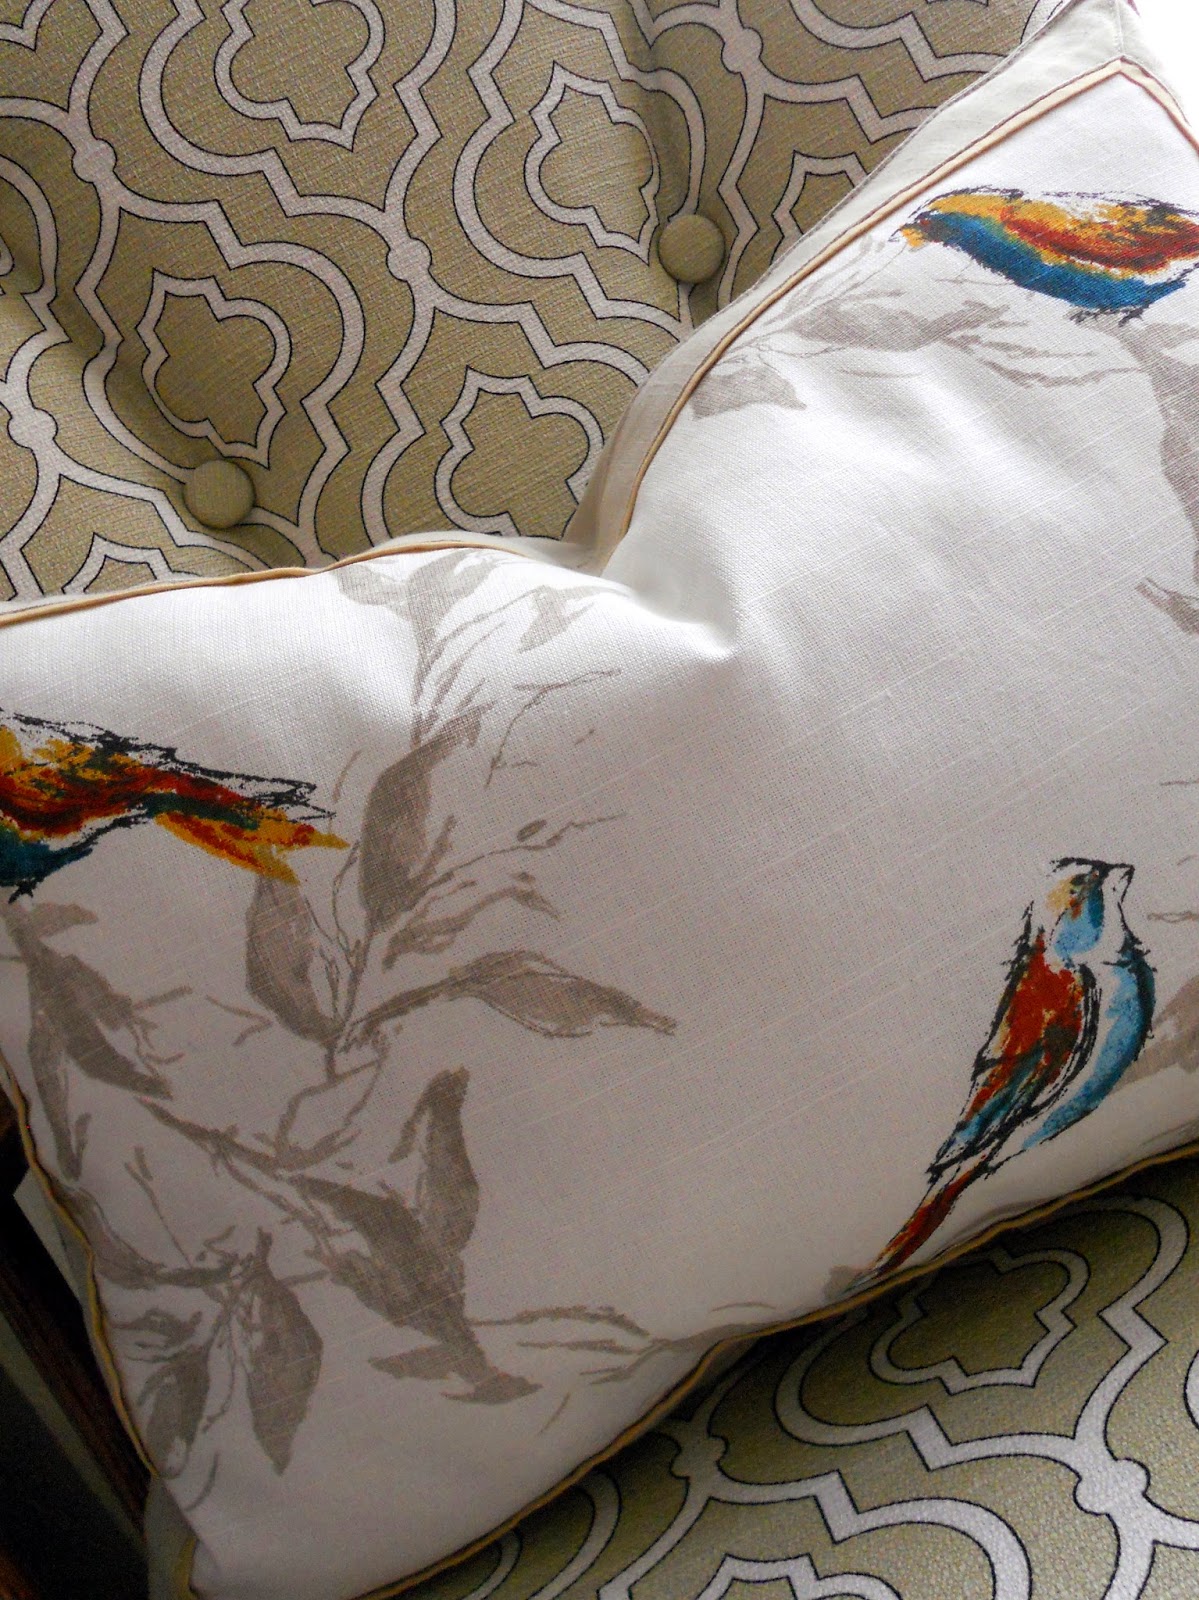
The pillow form I tried was a 12 x 16 down alternative pillow, sometimes referred to as "synthetic down." I was pleasantly surprised to realize how closely this synthetic version resembles a real down pillow -with all the benefits of a hypo-allergenic pillow! These pillow forms are reasonably priced as well. For example, a 12x12 feather down pillow form, in a case of 24, ends up being under $4 a pillow form. A 12x12 eco-filled polyester filled pillow form, in a case of 24, is just $2.80. Pretty amazing. The "cases" don't always consist of 24 items -- the number of pillows in a case is relative to the size of the pillow form.
August 2015 Update: Pillow Cubes is now selling pillows individually and not by the case! This enables the home sewer to use their products with ease and buy only what is needed!
I do feel like Pillow Cubes is a great resource, particularly for those who make and sell their own pillows. When you purchase their pillows forms, you get some well-made, high-quality pillow forms at a very reasonable cost!
When approached by Pillow Cubes to try their product, I told the representative that I would be happy to make a pillow {in the photo above!} using one of their pillow forms, and that I would gladly publish a post on my blog with a reference to Pillow Cubes site if I liked the product. I obviously did.
Monday, March 31, 2014
Placemat Pillow...
I've shared this idea about five times already on my blog, but here I go again! For the last few days I've searched for a new pillow that would add a touch of color to our recently reupholstered glider rocker. I couldn't find anything I had to have. I eventually found myself at Target looking in their pillow aisle. When I can't find a pillow that I like in the pillow aisle, I go to the linens. There I can often find a placemat that can easily be converted to a pillow, and this was no exception.
This placemat is from Target's Threshold line. It's the perfect placemat to convert to a pillow because it has a lining on the back. In other words, it is two pieces of fabric sewn together -- the front piece of the placemat and a back lining.
You'll need 15 minutes at the most to make this pillow. Use a seam ripper or sharp pair of scissors and open a hole in the bottom seam of the placemat that is large enough to fit your hand through -- about 5 inches. This particular placemat had topstitching and the seam, so I had to go through both of those stitches to create the opening.
Then, fill the placemat with Poly-Fil Fiber or another filling of choice. In my opinion, there's nothing like the feel of a down feather pillow!
Hint: Sometimes I will buy an inexpensive Aller-Ease Down Alternative Pillow at Target, cut it open, and use the filling for my sewing projects. It's messy, but it makes a beautiful down-like pillow.
When you have it filled to your liking, simply stitch the seam back together. You can do this with a sewing machine or by hand.
What you have left is this beautiful pillow...
Cost:
Placemat: $3.99
Filling: $2 - $5
Needle & Thread
Monday, January 20, 2014
Mr. Fox Pillow...
A few years ago we came home from church to find this handsome fellow in our backyard...
Although we live in the vicinity of open space, we don't live in the country, so he was a rather unexpected surprise. We found out shortly after I took this picture that foxes can jump 6' fences with a single bound. No kidding. I was amazed.
For a couple of years I've wanted to make something as an ode to Mr. Fox's visit. Last week I was inspired by the Glitter Fabric Rectangles I found at Hobby Lobby. This glitter fabric is located in the same "craft" aisle as the felt squares. When you cut it the edges don't unravel -- much like a fabric-backed faux leather -- and you can easily stitch through it to attach it to another fabric.
I came up with this ode to Mr. Fox...
Unfortunately, my fox has an uncanny resemblance to a racoon. My best laid plans sometimes don't pan out. I think I should have used smaller buttons for the eyes.
I used both the silver glitter rectangles and the gold glitter rectangles to glitz up my Mr. Fox Pillow.
I drew a simple pattern, then cut out the different pieces and appliqued them onto the blue and white canvas background...
Buttons were used for the eyes and nose.
With a wall like that anything goes. It's been fun to put some playful things in this room that appeal to young and old alike. My Mr. Fox Pillow will fall in line with some of the other decor I have in this room...
All the fabrics I used on the pillow are found at Hobby Lobby. The blue and white is a canvas fabric that is the perfect weight for pillows.
Thursday, October 11, 2012
Placemat Pillow...
I'm back from an amazing trip to the east coast. We visited the Washington D.C. area and had a wonderful time. In the next couple of days, I'll have to post a little about a couple of our amazing adventures while there.
Start by purchasing a placemat and some Poly-Fil Fiber "stuffing". Put aside 15 minutes of your time for this project. Make sure your placemat is lined on the back. In other words there needs to be two pieces of fabric sewn together -- the front piece of the placemat and a back lining to make a pillow. (See photo below.)
This time of year I love to peruse the placemats at Crate & Barrel. They have beautiful placemats, but instead of buying eight for my dining table I usually only buy one. The purpose: to make a placemat pillow. I've used this technique of re-purposing a placemat to make an accent pillow many times, but it's a technique that bears repeating. It's a quick, economical way to make a decorative pillow. Also, there's no skill set for putting together one of these beauties! Anyone can make one because there's no sewing machine required.
A couple of weeks ago I bought this beauty, the Tessa Placemat...
Here are the specifics:
Start by purchasing a placemat and some Poly-Fil Fiber "stuffing". Put aside 15 minutes of your time for this project. Make sure your placemat is lined on the back. In other words there needs to be two pieces of fabric sewn together -- the front piece of the placemat and a back lining to make a pillow. (See photo below.)
Use a seam ripper or sharp pair of scissors open a hole in the
bottom seam of the placemat that is large enough to fit your hand
through. Then stuff the inside of the placemat with the Poly-Fil until it's nice and full. I use one 12 oz. package of stuffing.
Sew the seam back together with your sewing machine or by hand using a blind stitch. The whole process takes the better part of 10 minutes!
I particularly love the autumn motif on this pillow and the way the branches bear blooms of all the autumn colors I love -- mustard, pumpkin, eggplant, cayenne, gray and chocolate! The aari embroidery -- with its continuous interlocking chain-stitch -- adds to the texture of this beautiful pillow.
Placemat @ Crate & Barrel, $8.95
Poly-Fil Fiber @ Hobby Lobby or Walmart, $2
Needle & Thread (sewing machine optional)
Total: $11
Total: $11
{Comparable pillows at Crate & Barrel sell between $35 - $50.}
Wednesday, January 11, 2012
Simple Ruffled Pillow...
I was shopping the other day and came across a simple ruffled pillow. I loved the uncomplicated look of this pillow with its two little rows of tiny ruffles. {Below is the photo I took with my cell phone.} It was $78 and 21" x 27" -- a whopper of a pillow in cost and size. The cost would have discouraged me enough, but it was also too large for what I had in mind, so I decided to make one instead.
Our bedroom redo is almost complete, but I still have a few finishing touches and a pillow accounted for one those. I wanted a 15" pillow to sit on a leather reading chair that would compliment the knitted throw that I had recently bought. This pillow with its little ruffles was exactly what I was looking for. Here's what I came up with...
This is what you'll need to duplicate this pillow:
front panels - 3 strips of fabric 6" x 16"
front ruffles - 2 strips of fabric 2" x 40"
back panel - enough to finish the pillow the way you choose
1/2" seams
1/2" seams
Because this pillow is so simple, I'm not going to give detailed instructions. Just fold and press the ruffles in half lengthwise, gather them up and tuck them between the seams of the front panels. Then finish the back of the pillow and you're done!
This time I experienced something new when making a pillow. I love the softness of a down pillow -- so luxurious. I wanted that for this new pillow, so I went to Target and bought a down pillow. It was $24, but I knew I could use the down as filling for at least three pillows, so I easily rationalized the expense. I slit the pillow to retrieve the down. Yikes...
It was messy.
Very messy.
I persevered, however, and filled up my pillow insert with a thousand and two little feathers. {And it only took me 30 minutes to vacuum up the feathers that escaped to every corner of my main floor.} Thankfully, it was worth the effort, because this pillow is soft and luxurious...
Cost...
Down-filled pillow insert: $9
Pillow cover: $2
Total: $11
Linked to:

Make-It-Yourself Monday @ An Original Belle
Sister Sunday Link Party @ Sisters of the Wild West
Show & Tell @ Be Different Act Normal
Sat Nite Special @ Funky Junk Interiors
Friday Favs @ Naptime Crafter
Made Monday @ Toastie Studio
Friday Flair @ Whipperberry
Free for All @ Sassy Sites
Hookin' Up with House of Hepworths
Strut Your Stuff @ Somewhat Simple
Sew Cute Tuesday @ Creative Itch
Transformation Thursday @ Shabby Chic Cottage
Show Off Your Stuff @ Fireflies & Jellybeans
DIY Under $15 @ A Little Tipsy
Party Time Tuesday @ Northern Cottage
Monday, December 12, 2011
Holiday Accent Pillow from a Placemat...
This isn't the first time I've repurposed a placemat to make an accent pillow, but it's a technique that bears repeating. It's a quick,
economical way to make a holiday pillow. Also, there's no skill set for putting together one of these beauties! Anyone can make one because there's
no sewing machine required.
Here are the specifics:
Start by purchasing a placemat, some poly-fil fiber "stuffing", and putting aside 15 minutes -- or less. I purchased this holiday placemat at Target. Make sure your placemat is lined on the back. In other words there needs to be two pieces of fabric sewn together -- the front piece of the placemat and a back lining.
Use a seam ripper or sharp pair of scissors and open a hole in the bottom seam of the placemat that is large enough to fit your hand through.
Then stuff the inside of the placemat with the Poly-Fil until it's nice and full. I use one 12 oz. package of stuffing.
Sew the seam back together with your sewing machine or by hand using a blind stitch.
The whole process takes the better part of 10 minutes. Truly.
I've given placemat pillows to friends for Christmas and have several around my home as well. They are so economical and easy to make and they create a fun splash of holiday cheer in any room!
Linked to:
Show Off Your Stuff @ Fireflies & Jellybeans
DIY Under $5 @ A Little Tipsy
The Inspiration Board @ Homework
Show Me What You Got @ Not Just a Housewife
Handmade Tuesday @ Ladybug Blessings
Made by You Monday @ Skip to my Lou
Here are the specifics:
Placemat found @ Target, $3.99
Poly-Fil Fiber @ Hobby Lobby or Walmart, $2
Needle & Thread (sewing machine optional)
Start by purchasing a placemat, some poly-fil fiber "stuffing", and putting aside 15 minutes -- or less. I purchased this holiday placemat at Target. Make sure your placemat is lined on the back. In other words there needs to be two pieces of fabric sewn together -- the front piece of the placemat and a back lining.
Use a seam ripper or sharp pair of scissors and open a hole in the bottom seam of the placemat that is large enough to fit your hand through.
Then stuff the inside of the placemat with the Poly-Fil until it's nice and full. I use one 12 oz. package of stuffing.
Sew the seam back together with your sewing machine or by hand using a blind stitch.
The whole process takes the better part of 10 minutes. Truly.
I've given placemat pillows to friends for Christmas and have several around my home as well. They are so economical and easy to make and they create a fun splash of holiday cheer in any room!
Linked to:
Show Off Your Stuff @ Fireflies & Jellybeans
DIY Under $5 @ A Little Tipsy
The Inspiration Board @ Homework
Show Me What You Got @ Not Just a Housewife
Handmade Tuesday @ Ladybug Blessings
Made by You Monday @ Skip to my Lou
Thursday, October 06, 2011
Printed Halloween Pillow
A couple of days ago I headed over to Graphics Fairy to have me a look-see. I love to check out holiday graphics when I visit, and yesterday I came upon a Halloween graphic that I loved. The image below is what pillows are made of -- at least at my house!
Last year I created a pumpkin pillow by printing a picture that I found at Graphics Fairy onto fabric, so I thought I would follow the same process to make another pillow with the image above.
All you need to begin the process of printing on fabric is a piece of paper (I've used regular copy paper or cardstock), some muslin fabric (cut slightly larger than the paper) and spray adhesive...
Start by ironing your fabric flat and laying it down on a hard, flat surface. Spray your paper with the adhesive, and carefully place it on the fabric -- adhesive side down. Press the paper onto the fabric, then trim your fabric edges to the exact size of the paper.
I downloaded the batty image from The Graphics Fairy onto my computer.
Then I inserted the saved image into a Word document. Below is an image from my computer screen. It shows the dimensions that I enlarged the image to so it would fit horizontally onto my 8.5 x 11 inch piece of paper.
To print onto your fabric put your paper/fabric into your printer -- fabric side down (for inkjet printers). Make sure you set the 'Print Quality' to "best." Then print the image onto your cardstock/fabric.When it emerges from the printer it will look like the photo below. Kinda cute, eh?
{Just a warning: There are some tutorials in blogland that tell you to tape your fabric onto paper to print. I tried that once. For me that method didn't work well at all. When you tape the fabric to the paper, the fabric tends to shift as it goes through the printer and the image prints unevenly onto the fabric.}
Let the ink on your fabric dry for several hours, then peel off the fabric from the paper.
{Yet another warning: This method of transferring a print directly onto a piece of fabric is NOT washable. The image runs when it comes in contact with water. I would recommend this process for seasonal items that you only display for a month or two out of the year, so the need for cleaning would be diminished. Because it isn't washable, make sure all the water is drained from your iron -- don't press your seams using steam.}
Trim your fabric so there is about 1/2" on all sides of the image. I used 1/4" seams for all the seams. To make a pillow using the image as a middle panel cut two pieces of fabric 2 1/2" wide and as long as the side are (see below). Sew the middle panel to these side panels using a 1/4" seam.
Press the seams toward the side panels and topstitch the seams to the side panels 1/8" from the seam..
To make the top and bottom panels cut two more panels that are 2 1/2" wide and as long as the top and bottom measurements of the pillow. Stitch with a 1/4" seam, trim edges if necessary, press seams toward the top and bottom panels.
Topstitch the seams to the top and bottom panel 1/8" from seam...
The end result is a pillow about 11" x 12". I finished it off with a little ric rac tucked into the seams between the front and back of the pillow...
I kind of like this little pillow.
This is about as "scary" as I get for Halloween.
Truth is I'm a fraidy-cat at heart.
{Shiverrrr}
Linked to:
Halloween Linky Party @ eighteen25
Friday Fun Finds @ kojodesigns
All Things Spooky @ All Things Thrifty
ffa Friday @ Sassy Sites
Friday Flair @ Whipperberry
Catch as Catch Can @ My Repurposed Life
Subscribe to:
Posts (Atom)