Showing posts with label paint. Show all posts

Monday, July 11, 2016

Children's Ice Cream Shop... the big reveal!


A few weeks ago on a blog post I mentioned that I had bought a used TV stand to repurpose into an ice cream shop for children. I finished it shortly after that post and it's time for the reveal. You might remember that I talked the cashier at the thrift store down to $5 for this "beauty." {I'm embarrassingly cheap when it come to repurposing items.}


Here are the steps it took to repupose this TV stand into a fun treat shop for the grandkids...

1. I disassembled it -- the top, kick plate, knobs, and cupboard doors all came off.


At this point, the back of the TV stand became the front of the ice cream shop, so when I refer to the "front" and "back" I am referring to the front and back of the new ice cream shop.

2. I applied a coat of Kilz Original Oil-Based Primer on all the pieces.  I also bought a piece of hard board and cut it to size for the front of the ice cream shop. {There was no "back" on the TV stand before.}

3. I used Behr "One to Remember" and Behr "Misty Isle" to paint the shop. These are beautiful colors reminiscent of peach and mint chocolate chip ice cream -- perfect for the little shop.


4. When the pieces were painted, I reassembled the stand -- turning the top around to the (now) front of the ice cream shop and placing the kick plate on the front of the shop. The hard board was also put on the front of the shop. New knobs were placed on the cupboard doors.


5. I bought two 1-1/4" x 48" round dowels at Home Depot. Two round holes were drilled in the top of the shop. I also cut two 2-1/2" cubes and drilled a hole through both of those. They were glued to the inside of the shop to help secure the bottom of the dowels. {See below.}


6. Strips of cotton were cut 1-1/2" x 16" to make the fabric banner. It was strung across the dowels.


7. A cute ice cream sign was purchased from Amazon to add to the front of the shop.


8. Two "Melissa & Doug Ice Cream Scoop Sets" were purchased. This magnetic play set makes it easy for little ones to scoop up the ice cream and place it on the cones!


The result was more than I'd hoped for... 


The ice cream shop was revealed at our family reunion. It was my hope the little ones would enjoy playing with something new. It did not disappoint...


It was especially fun when the adults got into it and ordered real ice cream from the kiddos. 


From a junkie old TV stand to a fresh new children's ice cream shop, this repurposed item was one of my favorites of all time!


My thanks to Mindi, at My Love 2 Create, for inspiring this project with her Frozen Treat Stand!

And one more thing... aren't my grandkids adorable!?!


Wednesday, October 14, 2015

Luscious Paint Colors...


Last week I was in Virginia visiting my son and his family. It was such a fun week, and I had a lot of time with my two and four year old grandkids during the days while their normally stay-at-home-momma took some classes. During the afternoon while the two year old napped my four year old granddaughter and I crafted. I think I've found someone who loves to craft as much as me. I'd done a bit of pumpkin painting lately, so I thought it might be fun to have her paint some pumpkins. We bought some mini pumpkins at Target and then searched for some acrylic craft paint. Instead, we found these delightful samples pots from Target's Devine Color Collection by Valspar. I'm impressed.

These are beautiful paints and they are customized to Target home decor. Be still my heart. Anyway, I might just have to paint a wall or two in the next couple of months, but this is what my granddaughter did with these luscious paints...


Adorable, eh? 
I'd love to say she takes after me,
but she has her mother's talent for color and style stamped all over her!


I really loved the lustre of this paint, and the colors are gorgeous. We used:

Meadow...
 Pond...
 and Petal...

These beautiful colors certainly put me in the mood to buy some paint brushes and get busy.
I'm picturing a striped wall with all three colors.
Yum.


Monday, October 12, 2015

Exterior House Renovation -- Final Update...


It has been a couple of weeks since our house renovations were complete, but "life" happened in between then and now. I've been on the west coast and the east coast in the last two weeks visiting and helping kids, but now I'm home and can update my blog to include the final exterior house renovations we completed in September. You might remember the last blog post about the renovations, where I showed you a before and mid-renovation photo...


Since this mid renovation photo was taken, we've added shutters to our home. In my first blog post about the exterior renovations I mentioned how we made these shutters. I've come to love them! They added so much to the exterior of our home...


We also added new lighting fixtures. For some reason it took me several days to decided on the exterior fixtures. I knew I wanted barn light style for over the garage door, and I found this one on Amazon...


Then I had to find a door fixture that complimented that style. That was the challenge. I finally found one on Overstock.com -- from Capital Lighting Dylan Collection.


One of the most notable things we were able to do for this renovation was to change out the garage door. We moved into our home 24 years ago, and over time garage doors get a lot of wear and tear. Ours was no exception. Putting in this new insulated garage door was a wonderful improvement. We decided on a carriage style with windows. We also chose to get the inserts for the windows {not in the above mid renovation photo}, which add a bit a character. For many homes {ours included} a garage door takes up a large part of the front of the home. We wanted to make it an interesting feature.


I am so happy with the results of this renovation, and I'm grateful the colors turned out how I'd hope they would. Again, here's the before...


And the after photos...


FYI: Paint Colors...
Door & Shutters: Benjamin Moore Hale Navy HC154
Trim: Benjamin Moore China White PM20
Siding: Benjamin Moore Custom Color {below} to match Sandstone Garage Door
    542 - 2x (gallon)
    Y3   1x   24.0000
     S1   1x   8.0000  
     R3   0x   7.0000


Wednesday, September 23, 2015

Realistic Stems for Pumpkins...


I should probably name this "Pumpkin Week on Just Another Hang Up" or some such thing. Yes, I have yet another pumpkin post for y'all! I posted a tutorial on Fabric Pumpkins on Monday, and Tuesday I showed how chalk paint can transform store-bought pumpkins. Today I'm going to show how dollar store {aka "cheap"} pumpkins can be transformed into more realistic looking pumpkins.


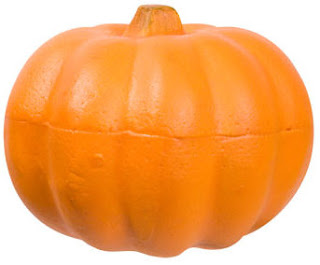
Have you ever noticed that the stem on a fabricated pumpkin is one of the most important things that make an imitation pumpkin look more real? Take the item above as an example. It couldn't look more fake with that orange stubby stem. Well, truth be told, there's a lot wrong with the pumpkin above, but the good new is -- {wait for it} -- it can all be changed with a little paint, sisal rope, cinnamon, glue, and a positive attitude.

The other day I was perusing Pinterest, when I came upon a pin that directed me to this website with a post about how to make realistic looking stems on a fake pumpkin. It made my day!

The next day I followed the blog post at Anderson & Grant and made a sisal rope stem for the pumpkin below. I learned a few things. I felt like this first stem was way too thick for the size of the pumpkin...


So, for the next couple I did something a little different. First I separated the strands of the sisal rope a little more thoroughly, so they were just strands of rope. Then I cut some shorter lengths and hot glued them around the base of the stem.


After that I cut some longer threads of sisal and hot glued them to the shorter strands. I didn't use nearly the same amount of longer threads as the shorter threads. As a result, I had a stem that wasn't as thick as the first, but covered the original stem well. {The gourd below is the same one as above, after the transformation of stem and paint...}


Then I used Mod Podge and cinnamon, like the other blog post recommended, but I didn't put on a second coat of Mod Podge {not necessary}. What I got was gourds that looked like they'd been torn from the field...


Well, not exactly like they'd been harvested from the field because I've never seen a blue pumpkin growing in a field {wouldn't that be cool?}, but you get my drift. Now we have a gorgeous display of more realistic-ish looking pumpkins and gourds.


Honestly, I think we've improved on Mother Nature.


Just sayin'.

Thursday, September 17, 2015

Update: House Renovations


I don't know how they did it, but the painters we hired had the house painted in three days. I am sooo very happy with the results! They worked so hard. We also had the new garage door installed, which did so much to update our home. The first two photos are during the painting process...


We're not completely done with the renovations. We still have to install the board and batten exterior shutters on the second story.


We also have some dark bronze lighting fixtures to install by the front door and over the garage. I'll post when we are completely done, but so much happened this week that I'll give you a preview of where we stand right now...


I absolutely love the colors of the paint. Whew. Such a relief. The blue (Benjamin Moore Hale Navy) front door is just the punch of color I wanted...


I'll be back in about a week to show you the completely finished renovation.