I hope you all had a fabulous Thanksgiving holiday! I'm flying home later today from California. I can't wait to get home and put up a few Christmas decorations and sit down at my sewing machine and whip up a few projects for presents. Speaking of presents...
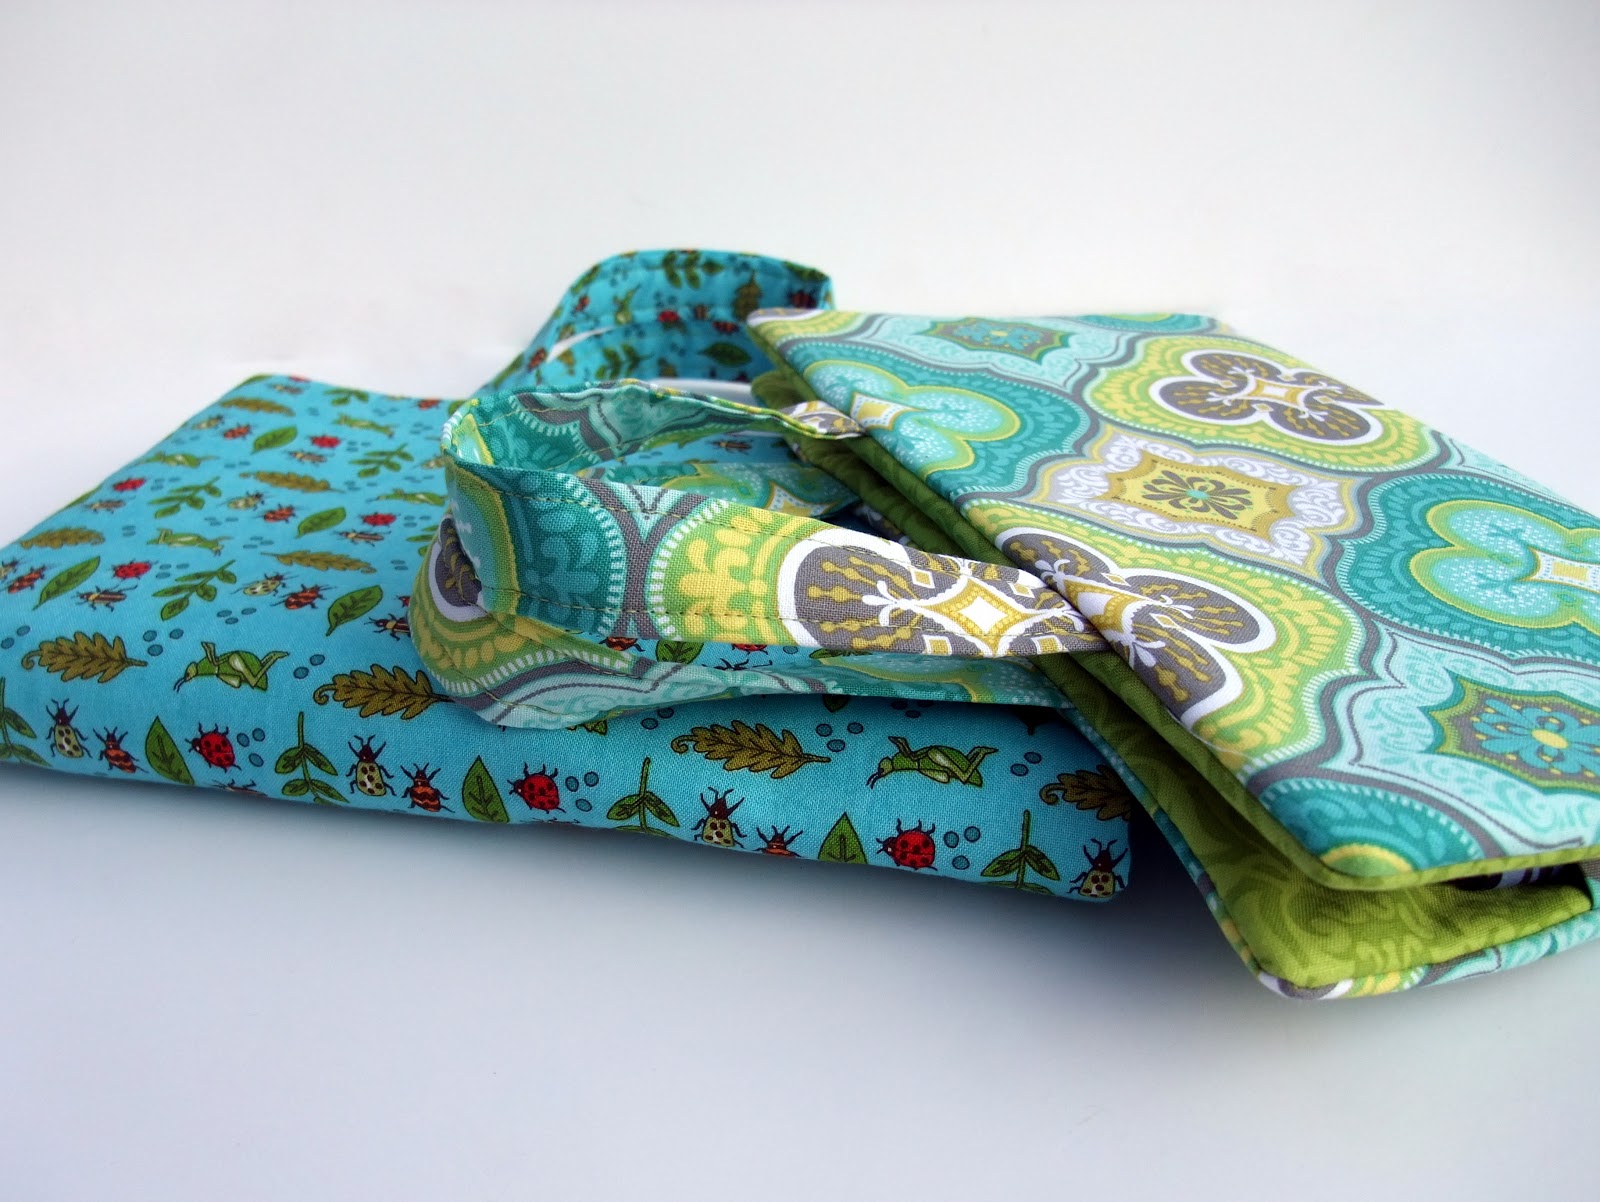
Remember these?
A week or so ago I made these adorable
Crayon Caddies and mentioned a tutorial would be forthcoming. I decided to post the tutorial this week hoping the hoop-la of Thanksgiving weekend would be over, and you might have a little more time to work on a sewing project. This project is perfect for a Christmas present for the little boys and girls in your life! It is a project designed for the beginner sewer, so don't be shy! I took a gazillion pictures for clarification and I hope the instructions are easily understood! Here we go...
Materials needed:
Outside cover: 1 - 11"x15" cotton fabric
Lining
(contrasting fabric): 1 - 11"x15" cotton fabric
Handles: 2 - 3.5"x11" cotton fabric
Crayon Pocket (double thickness): 2 - 4"x11" cotton fabric
Paper Pocket (single thickness): 1 - 5.5"x11" cotton fabric
Stamp Pocket
(contrasting fabric): 1 - 4.5"x11" cotton fabric {Note: In the process of writing this tutorial I used the word "Stamp Pocket" and "Sticker Pocket" interchangeably -- sorry! They are one and the same.}
Fusible Interfacing: 2 - 11"x15" (for outside cover and lining); 2 - 3/4"x11" for handles
Velcro: 3" strip
Thread
Note: Use 1/2" seams unless otherwise indicated.
Now for the fun stuff... Please note there is a corresponding photo to each Step for clarification. Click on the photos to enlarge them and see them more clearly!
Lil' Kid Crayon Caddy
To begin: Cut out all your pieces...
Making the handles:
Step 1: Take both "handle" pieces and iron them in half lengthwise. Then take the raw edges of the handle and turn them into the middle fold just ironed.
Step 2: Insert a 3/4"x11" fusible fleece piece into the fold of each handle and press -- adhering the fusible fleece to the fabric.
Step 3: Sew along the folded line and the pressed edge of the handles about 1/4" from the edge.
Step 4: Press the handles flat.
Making the "Paper" and the "Sticker" pockets:
Step 5: Fold over and press the top edge of the "Paper" and "Sticker" pockets l/4" from the top across the length of the fabric.
Step 6: Fold over again 1/4" and press.
Step 7: Finish the top edge of these pockets by sewing across fold approximately 1/4" from the edge.
Making the "Crayon" pocket:
Step 8: The pocket for the crayons is double thickness. Take both pieces of fabric and pin right sides together.
Step 9: Sew down both lengths of the pocket 1/2" from the edge.
Step 10: Trim seams as shown in photo.
Step 11: Turn the pocket right sides out and press.
Attaching the Velcro:
Step 12: Take one of the 3" strips of Velcro and pin it 1 1/8" from the top of the lining, centering it in the middle of the carrier. Sew. Take the corresponding strip of Velcro and sew it to the bottom of the "Sticker" pocket 1 1/8" from the bottom of the pocket, centering it in the middle of the pocket.
Attaching the Fusible Fleece:
13: Attach the 11"x17" pieces of fusible fleece to the outside cover and the lining with the heat of an iron.
Attaching the pockets:
Step 14: Pin the top of the "Crayon" pocket 3.5" from the top of the carrier lining.
Step 15: Pin the "Paper" and the "Sticker" pockets to the bottom of the lining, making sure to align the bottoms of the pockets with the bottom of the lining. (The "Sticker" pocket goes on top of the "Paper" pocket.)
Step 16: Baste side edges of pockets to the lining about 1/4" from the edge.
Making the individual crayon pockets:
17. Take a ruler and measure over 5.5 inches from the outside edge of the crayon pocket. This should be the exact center of the pocket. Put a pin at the top of the pocket and at the bottom of the pocket.
18. (Enlarged photo of same area.)
19. Take a piece of masking tape and lay it along the side of the pins, making a straight line.
20. Take the pins out and sew along the edge of the masking tape. This will enable you to create a straight line when sewing!
Step 21: Continue this procedure -- measuring, pinning and taping -- to make 1" individual crayon pockets across the length of the pocket. The two individual crayon pockets on each edge of the carrier will be 1.5" wide -- instead of 1" wide. When you sew the lining to the carrier cover with a 1/2" seam it will shrink those crayon pockets on both sides to 1" each.
Step 22: Sew across the bottom edge of the crayon pocket 1/4" from the bottom edge.
Attaching the handles:
Step 23: It's difficult to see here because of the busyness of the fabrics, but attach the handle ends -- right sides together -- to the top and bottom of the outside cover 3" from the outside edge. Baste the handles to the carrier cover 1/4" from edge.
Hang in there! We're almost done....
Attaching the outside cover to the lining:
Step 24: To round the corners of the outside cover and lining, take a round bottle, line up with the edges of a corner with the edges of the bottle and trace around the bottle. Trim the rounded corner on the line.
Step 25: Pin the outside cover and the lining -- right sides together -- leaving a 3" opening on the side.
Step 26: Sew a 1/2" seam around the outside edges, being careful to leave the 3" opening. Trim seam as shown below.
Finished product:
Step 27: Turn your caddy right side out through the 3" opening. Press seams and sew the opening shut by hand with a slip stitch.
Finished! It probably took you about as long to read this as it will for you to make it!
Seriously.
Have fun creating!


