Showing posts with label wedding plans. Show all posts

Thursday, August 13, 2015

French Wedding Brunch


It's been an especially busy couple of weeks as our family celebrated the marriage of our son and his beautiful bride. The last few months I've given you glimpses of plans and items we made and bought for the big occasion. Last weekend was the wondrous event, but I'm going to hold off telling you some of the details of the reception until we get back the professional photos. For now I'll just tell you that those invited to the reception traveled through San Francisco on classic cable car buses, stopping at iconic venues to sample San Francisco at its best. We were treated to tasty appetizers, clam chowder in sourdough bread bowls, and scrumptious gelato.  Below is one of our grandchildren celebrating by dancing with the bride on the Hyde Street Pier. Their joy was felt by all!

These beautiful photos are courtesy of my talented daughter, Jillian.


Early on in the planning my husband and I were asked by Justin & Meghann (our son and his fiance') if we would host a brunch after the wedding. Traditionally, a reception is held after the wedding, but in this case the reception was the day before in San Francisco and the wedding the next morning in the LDS Temple in Oakland. The wedding brunch would be the last activity in a weekend filled with events, so we wanted it to be beautiful and relaxing. The brunch was held at my sister and brother-in-law's grand home, built in 1905, just 10 minutes from the temple. The home is beautiful and has an imposing view of San Francisco and the bay, so it is the perfect backdrop for this kind of occasion.

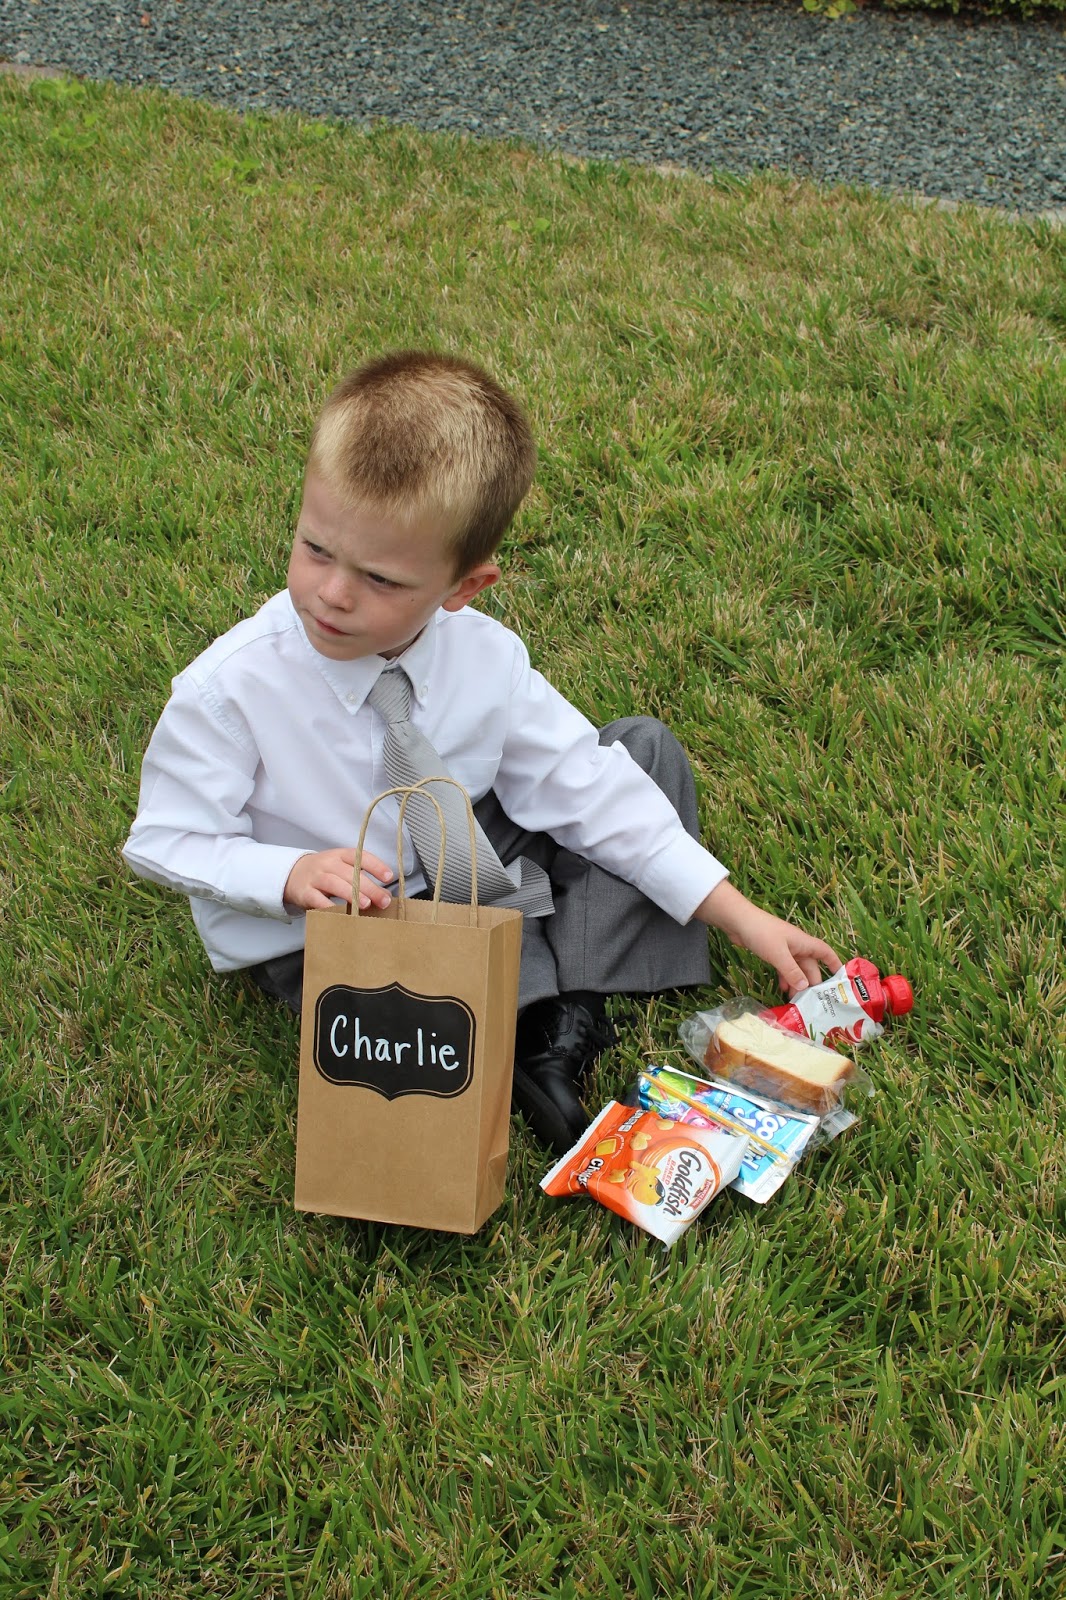
We didn't really want the luncheon to begin before the bride and groom arrived, so I decided to make a little "tide-me-over-lunch" for the smaller kids because we knew they would be ferociously hungry the minute they approached the house. I bought these cute sacks at Michael's and filled them with a drink, applesauce, chips, fruit snacks and half a PB&J sandwich. This held them off till all the adults had gone through the buffet line. {This was a brilliant idea, if I do say so myself.}


When Meghann told me that she loved all things French, the "theme" for the brunch was born.


I called La Boulange {a restaurant & caterer in the Bay Area}, and
we designed a menu consistent with what one might order for brunch in France.
 For example, chocolate croissants...


fruit cream and lemon curd filled tartlettes...


"smoked salmon & cucumber," "apple, brie, & jam," "prosciutto & fig jam," 
and "chicken & provolone" brioche tea sandwiches...


an assortment of petite quiches --
"vegetable," "bacon & pea," and "ham & cheese"...


chocolate ganache tartlette...


mini-pastries, and an assortment of fruits, nuts & cheeses...


a "pear, walnut, & blue cheese salad" and a "hearty chef salad"...


 and macarons.


One must never forget the macarons at a French-themed brunch...


The bride's sister made this traditional French wedding cake, called a croqembouche,


and I ordered three different styled cakes to be shared among the guests.


One was chocolate cake with chocolate filling, 
another was lemon cake with raspberry filling, 
and the last was vanilla cake with salted caramel filling.
Simply beautiful and beautifully simple.


 I would highly recommend Andrea at "Cake" in Lafayette, California.
Her cakes were beautiful and absolutely delicious!
Go here to learn about the cake toppers that were bought and made for these cakes.


I love the feeling of satisfaction after a party that's gone well,
when you realize all your hard work and effort made a difference.

Happy.


Monday, July 27, 2015

Wedding Cake Toppers...


I'm not a deep thinker, however, when it comes to details surrounding a wedding I might tend to over think. I've mentioned that our son is getting married in the near future and that my husband and I are hosting a wedding brunch to be held after the wedding ceremony. The brunch has a "French Country" theme. The reception the day before will be the main event, so we hope this brunch will have a more relaxed atmosphere. Still, I love to plan the details of events like this, so I hope it's very special. Instead of a typical wedding cake we are serving a number of different french desserts {fresh fruit and creme filled tarts, macarons, and croquembouche} and several simply decorated white cakes. That way the bride and groom will have the opportunity to take part in the tradition of "cutting a cake" after the wedding ceremony. As a result I've been scouring the internet and stores for three cute cake toppers to place on top of these three simply decorated eight-inch cakes.When I saw this adorable ring bowl an idea was born.


Instead of having cake toppers that have no use after the ceremony, I wanted each cake topper to be kept and used throughout their married life. That was no small task. It took a lot of imagination to come up with the three toppers, but here they are. The first topper I bought was this ring holder. The mint green color goes perfectly with their wedding decor, and I hope the bride uses it whenever she needs to remove her rings. I found this at a flea market in our town.


The second topper is this beautiful little crown that I bought in "Parts for your Art" Etsy store.


I fell in love with several wedding cakes with a crown topper on Pinterest. I bought this crown in a blue color and changed the color slightly to light sage green, then glazed it to make it appear to be a vintage French item. Have you ever seen newborn baby photos with a crown on the head of the baby? Well, in the future this item can be used in that way when their babies are born and, then again, if they wish, as a 1st birthday cake topper.


I really struggled over the third item, but when I came upon a miniature glass cloche the light went off. I bought the cloche and then went looking for the other items. The base of the cloche was found at Hobby Lobby -- just a 3.5" round plywood disk. I'll put a pretty doily die cut on top of the disk and just under the cloche. 


Then I'll thread some ribbon around the tops of the two keys and tie it in a bow. Those keys go under the cloche. The keys symbolize the keys of the bride's and groom's hearts. The keys can later be used as their first Christmas tree ornament.

Each cake will be put on one of these beautiful cake stands that I bought from Save-On-Crafts. I think they are so pretty and they have that Frenchy feel that I'm trying to incorporate into the brunch!


Sometimes I think I'm a little "out there" when I put so much effort into something that could be so simple, but I hope it's the touches like these that make the brunch special and beautiful.
 

Monday, July 20, 2015

Silverware Envelopes and other wedding details...


One of the responsibilities {and pleasures} my husband and I have for my son and daughter-in-law's wedding will be to host a wedding brunch for family and friends just after the ceremony in the Oakland California Temple. This will be a more casual and relaxed setting than the reception the day before in San Francisco. We're fortunate that my sister and her husband live just ten minutes away from the temple, so their beautiful home will be the setting for the brunch. The theme is a French country brunch buffet with lots of pastries, tea sandwiches, quiche, salads, fruits, tarts and macarons. As if that isn't enough we'll have some wedding cake and a croquembouche or French Wedding Cake. The bride's sister is making the croquembouche. Here's a photo of the dry run they did to see if they could pull it off...


A croquembrouche consists of cream puffs and other confectionery items arranged in or on a cone and held together by caramel sauce. They bought a styrofoam cone, wrapped it in parchment paper and added the cream puffs with the tacky caramel. It's pretty amazing, isn't it?

There will be about 100 people at this event, so I'm busy planning all the details so it will run smoothly and look effortless. While scouring Pinterest I came upon this lovely idea at Save-On-Crafts.


They are called Silverware Envelopes. I love a quick exit from a buffet {especially when there are a lot of people waiting in line}, so this is the perfect solution to house all of one's utensils and a napkin in a to-go pouch. It's a great idea not just for this occasion, but for any type of casual entertaining.

I knew I could either spend over $80 to order 100 of these cute envelopes, or I could try to make them myself for a quarter of that price. You guessed it. I made them...


I bought four packages of #9 Kraft Policy Envelopes {25 per package} at Hobby Lobby for $2.49 each on sale at 50% off. That's 100 envelopes for $9.60. The outside dimensions for this envelope are about 9"x4". I lopped off the top flap with a paper cutter.


Then I went online and found this silverware stamp at Stamper's Anonymous for $13. I actually like this stamp better than the stamp they used on the store bought items because it's a little larger and a better size for the envelopes.

I love the vintage image of this knife, fork, and spoon.


Instead of spending over $80 on these envelopes, I spent about $23, and I have a stamp that I can reuse in the future for other parties. Time to check that detail off the list!


Monday, June 29, 2015

Picnic Blanket Tutorial


Several weeks ago I published a post telling you about some French Inspired Picnic Blankets my soon-to-be daughter-in-law and I were cooking up. Go here to read more about this project.


These pieced blankets are going to be used by and given to guests at their wedding reception in August in California.


At that time I mentioned that I would make a simple tutorial to explain how to make these simple blankets. Well, the pattern and instructions are now available.


If you're interested in downloading my "Picnic Blanket Tutorial", click here.

(Update: Please note on page 4 of the document, third paragraph it should read: 
"You now have a completed quilt top that is approximately 60" wide by 72" long.")

Enjoy making the blankets for family, friends, neighbors or for sale.


Today I will finally complete the last of the wedding blankets we're making!
Forty-three blankets in all.
Done!

Thursday, June 11, 2015

Another "French" Tray...


I'm off on another trip this week, but last week I spent some time sewing and crafting. I had another idea for a light and inexpensive tray for the brunch we're hosting for our son and his bride in August in California. We'll have lots of pastries, tarts, macaroons and other French delicacies that morning, so we need a number of trays (that are easy to transport and lightweight) for the event. As I was walking through Hobby Lobby a few days before, I noticed some trays with little legs on them. I decided to make one of my own with some drawer or cabinet knobs that were on sale. I simply took that screw out of the pulls by unscrewing it from the wood. Ta da...


I picked up four of the knobs for 50% off and bought the large wooden tray below -- also on sale.


The bride chose these gorgeous colors for the wedding...


I love these beautifully muted shades, and they play so well together. I asked the bride to chose the colors for this tray (since I had done such a poor job the last time).


At her suggestions, I painted the feet a silver sage then sanded them down in spots for the turquoise to show through just a touch. Then glazed them for an antique look.


Meghann (the bride) suggested I paint the tray a light gray. I first put a coat of silver on the tray, then painted it the light gray. Then I sanded it down in some spots to show a little of the silver underneath and again antiqued or glazed it to age it a bit. Some French-themed canvas from Hobby Lobby was chosen to line the tray...


After putting two coats of Mod Podge over the canvas I tacked (with hot glue) some Natural Linen Braid around the inside edge of the tray to cover up the edge of the fabric.

I've also bought some other cute trays and vases that sport a French flair that we will use. I purchased this one for under $7 and we'll load it up with beautiful ripe, plump grapes...


These vases are the perfect color gray and green. I bought them for $9 at a Flea Market -- score! Seriously, I love it when I can find just what I want at a Flea Market. Can you picture them with mounds of flowers spilling over the tops of the vases?


And another larger tray for pastries or tea sandwiches -- also $7.


FYI - I'm not a total cheap-skate and it's not all about the cost for me, but I have to admit it does make me happy when I can find or make special items -- at a good price -- that will add to the ambiance of a special day!

Monday, June 08, 2015

Wedding "Picnic" Blanket x 40


The last several weeks I've referred to a project my soon-to-be daughter-in-law, Meghann, and I have been working on for their wedding. A little background info... A couple of months ago Meghann and Justin called to "run something by me." Not being experienced sewers they weren't sure how difficult it would be to make 40 quilts for picnic blankets to give to their guests as gifts during the wedding reception.The guests would use these picnic blankets for part of the reception and the next day during the wedding brunch. They had a budget of $20 per quilt. I didn't want to disappoint, but usually a baby receiving blanket costs me over $20 to make. I didn't see how we could make a quilt big enough for a picnic blanket on that budget. Not to mention... I shuddered at the time I thought it would take to make them.


I told the bride and groom that I would do my best to try to find something already made. I was certain this would be an item that would be less expensive bought, rather than handmade. I found a few fleece blankets that could have worked. This one in particular is an amazing price, but the bride wasn't going for that look. You'll remember that she loves everything "French", and she was hoping for some blankets in the muted shades of her wedding.


She also wanted it to be something that would be used over and over again as a picnic blanket or throw. And, honestly, if you're going to spend $20 on each item, you want it to be something that the guest will enjoy more than once!


That's when I came up with a pattern for a blanket that would consist mostly of muslin with two coordinating fabrics to add contrast and color. The blanket is approximately 72" x 60", which is a generous size for a picnic blanket. Three-quarters of the front of the blanket is made from a beautiful linen-type muslin, 1/4 is from a cotton duck or canvas fabric with a coordinating flap of canvas fabric, lace, or ribbon in between the two.


Meghann didn't have much experience sewing before we started this project, but she caught on quickly and is a champ now! We even solicited the groom's help to cut fabric...


When Justin and Meghann brought up the idea of making picnic quilts for everyone, I pictured us quilting one inch squares together from now till 10 minutes before the ceremony. It scared me. A lot. This idea of using strips of fabric is doable, but it is still a huge labor of love. I love them for wanting to do this for their wedding guests. I'll have to tell you more about the wedding weekend later. Every detail of their wedding was envisioned to create a wonderful experience for all those attending.


Although all the blankets have a subtle French flair, some have more of a feminine feel and some are more masculine. Believe it or not we have stuck to that $20 budget for each of these blankets. Most of the fabric for the tops of the blankets was bought on sale, and I bought the muslin we used for the backing for a very good price on Amazon. {There is no quilt batting between the front and back fabrics.} The blankets were made for about $15 - $18 each. I think that's amazing consider how much fabric is used to make one of these picnic blankets.


The last little detail for these blankets are these iron-on tags. One of my daughters designed the pattern, and we had them made through this Etsy shop. Meghann puts them on the corner of each quilt. I love this sweet detail...


The good news is that all the quilt tops are completed and 1/4 of the quilts are totally finished. It's a good feeling to know that we'll be done with these picnic blankets in plenty of time for the wedding...


If you are interested in a more detailed pattern for this blanket and some tips in getting the fabrics for great prices, please leave a comment below. I'll publish this information, if there is enough interest.