Showing posts with label grandbaby. Show all posts

Friday, February 03, 2017

Another Baby Quilt...


Last week I published a post about a quilted baby blanket I made for a granddaughter due in March. Today I'll be showing you its "cousin" for our granddaughter due in February. {For any of you that are curious -- these are #19 and #20. Hard to believe, eh?  We're very grateful for all our grandchildren!} I used the same pattern and inspiration fabric for both quilts, but differed the accent fabrics. Here's the one I just finished for the baby due this month...


The colors for this quilt are a little brighter than the first quilt. This one has coral colors, where the other featured light pinks. Both are beautiful, just slightly different.


My favorite fabric in this quilt is this coral fabric from Cinderberry Stitches {Lecien Deer Lines}. I bought this fabric, and other fabric from this line, a few years ago and have used them on various projects. I adore it...


The other fabrics in the quilt are mostly from a fabric line at Hobby Lobby.

I chose a floral longarm quilt pattern this time. If you look carefully you can see the flowers and leaves in the quilting...


For the back I used the inspiration fabric {floral} and another complimentary fabric...


I'll be heading to California in a couple of weeks to help my daughter and her family when the baby arrives. This, and a few other things, will be tucked into my suitcase for the little one.


I have to admit I'm loving making these "piece in a day" quilts! 


Monday, January 30, 2017

Snappy Bag & Mommy Cards...


It seems as if many of my ideas lately are gifts for a new mother. This is one that you won't see every day. The transition from career/working woman to stay-at-home momma can be significant. As much as we look forward to children coming into our lives, the shift from a working lifestyle where you are in constant association with others, to a lifestyle with a baby and husband being your "whole world" leaves many young mothers yearning for a little outside fellowship with others in a similar situation. Fortunately, staying at home is less structured than working, so you are in a position to meet others and become friends. That's where a "Mommy Card" comes in. You use it much the same as a business card.

One can hand it out to other young mothers you might happen to meet at the library, park, church or wherever! The card tells them your name and some contact information of your choice.


I ordered these cards for my daughter-in-law who after a number of years is becoming a stay-at-home mother to their first baby. They came from Vista Print and cost about $20 {embossing was extra} for 100 cards. If you think that's too many, you don't know my outgoing and friendly daughter-in-law. They are moving in the next couple of weeks, so she's sure to use them as she meets other young mothers living near her new home. 


I don't know if you remember my "Snappy Bag." Go here for the tutorial. They are just the right size to carry a young mother's new Mommy Cards. 


I think this is a fun little gift for the new mother to help her transition to her new role when she becomes a stay-at home momma!


Friday, January 27, 2017

Half Square Triangle Quilt the easy way....


Yesterday I published a post telling you about the baby quilt that I finished recently. It was a half square triangle quilt in a star pattern. I mentioned that this pattern was both simple and quick!


One of the reasons it was so quick is that I watched an amazing video at "Simple Simon and Company"  that demonstrated a short-cut when making half square triangle blocks. This little trick can save you a lot of time and effort. I'll let the video speak for itself. Go here to watch the video!

Another blog, "The Sewing Loft," has even more ideas on how to create blocks {quickly} for half square triangle quilts. 

Also, Pinterest has a myriad of ideas for how to put
together half square quilts for different
designs!


Thursday, January 26, 2017

Baby Quilt...


A week or two ago I dropped this quilt off at a longarm quilter. In the course of our conversation I told her that in the past I really didn't like to quilt that much. I love sewing projects that I can finish in a day. That has left intricate, complex quilt patterns out of the picture for me. In response she said, "So you're a seamstress, not a quilter." My reply, "Mmmmm, not really. I'm more of a sewer." That's how I've always thought of myself. I love quick and easy projects that can be finished in one afternoon and given away the next day!

A month ago I came across this star quilt pattern. I loved the simple pattern, so I decided to try my hand at a couple of baby quilts. I sized it for a baby and gave it a go.


I think this simple quilt has turned me into a quilter. I've decided quilts don't have to be intricate and time-consuming to be beautiful. I chose some fabrics from Hobby Lobby. The floral print (in the center) is one I've bought for a number of project, so I decided to build the quilt around that print. {The colors of the quilt are more accurate in the photo below than in the other pictures to follow.}


We have two granddaughters due in the next couple of months. This is for the baby due in March. The baby's momma loves soft pinks, grays, whites and beige colors. I hope she'll like this quilt. More importantly, I hope the baby will grow to love it.


The other grandbaby's quilt is waiting to be longarm quilted as I write. That one features the same floral and blue fabrics, but instead of the soft pink, it has coral colors. I'm anxious to get that one back too.


The beauty of this particular pattern is that I cut it out and finished the top of the quilt in an afternoon. Just the way I like it!


I think if you're going to have a simple pattern, like this one, it really helps to get it professionally quilted. The quilting made a world of difference and I love the texture it added to the quilt.


I made some bias tape from one of the fabrics I used in the quilt for the binding. This arrow fabric (with gold metallic accent) is cute on the bias.

For the back of the quilt I just used the floral print and this beautiful soft pink swan fabric...


The moral of this story is... don't ever count yourself out. I didn't think of myself as a quilter, but this easy pattern has made all the difference. I kind of love quilting now.


Monday, January 06, 2014

Etsy store reopened...


Happy New Year! December was filled with Christmas preparations and family time. In fact we still have my daughter's family here until tomorrow morning. I'm grateful we were able to spend Christmas with some of our children and their families. So much fun!

Just wanted to let you know that my Etsy shop is open, and I'm ready to take orders. I closed it during the holidays so I could concentrate on people and things that are more important, like watching my son-in-law and grandson build this handsome fellow...


Tuesday, September 10, 2013

Child's Play Tent Tutorial...


As a child I remember building forts, tents and tee pees with sheets, blankets and pillows layered over chairs, sofas and beds. Something magical happens when a child's imagination is fired. This indoor/outdoor play tent is the perfect hideaway for any child, and it's an easy, fun project that shouldn't intimidate any adult. Let me repeat... This is probably one of the easiest projects you could make for a child. As an added bonus this tent folds flat for easy storage!


This tent was introduced on my blog last week as part of the 
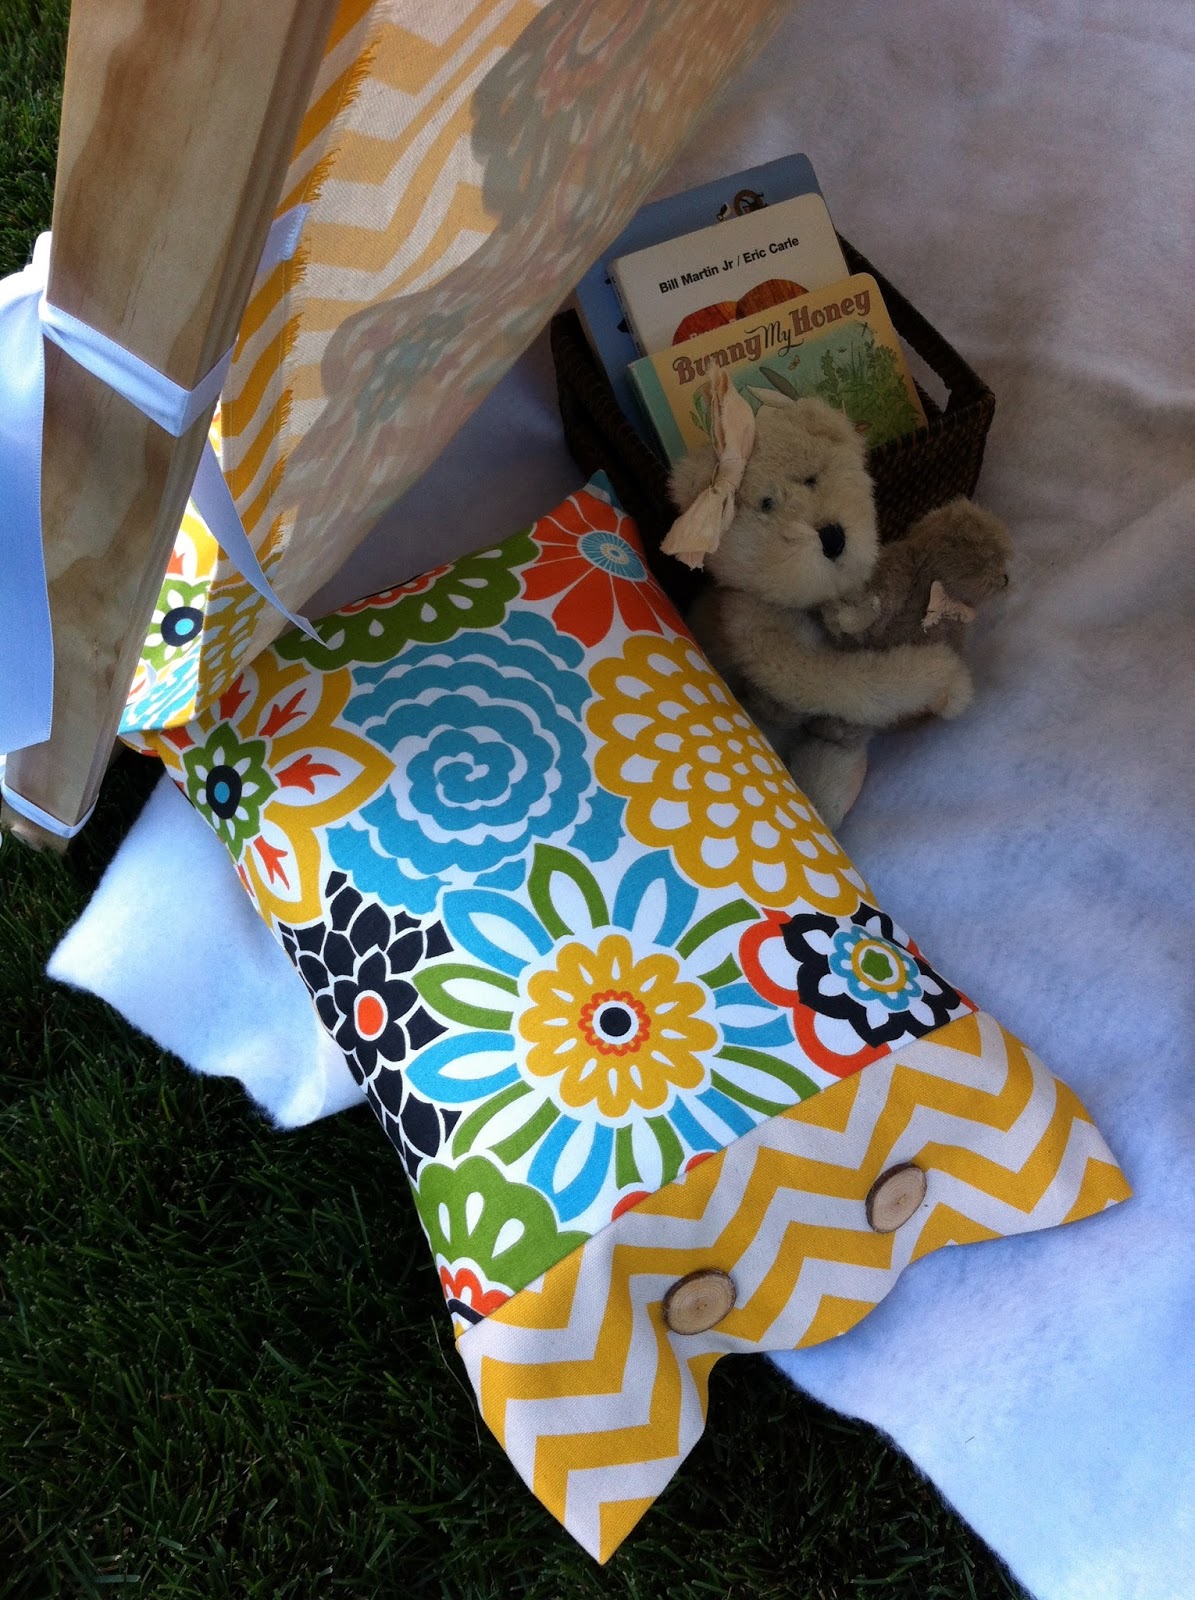
"Waverize It" fabric challenge. Click here to learn how I added Waverly's "Button Blooms Confetti" fabric to a chevron print to give the effect of flowers climbing up the sides of the tent!

Materials for Tent Frame:

2 - 1" x 2" x 8' lengths of select pine, cut each in half to form four 4' lengths for tent poles
3 -  3/4" x 48" hardwood dowels
3/4 inch spade drill bit 

Note: I bought "select pine" (which is the highest grade on the market) for the tent poles at Home Depot. Select pine has a smooth, even finish with no splinters, however, there are less expensive grades available that you could use. Home Depot will cut these lengths in half at no additional charge. All the materials for the tent frame, including the drill bit, cost about $20.

Instructions for Tent Frame: 

1. Take one 4' length of 1" x 2" select pine and measure and mark 6 inches down from the top of the piece and 3 inches up from the bottom of the piece, centering the mark on your wood. Using the 3/4 inch spade bit, drill a hole through each mark. I used a drill press to drill accurate holes, but a hand-held drill will work well too.

2. Repeat with the three remaining lengths of pine.

3. Line up two lengths of pine (tent poles) and slip a dowel through the holes that are 6 inches from the top. The dowel should fit snuggly in the holes. On the other end of the same dowel slip the two remaining tent poles onto the dowel. That dowel will form the the ridge pole on the top of the tent.


4. Slip the other two dowels through the holes that are 3 inches from the bottom of the tent poles to form a brace on each side of the tent.

Optional: If  you have rambunctious kids and are afraid that it will collapse inward when bumped by your little ones, you can add an additional horizontal pole on the base at the back of the tent. Use another length of pine, drill 3/4 inch holes in the ends and slip the pine over the two bottom braces (dowels), like this:


When you go to store the tent, simply take off that bottom piece of pine and collapse the tent inward.

5. Your frame is complete. It couldn't have been easier!

Materials for Fabric Tent:

Note: Because people may want to finish off or hem the edges of their tent differently, I am going to give the finished measurements** for the fabric tent.  This finished measurement is the size of fabric you will need after you've hemmed the edges. One might choose to turn over and hem the raw edges around your tent, zig-zag the edges, or simply leave the edges "as is". That decision might depend on what type of fabric you choose. Duck, twill, upholstery fabric, faux leather, fleece or cotton (make sure it is at least 44" wide) can all work beautifully for this project. Buying a twin flat sheet at Walmart and cutting it down could be the least expensive way to go. Faux leather or fleece would be cute for a little boy's tent and you wouldn't have to finish off the edges! If you're a less experienced sewer, the thinner fabrics (a twin sheet or lightweight cotton) will be easier to manage.

8 yards of 1" ribbon or twine for ties, cut in 8 - 1 yard lengths
45 inch length of 2" wide grosgrain ribbon for casing
**Finished Size of Fabric for Tent: 43" x 86"

Instructions for Fabric Tent:

1. Finish the edges of your fabric to form a 43" x 86" rectangular piece for the tent.

Tip for the novice sewer: If you choose to hem your tent edges, make sure you add the size of your hem to your original fabric piece. For example if you stitch a 1 inch hem on each of the four sides of your tent, you should start with a piece of fabric that is 45" x 88", then turn over the edges 1 inch on all four sides and stitch around the outsides edge to form a piece that is 43" x 86".

2. Fold the tent in half lengthwise and iron along the center fold. This fold will help in the casing placement.


3. Center grosgrain ribbon over the center fold on the wrong side of the tent fabric and pin. Turn short ends of ribbon under to make a finished edge and stitch close to the outside edge along the length of the ribbon. This will form the casing for the ridge pole.


4. Mark 18" down from the center fold and pin one 1 yard length of the ribbon or twine to the wrong side of the tent fabric. Measure 18" down from the marking you just made and pin another length of ribbon or twine. Do this on all four sides of the tent fabric, like this:
5. Sew ribbon or twine in place with a straight or zig-zag stitch.

6. Slip ridge pole through the casing in the tent. Tie ribbons or twine around the tent poles to secure the fabric.


7. Enjoy watching the children in your life pretend, imagine, invent and relax in their own little world.


When the children are finished playing, simply fold the tent poles together for easy storage!


Linked to:
Show Me What You Got @ Not Just a Housewife

Monday, September 09, 2013

Home Again...Fabric...Tutorial...


I returned home last evening from a wonderful week with one of my son's and his family. They had a new little one join their brood a few weeks ago, so I went to help the family. So much fun! I miss them already. Here's an adorable photo of his older sister. She and I took a lot of walks together. It made me realize how much a two year old enjoys the journey. She hopped along picking up treasures and holding them in her chubby little hands loving every minute of the adventure. As an adult I usually set my sights on the destination, rather than appreciating the journey. It was a good lesson for me to learn.


As much as I miss that little newborn baby boy and his family, it was good to get home. These beautiful fabrics were waiting for me when I returned...


I have a lot of projects that I'm going to be working on this fall for Christmas presents. These will definitely come in handy. I ordered them at Fabric Bubb (Etsy shop).

Tomorrow I'm looking forward to publishing my tutorial for the Child's Play Tent that I posted about last week. It's such a fun, easy project that anyone -- regardless of their sewing ability -- can tackle!


Sunday, September 01, 2013

Waverize It!


I'm delighted to take part in "Waverize It!" a fabric challenge for bloggers sponsored by Waverly Fabrics and Jo-Ann Fabrics and Craft Stores. This challenge is in celebration of National Sewing Month in September and Waverly's 90th Anniversary! Participating bloggers were challenged to think outside the box and transform something in their lives through sewing, using Waverly fabrics. I love me a challenge...

Waverly's beautiful "Button Blooms Confetti" was the inspiration for my project. Its bold, vibrant colors reminded me of a meadow of wildflowers...


... so, I decided to plant a child's play tent in that meadow of flowers and let those blossoms climb up the sides of the tent!


Wonder-Under (a double-sided paper-backed fusible web) was used to adhere the "Button Blooms Confetti" fabric to the chevron print.


I pressed a long strip of Wonder-Under to the Waverly Fabric, then used scissors to cut around the flowers. The paper on the back of the fusible web was removed and the flowery fabric was positioned and ironed onto the right side of the chevron print.


I had a little fabric left over, so I made a coordinating pillow. I imagine this tent will be used for quiet times and for noisy play times!


I love how the bold, vibrant flowers in this Waverly fabric look like they are growing up the sides of the tent...


This Waverize It! blogger contest has been fun for me to participate in, but here's the good news. In September Jo-Ann and Waverly are hosting a


open to all consumers. This contest helps celebrate National Sewing Month in September and Waverley's 90th Anniversary! The grand prize for the Facebook contest is $1000 in Waverly fabric and a $250 Jo-Ann gift card! Start dreaming how you can Waverize something in your life.

Click here to enter the Waverize It! Facebook Contest 

Good luck!


Click here for my complete tutorial on how to make this tent!

Monday, July 15, 2013

Pocket Bibs...


I've mentioned before that my sewing machine has been humming non-stop lately. I'm in "baby mode" -- getting ready for #13 grandbaby due next month. Receiving blankets were first off the line, then burp cloths. The next thing I made were some soft flannel bibs for the little guy... 


I posted a tutorial on how to make these cute bibs a couple of years ago. Go here for the tutorial and to find out how to get the pattern.


I revealed in my "Burp Cloths for Baby" post on Monday a tip on how to use lightweight receiving blankets from Target as fabric for baby items such as bibs, burp cloths and taggie blankets. These bibs were all made from those coordinating fabrics...


When I originally made this pattern I had intended it to be used for babies 1-6 months of age, so I was surprised when I went to see our granddaughter around her 1st birthday and she was still using it. I'm glad that they can be used throughout the baby's first year...


A bib is one of the quickest things you can make, and this pattern is simple enough for the novice sewer.


If you'd like to see the instructions and request the pattern for this bib, go to this Pocket Bib tutorial.

Linked to:
Friday Favs Party @ Nap Time Crafter
The Inspiration Board: Creative Party @ Homework
Show Me What Ya Got @ Not Just a Housewife