Thursday, May 21, 2020

Refinishing an Oak Pedestal Game Table... {Part 2}


See Refinishing an Oak Pedestal Game Table... {Part 1}

This post is for the novice furniture refinisher and it's about putting perfectionism aside when working with wood. When I sew I am careful to precisely line up seams and sew with precision in order to make a project look more “professional," however, I have to remind myself when I’m working with wood that it is a “living” product and to appreciate its not-so-perfect nature. Because wood is a porous, fibrous, organic material, it is filled with imperfections and unique characteristics. It's those unique characteristics that make wood beautiful. Sometimes I have to remember this when refinishing a piece of furniture. In all of the furniture I've refinished no two pieces have reacted the same way to the refinishing process. You can look at it as frustrating or a challenge depending on your outlook. Here's an example of the table I'm currently working on...


 Do you see in the photo above those little arrows pointing to the lighter wood grain lines going across the tabletop? Also...


...in the photo above the tabletop took the stain darker in the area where the arrows are pointing.  These differences could be because you applied the stain unevenly, but I'm very careful about the process of applying stain these days because I had a disastrous fail once when I wasn't so careful. (Go here for that post.) When the urethane is applied the differences are made even more obvious. Sometimes when I see things like this -- especially the difference in stain -- it irks the perfectionist in me, but I've learned to let it go. You'll never notice it once the furniture is situated in your home. 

This tabletop is so different than any other wood I've worked with. It might be the quarter sawn wood. In any case this is the craziness that was revealed in the wood when I put the first coat of urethane on it...


I might add that the wood looks a little rough, but I had sanded it down to smooth perfection before applying the gel stain! It's just a crazy wood with tons of character. I'm using a satin spar urethane to finish the tabletop. In the picture it's still wet, which is why it is so glossy. 

Anyway, the moral of this post is to embrace the imperfections in the furniture you acquire to refinish. And while you're at it, you might want to embrace your own imperfections and the imperfections in others. Your life will be happier for it!

Have a wonderful weekend!

Wednesday, May 20, 2020

Refinishing an Oak Pedestal Game Table... {Part 1}

Last year around this time I was on a quest to find a pedestal table to use as a game table in our loft.  I wanted a round table about 45 inches wide. I looked at new tables, but I was more interested in an antique solid oak table. I love these tables. In my mind they are so much prettier and made so much better than many of the tables they make these days. I was in the habit of looking on Facebook Marketplace every day to see if one would come on the market. Here's the table I finally ended up buying...

(Picture source: Seller)

This table was everything I wanted. Solid oak. Beautiful craftsmanship. Forty-two inches wide and in as good a condition as an old table could be. The best part is this table cost only $50. Fifty! I had been looking at tables that were anywhere from $1000 (veneer) on up (solid wood), so this was a find of monumental proportions. So happy! I don't have any idea how old this table is, but the base of the table is very different than many pedestal tables. Usually the pedestals are curved. This one has very straight lines and looks a little art deco (1925 to 1940) to me. Any ideas about how old this table might be?

Well, yesterday I finally got around to starting the refinishing of this beautiful piece. The tabletop was in very good condition, but it had a light honey oak finish. I wanted something darker. I used Zep All-Purpose Cleaner and Degreaser to clean the surface of the table before painting on the Citristrip to strip off the stain and varnish. The surface of this table didn't strip off as easily as other tables I've refinished. It took two applications of Citristrip and a lot of sanding to get it down to the natural wood. After stripping the wood I used Klean Strip Paint Stripper After Wash to clean off all traces of the stripper. All of these products can be found at Home Depot or Lowe's. Here's a photo of the table with the first Citristrip application...


The Paint Stripper After Wash leaves the piece a little wet, so I let it dry overnight and put it outside in the sun this morning to make sure it was totally dry before I started sanding...


Later, I used a little elbow grease and sanded the surface with my orbital sander. I used 120 and 220 grit sanding paper. Once it was sanded and cleaned again, its beautiful character started to shine through! I noticed, of course, the different striations on the wood. I did a little research and found this wood was quarter sawn. 


I'm used to seeing plain sawn wood which creates a "cathedral" pattern in the grain. (The grain starts and travels up to a peak and down again.) Quarter sawn gets its name from the fact the log is cut into quarters. "This cut features annual growth rings at a 60 to 90 degree angle. This creates a visually appealing, somewhat tight vertical grain pattern, often with dramatic flecking." It was fun to learn something new...


 (Source: Schenck and Company)

This afternoon I applied some Minwax Gel Stain in Hickory to the piece. It's beautiful! Here is half with the gel stain and the other half unfinished. I love how the darker stain makes the grain of the wood more obvious...


I absolutely love this dark brown hickory color on oak. I used this same color for my dining room table when I refinished it, and we've loved it. Tomorrow I will finish the top of the table by applying a couple/few coats of Spar Urethane. I plan on painting the bottom of the table, so you'll have to come back to see that process.

Wishing you a wonderful day!

Friday, February 14, 2020

Squirrels and Nuts Quilt...


There are only two camps. One camp loves squirrels -- the other calls them "rodents" does not. I could be the President of the Squirrel Fan Club in the U.S. of A. I love 'em! So when I saw this fabric with these pink-cheeked squirrely squirrels, I had to have it. I paired it with some more cute fall fabrics, and I knew I had the perfect fall quilt. 


I haven't sewed a lot since I moved into our new home in Massachusetts. I've had other interests, and my favorite time to sew is in the winter when it's cold outside. We've had another mild winter though, so it's cut into my sewing a bit. Our low is -3 degrees tonight though, so the machine has been humming today!


I've found that the posts on the railing in our loft are spaced perfectly to hang a quilt right in between the posts. It's great because it can hang there wrinkle free as I sew the backing!


I'm keeping this bad boy. He's going to be adorable when he's all quilted up, and when we had a bunch of family at our home over the holidays, I decided one cannot have enough quilts and comforters.


Have a wonderful weekend!

Monday, November 18, 2019

The last of the Christmas Quilts...


This poor little old blog's best days are over. I have ignored it completely these last few months and not even thought twice about it. All good things must end... or die a slooooow somewhat painful death, as is the case of this blog. {No tears necessary!} Anyway, my efforts are elsewhere these days, but I do love to chronicle things on my blog, so here's a post about the last few Christmas quilts I've finished.

This first one is a non-traditional color for Christmas, and I couldn't love the fabric more. Who doesn't love a little pink at Christmastime and get a load of those cute Santas in his village...


I'm so glad I put that red frame around the border of the quilt to break up the pink. It really adds a lot to the quilt and every now and then I hit the jackpot when I make a quilt. This one is unconventional and so cute.


This one is for my son and his partner. They decorated their home in silvery metallics last Christmas and it was stunning. I thought these metallic fabrics would be beautiful for their Christmas quilt...


This nutcracker fabric is so beautiful. We've collected a number of nutcrackers in our family over the years, so this fabric means more to us than merely a beautiful pattern. 


The last quilt is another playful one for a family with younger children. I think they will enjoy the colors and theme of this cute quilt...


I made 10 Christmas quilts this year. It was really fun having a theme for quilts and I'm amazed at how different they all are. That's one of the fun things about quilting -- no two quilts are the same!

Tuesday, August 06, 2019

My Favorite Quilt...


I never thought I'd say I "found" my favorite quilt, but this one is definitely "the one." Several weeks ago our family had a family reunion and most of our children and their families were present. We had a wonderful week, but, for me and my husband, the highlight was being given this beautiful quilt by our children...


There are nine blocks in this quilt and each family made one, with the center block being an extra block. Our daughter-in-law Stephanie gave each family a bunch of block patterns and fabric to choose from. Each family choose the block they liked best and their fabric and a representative from each family made their family's block. I can't even begin to tell you how touched I was by this gesture...


And, the quilt itself is stunning and much more complicated than anything I've ever made, which makes me appreciate it even more. I adore the fabric choices both in color and pattern. Sometimes kids {which includes kid-in-laws} do things that take your breath away. This was one of those times. We're so grateful for this beautiful family heirloom.


Tuesday, July 30, 2019

Faux House Plants & Arrangements...


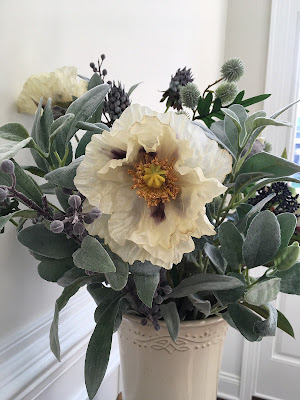
It's been a month since I posted. This month has been filled with packing, unpacking, and a family reunion sandwiched in between! We've been very busy, but we are finally in our new home. We decided to build a home when we couldn't find what we liked in an existing home. It took 11.5 long months to build, but we moved in a couple of weeks ago, and, so far, we've unpacked a gabillion boxes and only have two gabillion boxes left to unpack. It's become a slow process -- mostly because I have the attention span of a gnat. Yesterday I started to unpack some boxes and got sidetracked with what I wanted to put in a vase in our entryway. I wanted softer colors than I'd had in our other house -- some cream and sage greens. My daughter-in-law, Meghann, turned me onto how beautiful these shades are together when she used them in her wedding. I used the same shades in a luncheon we put on for them after the wedding ceremony. Here's a few pictures of that beautiful day...


Anyway, I'm using some those colors on our main floor and loving it. There's a lot of browns, creams, gray, and sage colors. My husband commented on this yesterday and said he thought it needed more color, so I bought this little original painting on Etsy and will put it in the entry...


I gave him a choice of three paintings and he choose the one with the most color -- my favorite too. It's of Kittery, Maine, which is right up the highway from our new house.

Anywho, I digress. Let me get back on track. A few years ago designers were touting the opinion that you should never use faux plants or flowers in your home. They implied they were ugly and tacky. {Blah.. ba-blah... ba-blah.} I happen to like greenery and flowers, and if the real thing is impracticable or too costly, then... fake gotta work. So, I'm not going to apologize for my slacker plants cause I kinda love 'em. I went looking for some greenery yesterday thinking of the silvery and sage colors in a eucalyptus branch, and ended up with something different. After hitting up Target's Magnolia and Hearth and Hand botanical collections, World Market, and Marshall's, I knew I had to get serious, so I decided to drive the 30 minutes it takes to get to a Hobby Lobby. New Englanders haven't discovered the benefits of Hobby Lobby like those in the west. There's a Hobby Lobby in every town in Colorado. Here they have them spread far and wide and you have to put on your pioneer bonnet and hiking boots to make the trek to one. All I can say to that is.... geesh.

I went into Hobby Lobby with the idea of sage greens, silvery tones, and cream colors. I came out with something a little different...

I started by picking up the lambs ear branches -- beautiful sage color with a touch of silvery fuzz. Then I reached for that little branch with the berries {on the left}.


Those berries have a little purple/blue hue, so that took me off in another direction. Each branch or flower I grabbed had some sage green and a touch of lavender or purple. Purple is not a color I'm usually drawn to, but it's understated in this arrangement, so I love it.


Well, here I sit writing this post when I should be unpacking boxes. Like I said my attention span is limited. Wish me luck as I act like a dock worker and unpack today.


I just remembered. I also bought this fern yesterday...


I should probably get back to unpacking now... unless I can find something else to grab my attention.

Thursday, June 27, 2019

Navy Nutcracker Quilt...


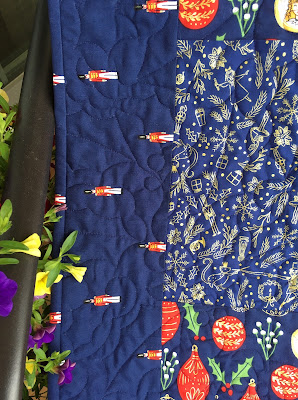
I'm trying to finish binding all the quilts that I have almost completed before the big move in a couple of weeks. I'm fairly certain that there won't be a lot of sewing for a month or two after we move as I arrange/rearrange things in the new house to our liking. Last night I finished this Navy Nutcracker quilt. Originally, the inspiration behind this quilt was this Michael Miller Nutcracker Metallic Ornaments fabric...


But, then I decided to use this fabric from the same line -- Nutcracker Metallic Navy Overture -- in an equal amount on the quilt, so they both became equally important! I adore this fabric with all the cute nutcracker characters and scenes...


Together these fabrics make a beautiful, almost monochromatic-ish quilt...


The fabric for the boarder and binding are also from the same line... Michael Miller Nutcracker Metallic Toy Soldier. These are all on sale at fabric.com right now for an incredible price. It pays to shop for Christmas fabric off season!

Recently, someone asked who I use to do all the longarm quilting on my quilts, so I'll give a little shout out to my amazing quilter. First of all, my quilts are very simply made. I don't really consider myself a "quilter." I'm more a sewer that likes to put fabrics together to make blankets. I love making simple quilts because I love choosing and putting fabrics together. It's the fabrics that draw me to quilting. Making intricate quilts with tiny squares and complicated patterns is not my idea of fun. Obviously. But, I love to have them professionally quilted because that makes ALL the difference in making the quilts look professional, so early on I asked a quilter friend of mine who she would recommend and Donna's name came up. Donna Smith owns the company "Quilted For You" in Mead, Colorado. She quilted 45 quilts for me in one year a couple of years ago when I got the bright idea to make a quilt for all our children and grandchildren for Christmas. This she did in between all her other much more complicated quilting projects. I really appreciated the fact that she did my quilts in a timely manner because time was of the essence that year! When I moved to MA I was hoping to find a local quilter, but I found that the prices for longarm quilting were much higher in MA than in Colorado, so I decided just to ship all my finished quilt tops and bottoms to Donna, and she quilts them and sends them back. It doesn't cost much more than having them quilted here, and it doesn't take much longer than it did when I lived in Colorado. That way I still get her expert touch on my quilts. She's fabulous and she can make a so-so quilt top look like a piece of art. She's done that a bunch of times for me!

Donna suggested a holly pattern for the quilting on this Nutcracker quilt. That pattern mimics the holly on the "ornaments" fabric.


I love the gold metallic threads in these fabrics. Christmas isn't Christmas without shiny metallic touches!


Wednesday, June 26, 2019

Santa's Village Quilt...


Oh, I love this quilt. I think this Santa's village fabric is one of my favorite Christmas fabrics that I've found -- so playful and festive!


I chose a raspberry red and lime green blend for the complimentary colors for this sweet village scene, and I love how it turned out...


For the quilting I chose a pattern with trees that mimic the ones in the village and stars and moons...


The inspiration fabric is a Riley Blake fabric. The collection is called, "Way Up North" by Jill Howarth. So cute...


These Christmas quilts have been so fun to put together! I can't wait to divide them up and send them off the end of November!